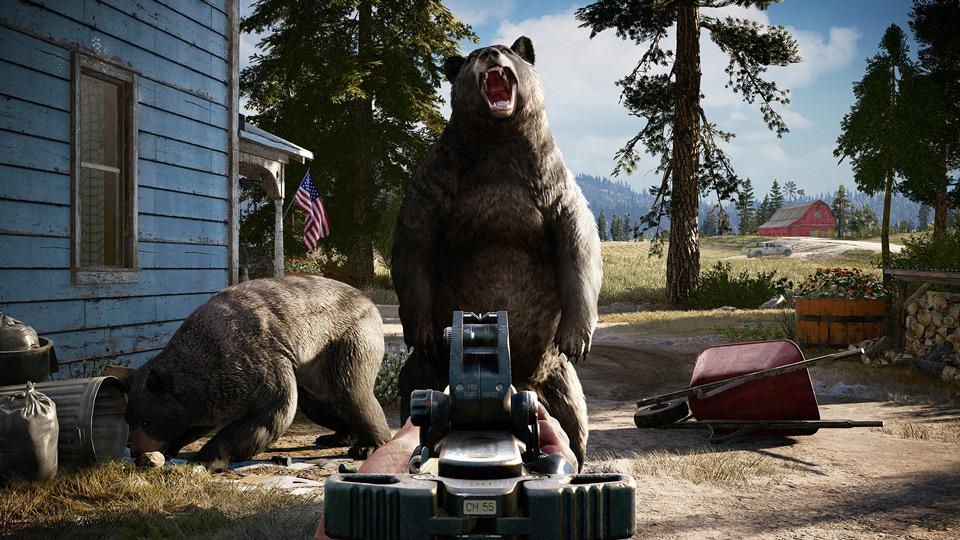
Competing successfully in PVP in Hunt: Showdown requires a combination of strategy and timing.
- Best Games Like Hades You Should Play Right Now Update 07/2026
- Best Upcoming Indie Games Update 07/2026
- Best Games Like Ratchet & Clank You Should Play Right Now Update 07/2026
- Best Games Like Fallout You Should Play Right Now Update 07/2026
- Windows 10 Home vs Pro – Choose What’s Best For You? Update 07/2026
Competence with your gear, tactical acumen, and the ability to anticipate and react to the movements of your enemies are all crucial to your success.
Bạn đang xem: Best Settings For Hunt Showdown Update 07/2026
You can improve your speed at spotting and engaging potential targets by adjusting a few settings, though.
Best Settings For Hunt Showdown
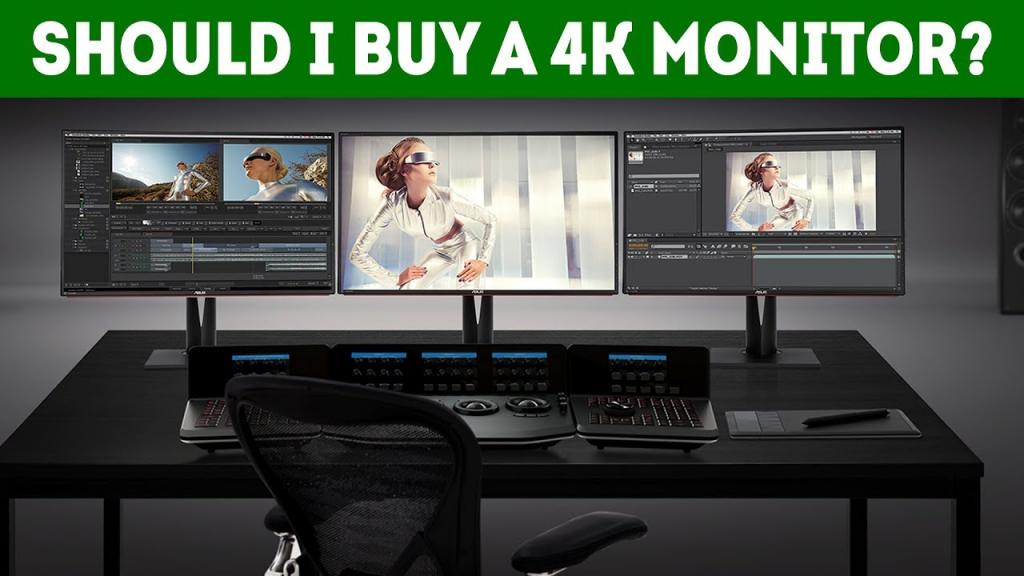
20. Monitor resolution
If you want the best possible resolution, you should use your monitor’s native settings. This is crucial for detecting distant motion and for seeing through cracks in wooden structures.
Changes can be made in the graphics section of the game’s options menu. As can be seen in the image above, the first option is the resolution setting. Specifying the screen’s resolution is a must. I have a 4K display and have previously experimented with 1080p gaming. What I discovered is that the extra resolution of 4K allowed me to pick up on subtleties that were previously lost to me in 1080p.
These minute, imperceptible shifts will be decisive in the outcome of life and death. Hunt: Showdown requires focused attention from the player. The senses of sight and hearing are crucial; if you can’t spot your enemy coming through the brush or hear the hunter hiding in the barn, you’re doomed.
19. Full screen mode
Be sure to switch to full screen mode from windowed mode. We’ll look into the options that can be adjusted to boost your FPS in full screen later on. If you want to switch to full screen mode, open the options menu and click on the graphics tab. Full screen mode can be accessed just below the screen resolution.
When viewed in full screen, your visual field is maximized. And it’s a great way to get more into what you’re seeing and enjoy it more. Just like having your monitor’s resolution dialed in properly, this is crucial. Participating fully in the game improves concentration and awareness.
Most of your matches will be lost because you were not fully immersed in the game or because you were distracted by something else on your computer. Because I wasn’t paying attention to my surroundings, I found that even relatively harmless things like hellhounds could kill me.
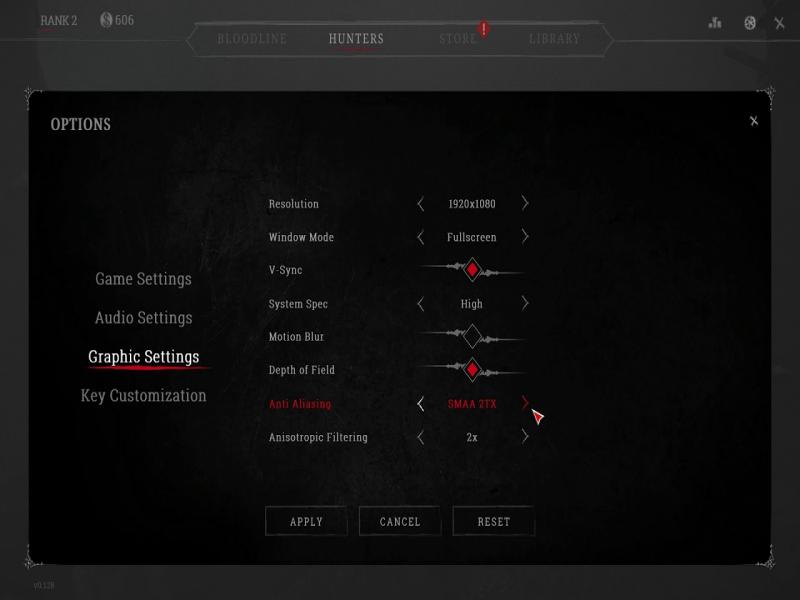
18. Disable V-Sync
Except for a select few displays, V-Sync is largely useless. On most displays, it does nothing but reduce performance while providing no discernible visual benefit. You can turn it off by going to the settings menu and selecting the graphics tab. It’s the option right above the performance numbers. To turn it off, simply click the button so that it is no longer highlighted in red.
Anything that hinders your performance without enhancing color or object clarity is ultimately harmful. If you can get 60 FPS and high quality visuals, that’s ideal. You’ll be able to spot individual motions and respond more quickly.
When using V-Sync, your frame rate may drop, especially in visually demanding situations. Several times I’ve lost to another hunter in a face-off because my frame rate dropped just as I needed it to remain stable.
17. Disable motion blur
Motion blur is a graphically monstrous nightmare that could only have come from the mind of a madman. This was done so that the game would appear more realistic. Instead, it creates a Lovecraftian nightmare of a visual effect by making everything blend together. You can turn it off in the graphics settings. It is the last choice and is inaccessible unless the corresponding button is filled in red.
Performance drops, long-range focus is disrupted while in motion, and motion blur is otherwise useless. The inclusion of motion blur wasn’t something I was aware of when I first started playing Hunt: Showdown. After missing a crucial move to my left in a stall at Davant Ranch’s horse barn, I ended up losing one of my first matches.
16. Disable depth of field
Although depth of field has less of an impact on frame rate (FPS) than motion blur, it still isn’t worth using. To play devil’s advocate, there is room for disagreement here. By activating depth of field, you can concentrate on what you’re aiming at without being distracted by what’s happening on the periphery of your vision. However, the advantage of being able to spot enemies in your peripheral vision cannot be outweighed by the fact that, as you gain experience, you will learn to tune that distraction out when focused on a single enemy.
In order to turn it off, select the graphics tab in the settings menu. In fact, it will be superior to motion blur. It’s a button, like the previous two, but it should be left blank rather than colored red. When I was a kid, I used to play games with depth of field turned on and I would always miss the other hunter who was hiding in the bushes and aiming right at my noggin.
15. No Max FPS cap
Some people will also disagree with you on this point. It has been argued that limiting the frame rate cap to 60 will mitigate frame rate spikes and valleys when exploring new areas. When possible, I give my GPU complete freedom to perform at its peak efficiency. In the end, it may come down to the capabilities of your graphics processing unit (GPU).
To change this, select “Graphics” from the “Settings” menu. An option to customize your maximum frame rate can be found in the tab that appears at the very bottom of the screen, just above the depth of field and below the V-Sync option. This option will be unavailable if Vertical Sync (V-Sync) is turned on.
14. General graphics settings
This refers to the graphics’ actual readability and sharpness. The key to success in Hunt: Showdown is finding that sweet spot between frame rate and visual sharpness. To get a smooth 60 FPS experience, you should adjust the visual settings to the maximum your PC can handle.
The meat of the graphics settings can be found in this section, so be sure to read the brief descriptions to the right of each option. Just like with any other graphics option, you can adjust the quality of each setting using the appropriate tab.
The above screenshot is an accurate representation of my current settings. In case you can’t tell, the preferences are:
- The World Over, Excellent Visuals
- Excellent Object Quality
- Superior Texture
- 16X (Anisotropic) Texture Filtering.
- Use SMAA 1TX for anti-aliasing (or 2TX if your GPU can handle it) to get the smoothest possible image.
- Lighting is dim (to facilitate long-distance observation).
- Reduced shadows (for better readability of nighttime maps and long-distance viewing)
- Turning off effects allows for clear vision in otherwise obscured environments, such as dense fog, smoke, or haze.
- Quality After Processing: Very Good
- Top Notch Particles
13. Personalize key bindings
Get familiar with the keyboard’s layout and use it until you know it by heart. While this isn’t a huge deal, some users may find the predefined key combinations to be uncomfortable and opt to alter them. If you’re not used to pressing C to crouch or if you always press E to perform a certain action in games like these, you can easily switch it.
Access the Key Customization section of the settings. You’ll find the shortcut keys for all of the game’s fundamental features right here. You can assign a single key to perform multiple actions, for example, binding the Sprint and Aim Down Sights actions, or you can assign each action to a different key.
Xem thêm : Best GTX 1070 Graphics Cards – Comprehensive Review Update 07/2026
My keys are all different now. I’ve remapped the map to the M key for personal preference and swapped the E and F keys since I usually use the former for interactions and the latter for bonus features like Dark Sight.
12. Auto hide most of the HUD
Similar to full-screen mode, this adds to the feeling of being completely immersed. The HUD in Hunt: Showdown is comprised of several different elements. You mainly have access to these via your inventory, which includes things like gear, health, stamina, ammunition, and a chat box. The game’s options have a dedicated section for all of these known as the HUD. Like other Hunt settings buttons, these are active when the corresponding red circle is filled in, and inactive otherwise.
Except for the ammunition indicator, I set the HUD to automatically hide. In contrast to the other displays, the ammo counter doesn’t get in the way while still giving me the information I need: the number of bullets I have left before I have to reload. Ammo can be conserved through careful shot placement, but knowing when it’s appropriate to reload is just as important. Whether or not you should attack an invisible foe depends on how many bullets you still have.
Many times I’ve been in a sticky situation, realized I was about to run out of bullets, and reloaded in time to kill an oncoming hunter. If I hadn’t been watching my ammunition, I never would have been able to accomplish this. You won’t be bothered by the other HUD choices unless and until their data becomes relevant to your situation.
11. Change HUD opacity to your preference
Another option that allows for complete immersion is this one. Having experimented extensively with the HUD’s opacity, I found that the maximum setting provided the clearest and most concise representation of all of the HUD’s options, though I can see how that might be too much for some players.
You can adjust this in the game’s options menu, under the HUD subheading. In that area, you can adjust various sliders. Adjusting the opacity with each of these sliders will have a different effect on the game; try making adjustments in groups of ten to fifteen first to get a feel for how the different settings interact with one another.
There was a time when I was experimenting with a 25% opacity for everything on my HUD. It was an intriguing experiment because I thought the screen was clearer even with the HUD items present, but I had to keep checking things because I couldn’t always tell them apart.
10. Make sure your volume is all the way up
While this is the default, you may want to crank up the volume on your PC or headphones for this game. A player’s ability to distinguish between sounds that are likely hunters and those that are merely ambient improves as they gain experience.
You need to be able to hear and differentiate between sounds in order to be successful and get kills, and if your volume is too low, you might miss a far-off noise that ends up costing you the game. You can adjust the volume on your PC and the game’s audio settings so that they match the image above.
In many hunting matches, the only indication that you are competing against other hunters is a distant flock of crows or ducks, or a gunshot. In other cases, you may be able to hear a horse or some grunts behind you, off in the distance into the swamp, which means that other hunters are on their way to ambush you. In many cases, all it took was the death of one grunt far behind me to set off a successful ambush.
9. Toggled versus hold settings
My crouch is toggled, and my sprint and aim down sights are both set to hold. Once I’ve pressed the crouch button, I don’t have to do it again. This makes it so that I can remain crouched without exerting any extra effort, which is useful because there are times in this game when it is necessary to do so.
To sprint, I must hold the sprint button, and to zero in on a target, I must do the same. Because of this, I can easily switch between modes without having to press the button more than once, which is especially helpful for these two actions that require a swift transition.
They will disagree with me on these points, I’m sure. You need to feel at ease with these crucial motions, so it’s important to tailor the settings to your preferences regardless of your starting position. Disagreement typically centers on the position of the sights when aiming. For some, switching between the two is a matter of personal preference or convenience. That’s fine, and the game tab shown above in the settings menu will allow you to make the necessary adjustments. The first three mentioned settings are tabbed so you can easily make your choice.
8. DPI setting
Your hunter’s ability to quickly change directions while moving and while still depends on the mouse DPI you use. When aiming down the sights, a low DPI allows for more precise adjustments. It’s best to use a low DPI setting if you prefer slow aiming or if you intend to play the low and slow game (ideally with a sniper). Ideal values fall below 1000, though your mileage may vary depending on the mouse software you use.
A higher DPI could be the answer if you’re looking to improve your movement speed. To get to the maximum DPI of my mouse (3600), which is insanely fast, I had to work up to it gradually. It was time well spent because now I can shoot accurately from afar when necessary and turn on a hunter and blast him away when necessary.
The methods for adjusting the DPI vary between manufacturers and product lines. One of my mouse’s buttons is located under the middle mouse button; you may alter this and other settings in the mouse’s preferences. It is up to you to discover the capabilities of your mouse.
7. In-game sensitivity settings
All of the sensitivity settings are customizable in-game. You can adjust the precision of your movements, which is just as important as the DPI setting. You can adjust your sensitivity in-game based on a number of factors, including the following: default sensitivity; iron sights; deadeye sights; marksman sights; sniper sights; and aperture sights. In the game’s settings, under the “game” tab, you’ll find a series of sliders, each of which controls a different sensitivity level.
The various uses for these sights necessitate a range of sensitivities. The default value of 0.80 is displayed above for demonstration purposes. My preferred method of play requires the exclusive use of iron sights, and I’ve honed my skills to the point where I can shoot with the same level of accuracy regardless of whether I switch to the magnified view or keep my sensitivity at its normal setting. Usually, I’ll just adjust my DPI to a lower value when I need it, but when I used to play with snipers, I found that presetting my sniper and marksman sensitivity settings made a huge difference and eliminated the need to adjust my DPI mid-match.
6. Disable additional hint banners
Some people might not put much stock in this, but for me it’s crucial to the full experience. I think one of the most important factors in a fruitful hunt is how much you put into it. Any kind of disturbance, whether mental or environmental, is extremely dangerous.
While new players may benefit from hint banners in the short term, you may find that turning them off causes a temporary loss of concentration. The option is in the “Game” section of the game’s preferences. To turn it off, simply click it and leave it blank—neither red nor empty.
5. Display performance stats
To determine the optimal visual settings for your computer, enable the option to track FPS and ping rates in the graphics settings menu of the game’s options (it’s above the V-Sync toggle). To gauge how well your machine handles various effects and settings across the map’s various regions and circumstances, you’ll need these bits of data.
Ping and frames per second (FPS) from the game’s basic performance stats are displayed for me. More information is displayed in the detailed statistics, as shown in the preceding screenshot. The trade-off between speed and accuracy can be difficult to achieve, but it’s worth it in the end.
4. Make sure your drivers are up to date
It’s crucial to keep your video driver up to date. Companies need to regularly update their drivers to keep performance issues to a minimum, especially as new games are released. For instance, if you have an Nvidia, you can simply download the GeForce Experience app to get the latest driver versions. You can get it from Windows itself, or you can go to the manufacturer’s site.
Xem thêm : Best Games Like Roblox You Should Play Right Now Update 07/2026
It’s worth noting that in 2012, a driver update was released that significantly improved Skyrim’s performance, by around 45 percent. This kind of substantial enhancement will fundamentally alter the way you approach the game. Many of my friends have told me they stopped playing Hunt: Showdown because of performance issues. I recommended they update their drivers, and when they did, the brand new game ran nearly perfectly.
3. Overclock your GPU
A driver update has the potential to significantly improve performance, while overclocking is guaranteed to help at least a little bit.
With proper overclocking, you can improve your system’s peak performance, resulting in a smoother gaming experience at higher frame rates and higher visual settings. Following the steps in this video and using a program like MSI Afterburner will make overclocking your computer safe and simple.
2. Tune your GPU using supported software
If you’ve recently purchased a graphics card or monitor, you should double-check that your GPU is properly tuned to the monitor’s refresh rate, though this is typically not an issue. It’s possible you’ll also want to adjust your color scheme to make things look more vivid and distinct.
In fact, if your graphics card and display are in sync, you may notice an improvement in performance. Seeing details that would otherwise be lost in a sea of muted tones is greatly facilitated by a palette of bright, contrasting colors.
1. Increase your monitor brightness setting
You cannot adjust your screen’s brightness in-game in Hunt: Showdown to make night maps more fair. The night maps can be difficult to see for some people. To improve visibility without excessively brightening the screen, try increasing the gamma setting.
If your display allows it, disable the full dynamic range mode and turn on the full color gamut. If your monitor has a limited color display or supports more dynamic contrasts, you may see blacks and dark grays when playing Hunt: Showdown.
Altering this requires familiarity with your computer’s display settings. You can do this in Windows or, if your monitor supports it, on the screen itself. The display menus on my monitor are accessible, for instance, via a tiny joystick located at the base of the screen.
Basic gameplay
Game Modes contains additional information on each available mode.
The general outline of a Bounty Hunt mission is always the same:
- Navigate a dangerous sandbox in pursuit of your prey.
- The boss monster(s) must be eliminated.
- Send its spirit to the underworld and take the Bounty Tokens it drops.
- You’d better get off the map before another Hunter incapacitates you and takes your loot.
Variables such as difficulty, time of day, boss type, and Hunter level make every match distinctive. Up to twelve players compete for the prize, either singly or in pairs or trios (depending on the option selected in the lobby).
QuickPlay rules differ from the standard version in several ways:
- The goal for each player is to amass four Rifts.
- First to collect four rifts is crowned the Wellspring.
- The wellspring is the source of all power, and the other players will do anything they can to eliminate him.
- Upon depletion of all available energy, the owner of the wellspring is declared the winner and awarded ownership of the Hunter.
Controls
Hunt features two different control schemes: Showdown Hunter and Gunslinger. Learn the distinction’s finer points here.
Movement
- Hold down [SHIFT] and [W] to initiate a SPRINT. (Your Hunter will quickly tire from a sprint. As long as you slow down, running is possible even when you’re exhausted.
- PLAY JUMP – [SPACE]
- VAULT = [SPACE] “head for the hills”
- LIFT AND LOWER A LADDER by pressing [W] and [S].
Combat
Hunter:
- When you want to attack with your melee weapon, hit the [LMB] button.
- MELEE ATTACK, HEAVY; hold the [LMB] to activate.
- Hold the [RMB] key and point your weapon!
- Fire a weapon by holding RMB and pressing LMB. (Melee attacks can be performed by pressing [LMB] without aiming. The first step in firing is aiming accurately.
- In other words, RELOAD [R].
- HOLD [RMB] [SHIFT] TO TURN ON/OFF WEAPON SIGHT (accurate shooting)
Gunslinger:
- Press [V] for a melee attack.
- Hold [V] for a HEAVY MELEE ATTACK!
- Press the [LMB] to fire a weapon.
- RETAKE POSITION – [R]
- HOLD [RMB] TO TURN ON/OFF WEAPON SIGHT (exact aim).
Other Interactions
- To see the map, click the tab.
- FADED VISION — press and hold [E]
- MOUSE WHEEL / [1 – 0] / CHOOSE MACHINERY
- HOLD RMB PRESS LMB TO ACTIVATE CHOSEN GADGETS
- USE DOORS, STAIRCASES, ETC.
- Switch to Weapon Mode [X] (the lanterns can be turned off, too)
Tips and tricks
Sound is a Key Part of the Game
Survival in Hunt: Showdown is dependent on sound more so than in most games. Many different types of traps exist, and they all have the potential to alert nearby players and monsters. Noise can be produced by a variety of means, including the discharge of a firearm, running through water, or even merely walking on wooden planks.
It is crucial to keep this in mind while playing so as to not only avoid making too much noise, but also to actively listen for it. Hear the sound of gunfire off in the distance? Reverse your speed so you don’t run straight into a rifle. Do you smell rotting flesh or hear zombies moaning? There’s probably another player in the area, and they’re making things awkward. Being able to hear the game clearly and being aware of the sounds you make while playing are both important.
The Health Bar
- Over time, you’ll heal up to the point where the damage bar is full again. You’ll need to track down medical kits in order to restock the other depleted bars.
- The value of a large bar is 50 HP, while a small bar is only 25 HP.
- Any time you die and are revived by a friend, you will lose one health bar permanently.
- Increasing your maximum health bar in the Hunter screen before a match will cost you tokens, which you can earn by winning matches.
Damage Types
- When you bleed, your health depletes over time. Press and hold [F] to staunch the bleeding. Keep bleeding out until you are unable to move. Because of your focus on stopping the bleeding, you will be unable to defend yourself effectively during this time.
- Poison is not harmful over time, but it does prevent the body from healing itself if it is consumed. Poison can be treated with an antidote shot or allowed to wear off on its own.
- For as long as you’re on fire, you’ll take damage to your maximum health and be rendered permanently incapacitated. Just hit [F] to put out the fire. If your health bar is reduced to 0 due to fire, you will instantly perish and cannot be revived.
This is a PvEvP Game
The tension between taking care of the monsters and taking care of the other hunters is a big part of what makes Hunt: Showdown so compelling. You will always be surrounded by enemies, such as Grunts, Hive, and Meathead.
Use this to your advantage the next time you get into a fight with another person. Is a Grunt squad close by? Draw their attention to it. Do you spot a red barrel around the next bend? Keep running and you might fool them. The difference between a quick victory and a hard-fought loss can come down to something as simple as keeping them distracted while a grunt walks up on them.
Choose Your Hunts Wisely
It’s simple to hire a hunter, select a contract, and begin killing off some grunts, but it’s often very difficult to actually claim the bounty. A reasonable question would be why is that the case.
Choose your weapons, tools, and consumables carefully, as different contract monsters have different strengths and weaknesses. The Butcher is especially vulnerable to shotguns, while the Spider is vulnerable to all firearms but has incredible speed. To put it another way, if you don’t have shotguns and you still want to kill the Butcher, you’re in for a much tougher fight. Think about what you have and how easily you can complete the contracts before deciding which one to kill.
Banishing the Contract
Only a third of the job is done by eliminating a contract monster. Now that it’s dead, you must send it straight to Hades. This may take a few minutes, and during that time, a burning effect will indicate your location on the map to other players, giving everyone in the match notice that it has begun.
The ritual can be performed without being physically present at the body; it will proceed regardless of your presence. You’ll need to keep the area safe if you want any chance of getting your hands on the bounty when it finally shows up. Stay in a secure location and only venture out when absolutely necessary so that you can keep an ear on your environment. As the other hunters will likely be in a hurry to find you, it is recommended that one hunter remain near the exiling creature while the other acts as a lookout.
After the monster has been expelled, two bounty tokens will appear in its place. Gather them (each Hunter can only have one), and get ready for the showdown as the remaining players swarm your location to try and steal the prize. Take care, the Bounty Tokens will keep pulling you back to safety in the afterlife. The lightning bolts that represent this mooring are detectable in Dark Sight. When a Hunter uses a Bounty Token, any other Hunter can track his or her movements.
Conclusion
So, there you have it. With these adjustments, you’ll be able to enjoy Hunt: Showdown more while also increasing your kill count.
Nguồn: https://gemaga.com
Danh mục: Best