- Pode Review (Nintendo Switch). Everything You Need To Know Update 07/2026
- Razer Kraken Pro v2 Review. Everything You Need To Know Update 07/2026
- Harry Potter: Hogwarts Mystery – Comprehensive Review Update 07/2026
- Herman Miller Aeron Review: Is It Worth The Money? Update 07/2026
- Generation Zero Review – What You Need To Know? Update 07/2026
Bottom Line
The Dell S2716DG has a disappointing contrast ratio and poor black uniformity, but its excellent performance, solid colors, ergonomic design, and inclusion of G-Sync will likely win over at least some customers.
Therefore, if you need a monitor that can deliver the performance that this one can, then this is the best option. If not, there is a plethora of other options to consider.
Bạn đang xem: Dell S2716dg Review Update 07/2026
The Pros:
- a display capable of 1440p resolution
- Exceptional performance at 144Hz 1ms
- Priced competitively for a G-Sync screen
- Super-flexible support structure
- Easy on the eyes
The Cons:
- weak comparison
- Awful black homogeneity
No monitor, especially not a reasonably priced one, simply has it all, so you’ll need to decide what’s most important to you before making a purchase.
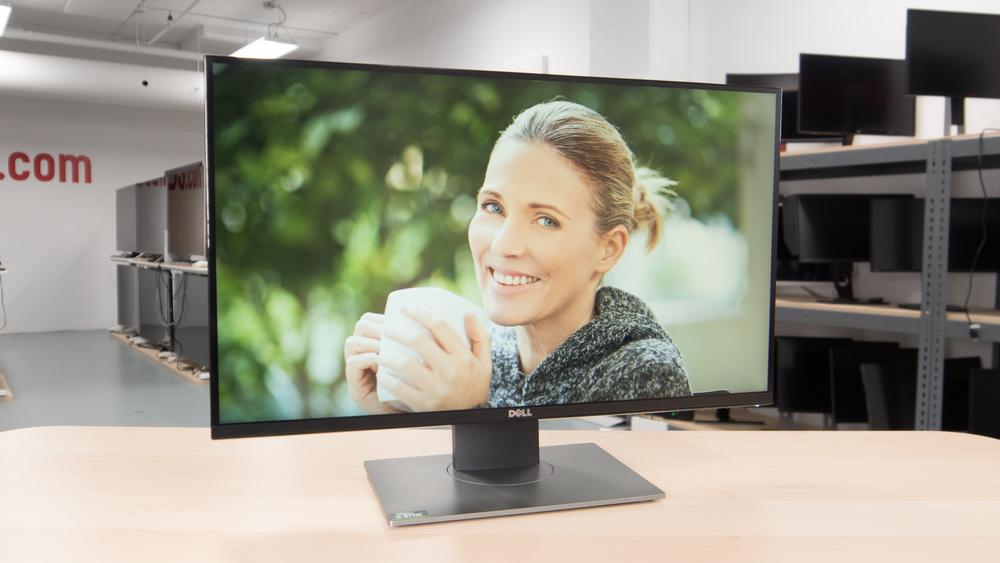
You can never “have your cake and eat it, too,” but there are always some models that come close. One such screen is Dell’s S2716DG, a 27-inch 1440p TN display with a refresh rate of 144 hertz and a response time of 1 millisecond.
It strikes a nice balance between speed and visual quality, which gamers will appreciate.
Here is a quick reference to the various sections of the document. Show
The Design
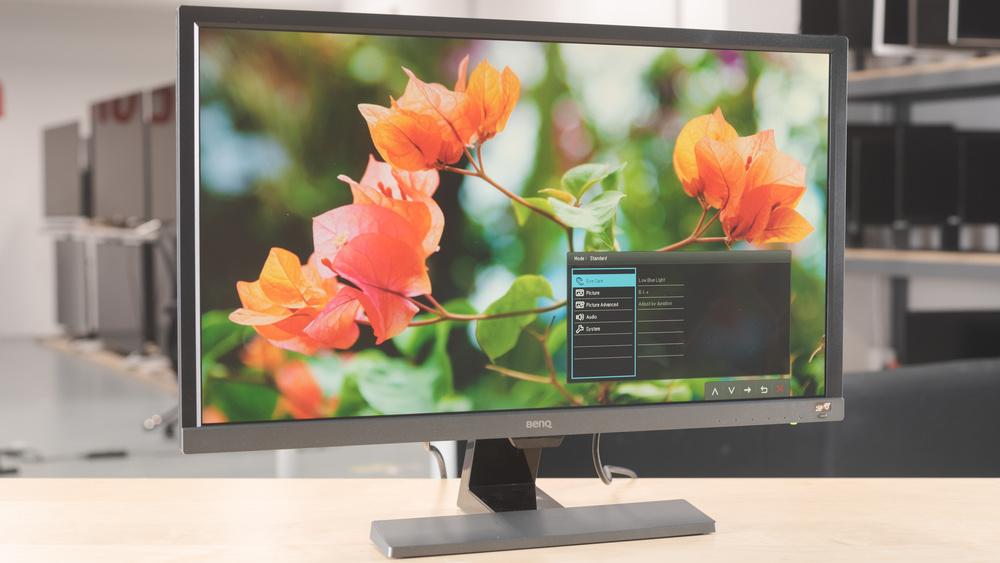
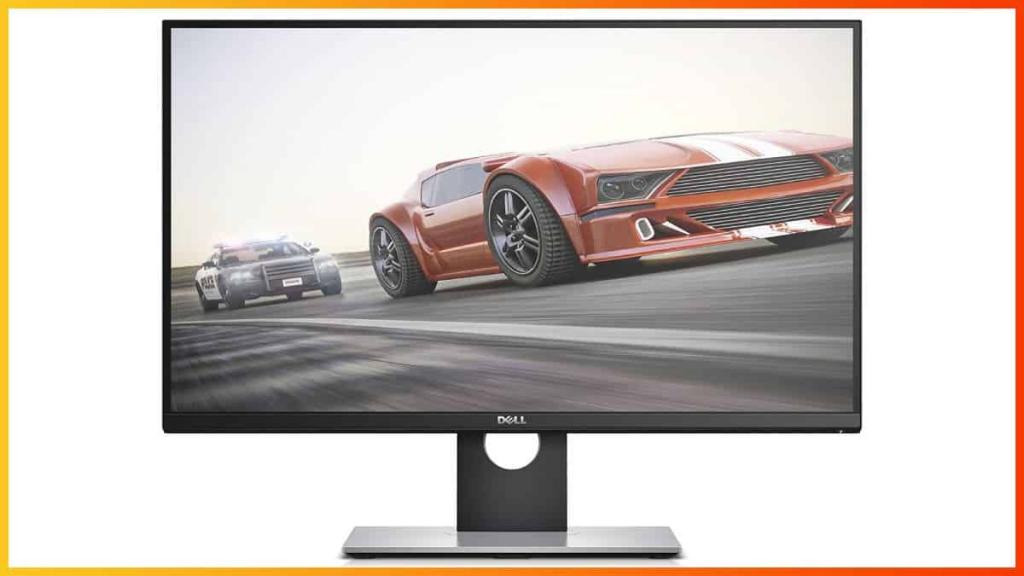
Just like the rest of Dell’s monitor lineup, the S2716DG doesn’t look like much from the outside.
The matte black finish is understated and complements a wide variety of decor styles, while the narrow bezels lend an air of sophistication.
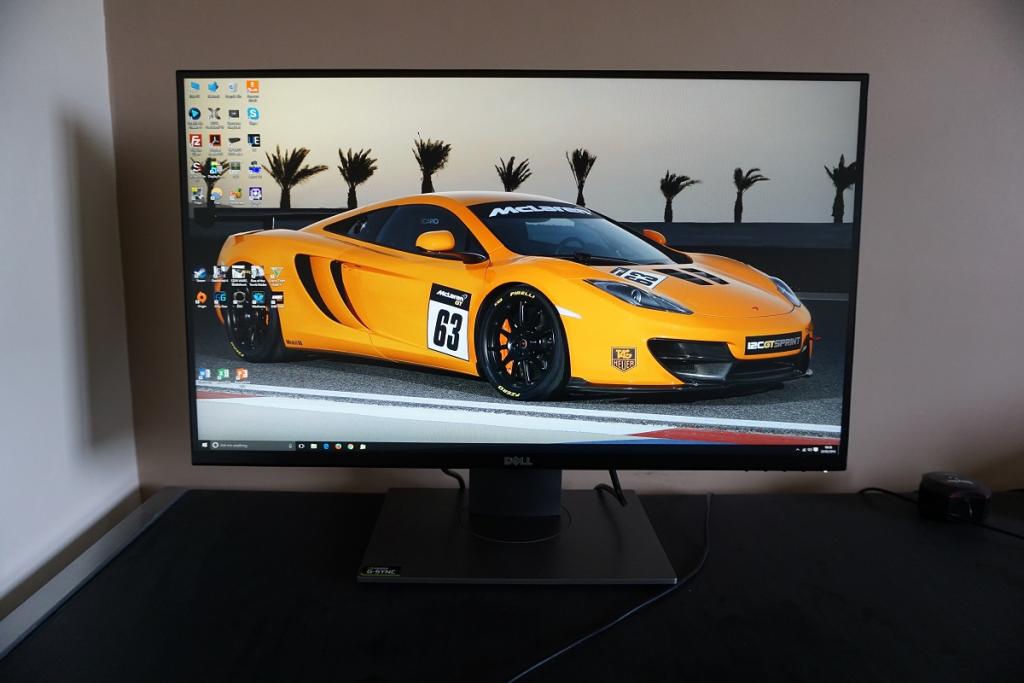
Also, the stand is a highly adjustable VESA stand that looks great thanks to its black and white color scheme and thoughtful cable management.
It can be adjusted in height (up to 5in/12cm), swivel (from -45 degrees to 45 degrees), tilt, and pivot. As a result, the stand should not receive many complaints.
Naturally, it makes use of the standard 100100 VESA configuration, the most common configuration among desktop monitors, so swapping out the stand or mounting it to a wall won’t be too much of a hassle.
Specifications
| Aspect Ratio | 27in |
| Proportional aspect ratio | 16:9 |
| Panel | TN |
| Resolution | 2560×1400 |
| Update frequency | 144 Hz |
| Speed of reaction | 1ms |
| Brightness | 350 cd/m2 |
| Contrast | 1000:1 |
| VRR | G-Sync from Nvidia |
| Connectors | 1x HDMI 1.4 a single DisplayPort 1.2 4x USB 3.0 Audio output: dual 3.5mm jacks |
| Help from VESA | 100×100 |
From the specs table above, it’s clear that the S2716DG is a 27-inch widescreen monitor with a high resolution, a fast refresh rate, and, most importantly, a TN panel designed with performance in mind.
Anyone looking for a responsive screen, but especially competitive gamers, will appreciate its speed and responsiveness.
Since this is a TN panel, you can rest assured that you won’t have to deal with much in the way of input lag or motion blur.
In short, this is as good as it gets, and the gameplay will look crisp and fluid at high framerates.
Despite having a high-quality panel, the S2716DG still has some of the problems that affect all TN displays.
Even though the stock stand only goes so far in terms of height adjustment, the relatively small viewing angle is no longer a problem.
As an added bonus, the monitor’s coverage of the sRGB color gamut is 93%, making it superior to most TN panels and more than sufficient for gaming. If you’re also doing design or video editing, you’ll want something with more precise color reproduction.
Further, this panel’s lackluster contrast and lackluster ability to display deep blacks are two of its major flaws.
As a result, they will look blackish-gray the majority of the time, especially if you play your games in a low-light environment.
Inadequate black uniformity is another issue that frequently appears alongside poor contrast.
Prominent clouding and noticeable backlight bleed can be seen around the screen’s perimeter, though the severity of the clouding varies from panel to panel.
You won’t have a good time using the S2716DG, a bright monitor with excellent performance and above-average color reproduction for a TN panel, in a dimly lit room.
Features and aesthetics
The monitor’s frontal design is contemporary and understated, setting it apart from more flashy rivals. There are no flashy lights, neon colors, or other outlandish “gaming” fashion statements to be seen anywhere. On the contrary, the experience is much more refined, looking similar to the majority of modern Dell screens. The bezels are of the now standard ‘dual-stage’ design, featuring a thin outer component made of hard plastic and a relatively thin panel border. When the screen is off (though it is still there), the panel border blends in with the background, but when the screen is on, the border stands out. Despite containing two parts, the bezels are still relatively thin, measuring 8mm (0.31 inches) in height at the top and sides and 17.5mm (0.30 inches) at the base. Initially, we tested an older version of the screen that had a regular (‘medium’) matte anti-glare surface. Later, we looked at a newer version that had a lighter matte anti-glare surface.
There are On-Screen-Display (OSD) buttons in the bottom bezel, too; they point down and to the right. The power LED is located in the button’s center and shines a subtle, cool white color when the screen is active and flashes this color when the screen is inactive (‘active-off’). When the power button is pressed, the monitor is ‘turned off’ (although it is still in standby), and the power LED turns off. The below video demonstrates how the OSD works.
As seen from the side, the monitor is relatively thin at around 20mm (0.79 inches) but it thickens in the middle. Two USB 3.0 ports (the lower one supports rapid charging for attached devices) and a 3.5mm headphone jack can be found on the left side of the screen. The monitor and its base are 200 millimeters (7.87 inches) deep; the screen itself is set back by about 34 millimeters (1.34 inches). This makes the screen compact and allows you to place it flush against a wall without straining your neck or eyes. However, unless you have a particularly deep desk, this can be a problem with some of the deeper monitor designs. The included stand allows for a wide range of ergonomic adjustments, including tilt (5 degrees forward, 21 degrees back), swivel (45 degrees left, 45 degrees right), height (130 millimeters [5.12 inches]), and pivot (90 degrees [5.8 inches] clockwise rotation into portrait). Poor viewing angles, which become horizontal in this orientation, severely limit the usability of portrait viewing and cause obvious color shifts from the normal viewing position. At its lowest setting, the monitor’s base is 50 mm (1.97 inches) off the desk, and at its highest setting, the top of the screen is 420 mm (16.54 inches) above it.
Not as attractive as the matte finishes (in black or silver) found on many modern Dell monitors, the back of the screen is also made of glossy plastic. However, we’re not going to hold that against the screen because it usually faces a wall. The stand’s base and the rear of the neck are both a dark silvery matte finish. The monitor’s down-firing ports and the area below it are finished in a matte black plastic. To the extreme left (when viewing from the front), there is a K-Slot. The AC power input (internal power converter) is located on the left side of the stand neck, and the remaining ports (DP 1.2a (supports G-SYNC), HDMI 1.4, USB 3.0 upstream, and 2 more USB 3.0 downstream ports) are located on the right side of the stand neck when viewed from the back. DisplayPort is required for 2560 x 1440 @ 144Hz and G-SYNC functionality, while HDMI is compatible with both 2560 x 1440 and lower resolutions at 60Hz. G-SYNC, ULMB, and 3D Vision are not supported, but users with AMD GPUs can still run the monitor at 2560 x 1440 @ 144 fps.
Keep in mind that the included stand can be detached with the push of a button located at the back of the stand’s neck, above the port area but below the attachment point. The 100 x 100mm VESA holes will be exposed after this, allowing you to use a different stand or mount if you so choose. The package features a USB 3.0 cable as well as a DP cable.
Calibration
Subpixel layout and screen surface
Early models (A00, A01) of the screen used a matte anti-glare medium finish. 144Hz TN panels typically have a screen surface like this. This type of screen surface diffuses ambient light well, allowing it to effectively deal with glare. This article notes that this also alters the monitor’s emitted light, potentially diminishing the display’s coloration and sharpness. When looking at lighter content, there is a noticeable amount of “graininess,” though it is not as thick and smeary as it is on some older IPS models in particular. The matte screen surfaces of competing AHVA models (and 60Hz IPS-types with this resolution) offer a smoother look to the image with more direct light emission, so they stand in stark contrast. A light matte anti-glare screen surface, similar to that used on the AHVA panels, is used in more recent iterations of the monitor, such as A02 and A03 (manufacturing dates of January 2016 onwards, perhaps slightly earlier). The image below shows the variation in haze values between the new and old screen surfaces, with the new version on the left and the review sample on the right.
The new screen surface improves color accuracy and gives white and other bright colors a more refined appearance. The graininess and other issues mentioned in this review only apply to the A01 revision, as they were fixed in later revisions with the new screen surface. Keep in mind that the image below is based on our A01 evaluation sample, and that the actual subpixel layout hasn’t changed.
Standard operating systems like Windows and MacOS use an RGB (Red, Green, Blue) striped subpixel layout. Text fringing issues caused by unusual subpixel layouts are therefore irrelevant on Macs, and ClearType settings are also unnecessary on Windows. However, they might want to do so anyway so they can adjust the settings to their liking.
Testing the presets
The monitor’s presets are sparse: “Standard,” “Warm,” “Cool,” and “Custom Color.” These options essentially only offer different color temperatures. Using the ‘Custom Color’ setting, users can also adjust the individual RGB sliders to create their own unique color scheme. To be clear, we won’t be focusing on the “Cool” preset, which has a bluish tint, but the others will be. We’ll also put the screen through its paces with the image-altering ‘ULMB’ (Ultra Low Motion Blur) setting activated. Later in the review, this aspect is dissected in greater depth.
Datacolor Spyder5ELITE colorimeter readings, as well as ‘by eye’ and application-specific measurements, are displayed in the table below. These measurements were taken after more than 2 hours of operation of the monitor. The Nvidia GTX 980 Ti G-SYNC capable GPU and Windows 10 operating system were used in our testing. No additional drivers or ICC profiles were installed, and the screen was left in its default “Plug and Play” mode. Assume the defaults were used unless stated otherwise. The only places where changes were made were in our “Test Settings” and in “ULMB,” where the brightness was increased to “100” from the standard “80.” During testing, we settled on a refresh rate of 144 fps for the monitor outside of the ‘ULMB’ mode.
| Tweak Your Display’s Preferences | Gamma, or the mean in the middle. | Zero degrees Kelvin (white point) | Notes |
| Conventional (Manufacturer Defaults) | 1.9 | 7062K | There is a noticeable lack of depth in certain areas, and the image is generally quite bright and cool. This is especially noticeable lower on the screen, where perceived gamma (and, by extension, saturation) is lower than higher up. Due to the nature of TN (Twisted Nematic) technology, the depth perception of the screen’s central regions is not as good as it is in the upper regions. Overall, the image is not “washed out,” and it is far more vibrant and well-balanced than on many 144Hz TN displays. |
| Warm | 1.9 | 6194K | Similar to the above, but with a much warmer overall tone to the image, as the name of the preset would imply. It is not a “Low Blue Light” setting because the white point is still around 6200K. |
| The Freedom to Choose Your Own Shade | 1.9 | 6652K | This preset is similar to the factory defaults aside from a more neutral white point. |
| Ultra Low Magnetic Field, 100s Pulse Width, 120s Frequency | 2.0 | 7349K | The most noticeable difference from the default settings is that the screen appears darker and also strobes, inducing a mild flickering like a 120Hz CRT. Also, the gamma is tweaked ever-so-slightly upward. Even at ‘100,’ as tested here, brightness is more comfortable than the factory defaults, though some users may prefer it brighter or dimmer. You can easily turn the brightness down, but you can’t turn it up past “100.” |
| ULMB, 100s Pulse Width, 100 Hz | 2.0 | 7239K | The same as above, but with more noticeable flickering. The levels of illumination are comparable, though the longer “on” time of the backlight strobe may give the impression of greater brightness. |
| Ultra Low Magnetic Field, Pulse Width of 100 at 85 Hertz | 2.0 | 7239K | The above still holds true, but the flickering has become very noticeable, making the monitor unpleasant to use. A sizable boost in luminosity is also included. |
| Ultra Low Magnetic Fields, Pulse Width 10 at 120 Hertz | 2.0 | 7324K | Too faint for our eyes to see in the dark. In this case, it’s just to show what happens when you adjust the Pulse Width Setting, which we discuss in more detail below. As expected, you’re not limited to the two extremes of ’10’ and ‘100,’ though. |
| 10s Pulse Width, 100 Hz ULMB | 2.0 | 7229K | Similar to the preceding, but with a little more flickering due to a slower refresh rate. |
| Pulse Width 10, at 85 Hertz, ULMB | 2.0 | 7172K | Lightens up a little, but it’s still way too dim. We again notice and find annoying the flickering caused by the refresh rate. |
| OSD settings that work best (explained further down) | 1.9 | 6455K | Dimmer overall lighting and some subtle adjustments to the color channels. There is still an obvious absence of shadows, making many colors look paler than they actually are. There is no obvious crushing at either end of the spectrum, but many of the shades are adequately rich. |
| Procedures for the Test (using an ICC Profile; see below) | 2.2 | 6476K | Over the ‘Optimal OSD settings,’ an ICC profile has been applied to fix the way gamma is handled while keeping the central white point at 6500K. Overall, the image is more detailed and richer, though it is still limited by the previously mentioned differences in gamma and saturation depending on which part of the screen you’re looking at. |
| A movie to watch to unwind at night (with the ICC profile applied, see below) | 2.2 | 4064K | Our custom ICC profile, built on top of the recommended ‘Optimal OSD settings,’ achieves a cool white point of 4000K. Thus, the monitor’s blue light output is greatly diminished, making it more suitable for use in the evenings. It’s similar to turning on F.lux or entering a “Low Blue Light” mode, but the ICC profile’s corrections are preserved, too, along with the lowered white point. |
Right out of the box, the monitor’s brightness and cool hue were noticeable. Overall, the shades lacked a little bit of depth, but they looked better than they do on many 144Hz models when set to their factory defaults. The OSD’s brightness was drastically reduced, and the ‘Custom Color’ preset’s color channels were tweaked very slightly, and the results were more pleasing to the eye. In spite of the gamma curve consistently displaying a value of ‘1.9,’ as seen in the first image, there was still a desire for a greater depth of color. Again, after some tweaking, the results were generally better than those of many TN models, but there was room for further improvement. These “Optimal OSD settings” were then used as the basis for our “Test Settings,” which we’ll get into after discussing the ICC profile that was applied on top of it. The second picture is a gamma trace after the ICC profile was used to correct the first.
Even though the monitor had a “Warm” preset, the white point was still measured as “only” 6200K in the center, which is warmer than the factory defaults but far from being a “Low Blue Light” mode. With that in mind, we developed an ICC profile with all necessary corrections and a target white point of 4000K, which represents ‘Low Blue Light’ preferences.
Optimal OSD settings
The on-screen menu (OSD) doesn’t offer a lot of customization options. We found that the ‘Custom Color’ preset needed only minimal tweaks to the color channels, and of course, a reduction in brightness, on our unit. Keep in mind that different color channel adjustments may be necessary due to inter-unit variation. Default OSD settings were used for everything not specifically mentioned here. The Windows ‘Response Time’ and refresh rate have been included for completeness.
Depending on the setting and personal preferences, brightness equals 43. A Typical Reaction Time
Custom Color Mode = Preset Mode
R= 100
G= 98
B= 98
Refresh rate = 144 Hz
Test Settings (ICC profile)
Test Settings were developed by combining the aforementioned “Optimal OSD settings” with an ICC profile generated from a Spyder5ELITE colorimeter. The primary change made was to enrich the colors and fix the monitor’s gamma. Please keep in mind that this ICC profile was developed for our particular unit and may not be the best option for others. This profile is meant to correct the gamma behavior of the monitor, but you can make additional manual adjustments to the color channels if necessary. Take the following steps to leverage our profile:
1) Download which is the ICC card.
2) Default the monitor to its “Optimal OSD settings,” though additional tweaks are possible. Our device, when using the ICC profile, achieved a brightness of ’43,’ or 161 cd/m2, when using this setting.
3) In this article provides guidance on turning on the profile and a list of restrictions that gamers should be aware of. The profile is usually recognized by games, or at least the gamma correction is applied; however, the image is not completely washed out if the profile is not used.
Relaxing evening viewing (ICC profile)
As mentioned before, we developed an additional ICC profile that functions as a “Low Blue Light” (LBL) setting. Neither the aforementioned ICC profile nor software like f.lux can be applied to the monitor simultaneously because there is no hardware option for this. This profile serves as a “Low Blue Light” adjustment and a gamma correction tool. All you have to do is follow the steps above, except ourA profile of the LBL. Once again, this is meant to be used in tandem with the ‘Optimal OSD settings,’ though additional customization is possible. The ‘Display Profile’ tool, which is described in more detail at the base of ourI.C.C. ArticleIt also facilitates the swift activation and deactivation of this profile.
G-Sync
The high list price of this monitor can be attributed in part to the inclusion of G-Sync.
Dell chose Nvidia over AMD because adaptive sync is essential for high-refresh-rate displays.
There are, of course, benefits and drawbacks to using G-Sync instead of FreeSync.
Fortunately, it functions more reliably, and typically over a much broader range of framerates. Nvidia’s rigorous quality control goes above and beyond adaptive sync to guarantee that each and every monitor is in perfect working order.
While G-Sync does reduce motion blur and ghosting, it does so at the expense of framerate, so quality does have a cost.
The fact that G-Sync is exclusive to Nvidia’s hardware is probably its biggest drawback. There will be no interference from AMD in how OEMs implement FreeSync.
G-Sync monitors are typically more expensive because Nvidia mandates that monitor makers pay licensing fees and pass their stringent quality control.
This monitor is aimed at performance-oriented gamers, so if you fit that description, you probably won’t mind shelling out a little extra for G-Sync.
However, AMD fans will be happy to know that Dell offers a significantly cheaper FreeSync variant of this display.
Contrast and brightness
Contrast ratios
The white and black luminances as well as the resulting contrast ratio were measured with a KM CS-200 (accurate luminance meter) at various brightness levels. Results for “Optimal OSD settings,” “Test Settings,” and “Relaxing evening viewing” are highlighted in blue in the table below. Black highlights show the maximum contrast ratio, the brightest whites, and the darkest blacks. Except as already mentioned in the calibration section, you can assume that any settings that aren’t explicitly mentioned here were left at their factory defaults.
| Controls for a Display | Light intensity in white (cd/m2) | Black light intensity (cd/m2) | Ratio of contrast (x:1) |
| Full illumination | 312 | 0.31 | 1006 |
| 80 percent luminosity (factory default) | 251 | 0.25 | 1004 |
| 60 % illumination | 199 | 0.20 | 995 |
| 40% Illumination | 147 | 0.15 | 980 |
| Lightness of 20% | 94 | 0.09 | 925 |
| It’s as dark as night with no light at all | 37 | 0.04 | 925 |
| Conventional (Manufacturer Defaults) | 237 | 0.24 | 988 |
| Warm | 239 | 0.24 | 996 |
| Specialized Hues | 256 | 0.23 | 1113 |
| ULMB, 100s Pulse Width, 120s Frequency | 114 | 0.13 | 877 |
| The Ultra Low Magnetic Field (ULMB), Pulse Width 100 at 100 Hertz | 119 | 0.14 | 850 |
| 100% ULMB, 85 Hz Pulse Width | 142 | 0.16 | 888 |
| Ultra Low Magnetic Field, Pulse Width 10 at 120 Hertz | 12 | <0.02 | – |
| Ultra-Low-Mid-Bandwidth Pulse, 100 Hertz | 13 | <0.02 | – |
| Pulse Width 10, at 85 Hertz, ULMB | 15 | <0.02 | – |
| OSD settings that work best | 163 | 0.16 | 1019 |
| Test Conditions (ISO profile) | 161 | 0.16 | 1006 |
| Television for a tranquil evening (ICC profile) | 118 | 0.16 | 738 |
When only the brightness was changed, the average static contrast was 992:1, which is very close to the 1000:1 requirement (i.e., the first six rows of the table). We found that even after making adjustments to the ‘Optimal OSD settings’ and applying the ICC profile to our ‘Test Settings,’ the contrast was barely altered, remaining at just over 1000:1 in both cases. Even more noticeable was the effect of the more extreme adjustments made in the ICC profile used for “Relaxing evening viewing,” which reduced contrast to a still-acceptable 738:1. When using ULMB, the contrast also decreased slightly, but it was still respectable at 850:1 to 888:1. The brightest reading on the chart was 312 cd/m2. At the monitor’s lowest brightness setting (i.e., with ULMB turned off), 37 cd/m2 was measured. The resulting brightness range of 275 cd/m2 was sufficient for most uses. We won’t bemoan the fact that this monitor doesn’t have a “Dynamic Contrast” mode.
PWM (Pulse Width Modulation)
At no point does the screen employ pulse width modulation (PWM), which is a common method of regulating screen brightness. To adjust the intensity of the backlight, DC (Direct Current) is used instead. This means that the backlight does not flicker, which is great news for people who are sensitive to pulse-width modulation (PWM) and its associated effects. With ULMB on, this “flicker-free” status is temporarily invalidated. This strobe backlight mode will naturally flicker because of its very design. However, because this flicker is distinct from PWM-induced flicker, even those who are sensitive to the latter may not find it bothersome.
Luminance uniformity
While watching a pitch-black screen in a completely dark room, we noticed that the backlight was not leaking in any way. The bottom was slightly cloudy, especially on the left side, but this was barely noticeable and blended in with regular use. A picture of this is provided below for your viewing pleasure. Because of the distance and angle, you can’t see it in the picture, but there was also a tiny bit of backlight bleed at the very bottom. Each unit has its own unique level of backlight bleed, so keep in mind that ours wasn’t handpicked out of the store’s inventory. While viewing darker content in a dim room, a golden sheen becomes apparent at wider viewing angles. TN glow is a possible name for this effect, but it is much weaker and not noticeable from a normal viewing position than IPS glow. The video analysis of different perspectives demonstrates this later in the review.
Lighter colors, here represented by 9 identical white quadrants, were also evaluated using the Spyder5ELITE to ensure consistency. The screen was divided into four equal areas, beginning in the upper left corner and ending in the lower right corner. Below is a table displaying the recorded luminance at each quadrant, along with the percentage difference between that quadrant and the brightest point.
High levels of luminance uniformity were present. “Quadrant 6” to the right of the center was where the brightness peaked (162.4 cd/m2). Maximum deviation of 150.6 cd/m2 was measured, which is only 8% darker, in ‘quadrant 7’, which is in the bottom left of the screen. Measured brightness was only 1–7% off from the mean, which is excellent. It’s important to remember that there may be slight variations in light distribution between different devices. Because of the viewing angle limitations of TN panel technology, you can also expect some deviation beyond the measured points, and you should also note that perceived brightness can deviate from measured brightness. In any case, it’s heartening to see such robust performance on our unit, which is not handpicked in any way and is, in effect, a random retail unit.
These variations are graphically depicted in the contour map below, with lighter greys representing higher luminance and, thus, lower deviation from the brightest point than darker greys. Also provided is the percentage difference between each darkest and brightest quadrant.
We will not be providing analysis of color temperature variation measured with the colorimeter due to the aforementioned viewing angle limitations. A monitor of this size and panel type will still exhibit color temperature shifts when viewed from outside of the sweet spot, as the panel’s viewing-angle weaknesses can cancel out the effects of any measurable deviation. As a result, any readings done here would be extremely deceptive because they wouldn’t reflect reality.
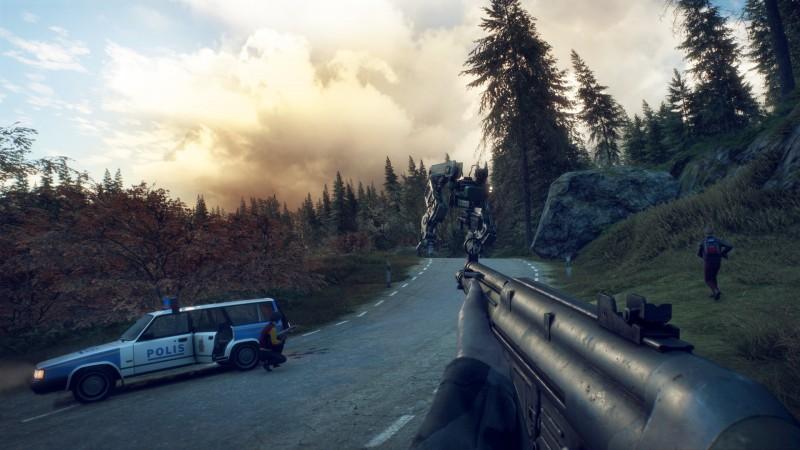
Contrast in games and movies
The contrasting performance in BF4 is very satisfying. In general, the level of detail in dark areas was good, though it did vary depending on which part of the screen you were looking at. Because of the limitations imposed by the human visual system, the perceived gamma rises toward the top of the screen and falls toward the bottom when viewed from an off-center position. As a result, some finer points were lost at the top while others were emphasized at the bottom. Darker parts of the screen’s center displayed more information than was intended. Due to near black shades looking a little lighter than they should have, details that should really blend in were visible in places that had more of an “oil slick” appearance. However, this was not as pronounced as the intentional gamma enhancement offered by settings like BenQ’s “Black eQualizer.” With no ‘IPS glow’ to obscure the edges of the screen during dark scenes, the viewing experience was consistent across the board. The screen surface texture made brighter elements, like fires and explosions, look a little grainy, but they still stood out nicely against the pitch black background.
The contrast in Dirt Rally was quite enjoyable on the whole, with the same strengths and weaknesses being seen as in BF4. It’s true that the scenery is more evocative when you’re driving through a dark area of town at night or during the day. There was also no “IPS glow” or other similar phenomenon to detract from the overall quality of the event. Minor details (such as the structures of leaves and the treads on tires) were clearly discernible across the majority of the display, adding up to an impressive level of detail. In the upper part of the screen, these details become less distinct, while in the middle and lower parts, they are more pronounced as intended. For instance, the car’s ventilation fan grills were typically shown quite low on the screen, and their near-black shades appeared lighter than intended, giving them a ‘flooded’ appearance. Some users have reported serious problems with the bottom two corners of the screen glowing too brightly on competing AHVA models, so it was nice to have that issue resolved.
Skyfall was also used as a reference Blu-ray to evaluate contrast. The monitor’s performance was admirable, as dark images showed fine detail. Even the darkest colors appeared reasonably deep, and even minute details like individual hairs and the texture of materials were clear. While the aforementioned gamma adjustments did apply, the film’s 16:9 letterbox aspect ratio meant that the top and bottom portions of the screen were obscured by black bars. Candles floating down a river at night are a good example of a contrasting bright color, but they look a little grainy on the screen. This wasn’t the ultra-smooth matte finish we’ve seen recently, but neither was it the thick and smeary grain typical of older IPS models.
Lagom contrast tests
We performed a more nuanced analysis of the strengths and weaknesses of contrast performance using Lagom’s tests for contrast. We came to the following conclusions.
- Each case showed exceptional performance on the contrast gradients, with clearly distinguishable brightness steps.
- Overall, performance on the black level test was satisfactory. The first few blocks stood out against the background even more than would be expected from standard 2.2 gamma tracking, but all of them were easily distinguishable. These blocks’ legibility varied according to where on the screen they were being displayed and adapted fluidly to head movement. There was a reasonable amount of camouflage if, for instance, they were shown at the top of the screen. As they moved down the screen, they got brighter and more differentiated. The final (white) block appeared somewhat hazy due to the screen surface, but dithering was not noticeable.
- The test for white saturation yielded fair results. Except when looking down, the third, fourth, and fifth patterns were not as distinct as they should have been. Again, this is indicative of the poor viewing-angle performance, though it is par for the course for a device of this size and type from TN.
- Though there was some banding at the very bottom, the greyscale gradient was generally smooth. The ICC profile made it more pronounced, but it was still noticeable without it. To my knowledge, there was no discernible hesitancy. Due to some graininess in the screen surface, the premium content didn’t look as polished or pure as it could have.
Colour reproduction
Colour gamut
Below is a comparison between the sRGB color space (green triangle) and the S2716DG’s color gamut (red triangle) as measured by the Spyder5ELITE. The monitor provides nearly perfect sRGB coverage, falling short only in the extreme red end of the spectrum. Beyond the sRGB color space, there is some expansion, especially in the green and less so in the red part of this diagram. Due to its intended uses, the slight increase in the monitor’s potential for vibrancy is much appreciated.
Colour in games and movies
The palette of BF4 was full of vibrant tones. As we mentioned in the calibration section, colors do lose some saturation as you move lower on the screen, and they look deeper than intended as you move higher up the screen, even from a normal viewing position. This means that the “identity” and “individuality” of shades are not as pronounced as they are on IPS-type models. When viewed from the bottom of the screen, earthy browns looked more like a clay color, while greens in the center and upper part of the screen looked quite pale. In spite of this, after we applied the ICC profile we created for our “Test Settings,” the colors looked much more rich and varied. The blazing fires and massive explosions produced a wide range of oranges and yellows, some of which were quite bright. Some of the colors were muted khakis and others were more muted than khaki, but there were also some nice deep greens. Although the environments did have a more natural look to them and the overall experience was more on the vivid side of the spectrum than the ‘washed out’ side, saturation and gamma changes were still present.
Similar excitement could be found in Dirt Rally. The in-game environments looked quite natural, despite the saturation loss further down the screen stealing some depth in places and the excessive depth further up making things look somewhat oversaturated. There was a nice range of green tones that looked natural, from muted pastels to more vibrant deep tones. Again, these weren’t as distinct and unique as they would have been on an IPS screen, but they were still fairly well represented. Moreover, the car liveries and advertisements lining the tracks displayed a range of vivid colors. Not as much “pop” as you’d get on some screens due to the screen surface, but still decent depth. The brightest colors stood out the most, including bright pinks, purples, yellows, and blues. As one moved up the screen, the vibrant colors, particularly the reds and greens, became more subdued and anemic. This time around, however, things tended toward the colorful rather than the drab.
Colors on the Blu-ray of Skyfall looked about right, though a little undersaturated in spots because our movie player software refused to use the ICC profile. Because of the 16:9 letterbox format, the more extreme tonal shifts were obscured by the black bars at the top and bottom of the screen. There was a decent amount of saturation in both the human skin tones and the natural environments, and the colors looked rich and varied. Again, there was some variation, most noticeably along the vertical axis, though the black bars made it hard to see. The film maintained its charm, and the use of vibrant colors helped to liven up the screen. There were striking cyan neon lights, orange flames, and a red dress that looked pretty deep, to name a few.
The Blu-ray of Futurama: Into the Wild Green Yonder was also put through its paces. Due to the relatively large areas of each shade that may be visible at once, this is an excellent test for color constancy. When comparing the top and bottom of the screen, the saturation of any given shade varied significantly. This was especially noticeable for darker shades. Dr. Zoidberg, who resembles a red lobster, appeared to be the correct shade of red some distance up the screen, but was a bit pale in the center (remember, the ICC profile was disregarded) and very pale at the bottom. This also lessened the range of similar pastel tones, which affected things like the characters’ skin tones, which varied depending on the screen’s brightness. Still, some of the colors, like the good deep purples and blues, appeared quite rich and deep. Likewise, the neon tones, such as hot pinks and greens, were fairly well-represented.
Viewing angles
The concept of color constancy and viewing angle limitations was examined using Lagom’s viewing angle tests. The following information was gathered while sitting in a comfortable position in front of the screen, approximately 70 cm away.
- As one moved down the purple block, the hue changed from lilac at the top to a bright pink in the middle and bottom. The pinkish hue varied noticeably with every slight nod or shake of the head.
- The top third of the screen showed a fairly rich red block, while the middle third had a slight pink tint, and the bottom third had an obvious pink tint. With just a nod of the head, the ratio of pink to red shifted.
- The green block looked lime green all the way through, with some yellowing toward the bottom (and quite strong yellowing at the very bottom).
- Everything about the blue cube looked like it was a very dark blue.
- The vertical stripes in the Lagom font started out looking green at the top of the screen before turning bright red. As the stripes went from green to red, they took on a faint orange cast. With even the slightest of head movements, the stripes changed from green to orange and red. Typically for a TN model, this kind of outcome reveals a strong viewing angle dependency to the monitor’s gamma curve. You can see how this experiment looked like from an average vantage point in the image below.
Below is a video that shows this test in action, from both close up and far away, against a dark and cluttered desktop background. Take note of how the Lagom stripe colors on the text change so easily, and how the desktop background’s colors begin to “invert” above a certain vertical threshold. Once more, this is par for the course for a TN model and not a flaw unique to this display.
Responsiveness
Input lag
By comparing the S2716DG to a number of other monitors with known latency, we were able to analyze its latency using a tool called SMTT 2.0 and a sensitive camera. Accuracy was enhanced by taking over 30 separate readings. We were able to estimate an input lag of 3.68 ms using this method, which is slightly more than half a frame at 144 fps. This number represents the time it takes for individual pixels to respond to an input, as well as the time it takes for the entire signal to reach your brain. With high frame rate content and a fast refresh rate, it gives players a fantastic sense of being “connected” to the action on the screen. This impression persisted even while using G-SYNC, as far as we could tell without resorting to more scientific methods.
Perceived blur (pursuit photography)
In a snippet from this articleThis article investigates the primary influences on a display’s responsiveness. Perhaps most important is the phenomenon known as “perceived blur,” which is affected not only by the responsiveness of the pixels but also, and arguably more significantly, by the movement of the eyes as they follow the path of moving images on the screen. In that same article, we discuss a method called “pursuit photography,” which captures a monitor’s motion performance in a way that accounts for both elements.
Xem thêm : Razer DeathAdder Elite Review. Everything You Need To Know Update 07/2026
Following are some ghostly photographs taken during a pursuit using the UFO Motion Test’s middle row (medium cyan background). The default speed of 960 fps was used for the test, as this is an acceptable practical speed for taking such photographs and adequately displays the necessary elements. The ‘Response Time’ setting in the monitor’s OSD was examined while the monitor was set to a number of different refresh rates (60Hz, 120Hz, and 144Hz). The monitor’s ULMB mode was also evaluated at 85Hz, 100Hz, and 120Hz with the standard Pulse Width setting of “100.” Finally, a Samsung S27A750D reference monitor with its response time optimized and brightness maximized to prevent PWM usage is used in the final column. Frame sequential 3D was selected on the Samsung in order to simulate 120Hz ULMB’s strobing backlight. Where perceived blur is caused primarily by eye movement and is not limited by pixel responses, the reference screen provides a reasonable indication of how things look when the strobe mode is turned off.
The UFO is very blurry when viewed at 60Hz. This appears to be caused primarily by eye movement and linked to the refresh rate itself when using the “Normal” setting (compare to the reference image), though there is also some trailing on top of this. This effect is caused by inverse ghosting (overshoot), which is not immediately obvious in the image. The overshoot is blatantly visible in the ‘Fast’ mode due to the excessive grey-to-grey acceleration that leaves a vividly colored wake behind the object. At 120Hz, blur is noticeably reduced, and the object appears much sharper and more narrow. Using the “Normal” response time option, there is some overshoot, but the results are very close to the benchmark. When switching back to the ‘Fast’ setting, inverse ghosting becomes immediately apparent. Everything looks very similar in these still images taken at 144 frames per second. When using the “Normal” setting, there may be slightly more inverse ghosting, though it is still minimal. We found that 144Hz in the ‘Normal’ setting was optimal, taking into account a wider variety of transitions and how responsive the monitor actually felt during use.
When ULMB is turned on, the UFO is much clearer to see. Even at 85Hz, the UFO appears much more “in focus,” with finer details clearly visible. As can be seen from these screenshots, things look slightly better at 100Hz and significantly better at 120Hz. This distinction is readily apparent through direct observation of the screen. The overshoot is also a result of the aggressive overdrive impulses used to hasten the pixel transitions as much as possible, avoiding the problems that can arise from conventional trailing or even frame overlap. What isn’t shown, however, is the flickering that occurs in strobe backlight modes like ULMB. In what follows, we compare the standard setup with and without the ULMB’s presence.
We’d like to wrap up this section by bringing up a topic that isn’t directly related to responsiveness but does belong here in the review. Particularly when things are moving quickly on the screen, some colors can seem to fragment into thin vertical bands that shift between the correct hue and one that’s either lighter or darker. We use the term “interlace-pattern artifacts” to describe the resulting tangled appearance of this interlacing pattern. Some users may call this “pixel inversion,” but it is not present on specialized test patterns designed to detect pixel inversion. And, yes, the presence or absence of artifacts on such tests has no bearing on whether or not the interlacing effect may be seen in-game or elsewhere on the desktop. The image below, captured while strafing through an icy cavern on Hoth in Star Wars Battlefront, is a good example of how easy they were to spot when lighter shades were involved.
It’s true that this picture does a good job of depicting the effect, but in a still image, the effect isn’t quite as pronounced or apparent. It has a more fleeting and subtle appearance, similar to an interference pattern that changes shape rapidly. Very few users will even be aware of this, and even if they do, they likely won’t find it annoying. For the sake of roundness, we feel it’s important to bring attention to this issue. It’s important to note that this occurs despite the refresh rate, G-SYNC, or ULMB setting. Since increasing the monitor’s refresh rate beyond 144 Hz causes the screen to lose signal regardless of the timings, we will not be including an “overclocking” section.
Responsiveness in games and movies
On Battlefield 4, the ‘connected feel’ to the gaming world was fantastic, and visual fluidity was achieved where the frame rate matched the 144Hz refresh rate (i.e. 144fps). You could tell the pixel responses were quick enough to make the most of the high refresh rate and the signal delay was nice and low, making your interactions with the game world feel natural. Whether on foot or at high speeds in a car, the improvement in perceived blur and ‘connectedness’ over 60fps (or a 60Hz monitor) was noticeable. Even when doing quick character maneuvers, it was much easier to keep track of the enemy’s whereabouts. While the responsiveness of the pixels was not lacking in any way (they were fast enough for optimal 144Hz performance), there was some overshoot in certain areas. This was most noticeable against a lighter background where medium-dark shades were in motion. If you look closely at the leaves of a palm tree against a clear blue sky, for instance, you might notice a hint of a third color (a brighter blue) that isn’t present in either the background or the object. Most players won’t find this to be a major issue while playing.
Thanks to the monitor’s flawless compatibility between frame rate and refresh rate, Dirt Rally benefited from unprecedented fluidity. Low latency and a high refresh rate may help with the game’s “connected feel,” or the sense of an instantaneous response to inputs, even though we don’t play at a level where these things matter a great deal. However, the noticeable improvement in clarity was noticeable, with the racing environments and other cars remaining much more in focus despite the high speeds at which they were moving. Again, there was some minor overshoot, but it shouldn’t be a dealbreaker for most users. Where objects of a medium darkness were cast against a bright blue sky, for instance, the inverse ghosting trails were the most blatantly visible. However, this was only something we became aware of because we were actively looking for it, and it did not interfere with our racing to any significant degree. Although this model’s degree of sensitivity varies from gamer to gamer, based on the feedback we’ve received, it doesn’t appear to be a major cause for concern.
Also, we used our own Blu-ray movie test titles and found no problems that could be traced back to the pixel responses. There was no obvious lag or overshoot as a result of subpar pixel optimization. Because 24 divides evenly into the 144Hz refresh rate, judder is less noticeable than it would be with a 60Hz model, even though the titles can only run at 24 frames per second (fps).
G-SYNC – the technology and activating it
If you have an Nvidia graphics processing unit (GPU) and a G-SYNC-compatible monitor (like the Dell S2716DG), you can toggle variable refresh rate mode. In our writing, and this article that delves into the technology and the advantages it offers. Not much of that will be repeated here, just the essentials. The proprietary ‘G-SYNC board’ found inside G-SYNC monitors takes the place of the monitor’s transitional scaler and other helpful electronics. Thanks to this innovation, the refresh rate of the screen can be adjusted to match the frame rate of the content (like a video game). This prevents the stuttering that can occur when the frame rate and refresh rate of a video source don’t match when using VSync. When VSync is turned off, tearing and juddering, which are common in games with a non-standard frame rate, are completely eliminated. Reduced latency in environments with varying frame rates is an additional perk over playing with VSync enabled. Unfortunately, as was previously mentioned, we lack the resources to provide reliable measurements in support of this.
If a GPU that is compatible with G-SYNC is installed in the system, the monitor can display it through the DP 1.2a (DisplayPort) input. We had built-in support for this technology, but if it isn’t already enabled, it’s simple to do so. All you have to do is launch the Nvidia Control Panel and go to “Display” to configure G-SYNC. Select your desired mode of operation after checking the box labeled “Enable G-SYNC.” As can be seen in the screenshot below, the technology can be used in either “Full Screen” or “Window” mode. Try switching the monitor to a different DP output on the GPU if you don’t see a G-SYNC option in the Nvidia Control Panel. Alternatively, try reinstalling the graphics card driver.
After the technology has been enabled, go to “Manage 3D settings,” where you’ll find two important options. The first of these is “Monitor Technology,” which, as displayed below, needs to be set to “G-SYNC.”
VSync is the second important option to adjust. You can toggle this feature on or off, or use the 3D application’s default setting. If you set the refresh rate to a value greater than the maximum for your monitor (which, in this case, is up to 144Hz/144fps), the GPU will trigger VSync. If you switch it to “Off,” your frame rate can increase beyond your monitor’s refresh rate, which will cause some tearing but will keep your latency to a minimum. Nvidia suggests users choose either “On” or “Off” rather than relying on the “Use the 3D application setting” option. This is due to the fact that some VSync implementations in games may cause issues for G-SYNC to function properly.
When the frame rate drops below the floor of operation (lowest frame/refresh rate supported by the technology), the refresh rate of the monitor behaves in the same way regardless of the VSync setting. Below 30Hz/30fps, the monitor will attempt to adjust its refresh rate to a multiple of the frame rate in order to reduce or eliminate stuttering and tearing. If the game’s frame rate drops to 25fps, the monitor will automatically increase the refresh rate to 50Hz. Low frame rates, however, remain low frame rates regardless of G-magic, as will be discussed below. You should also know that stuttering caused by factors besides the mismatch in refresh rate and frame rate (such as latency, low RAM, etc.) will not be fixed.
G-SYNC – the experience
We found that the frame rate in BF4 was fairly consistent but still quite volatile when using our preferred settings. The frame rate was consistently above 100 fps, though it jumped around quite a bit between 100 and 144 fps. It was very clear that there was tearing or stuttering (and juddering) occurring without G-SYNC turned on. When running at 144 frames per second (to match the 144Hz of the monitor), it looked like everything fit together perfectly; however, any frame rate below that caused the game to look choppy. As soon as G-SYNC was activated, the drops were much more bearable, and the game flowed more fluidly than it would have otherwise. Playability and overall fluidity remained very strong despite a slight dip from optimal fluidity (greatest connected feeling and lowest perceived blur) at the highest possible frame rates.
Just like Battlefield 4, Rise of the Tomb Raider is a visually taxing game that benefited greatly from G-SYNC. The title’s frame rate was noticeably lower than average, ranging anywhere from 40 to 100fps depending on the intensity of the action and whether or not it was taking place in a confined space or an open environment. As the sense of immersion was lacking at lower frame rates, this further demonstrated the importance of using a high frame rate. There was also a notable increase in how blurry things seemed. Still, the lack of distracting stuttering or tearing due to frame rate and refresh rate discrepancies improved the game’s playability. Furthermore, we increased the graphics settings and noticed occasional drops in framerate below the 30fps floor required for G-SYNC to function. It appears that the technology was properly compensating for the frame rate and refresh rate mismatches, as neither tearing nor stuttering were visible. However, the gameplay suffered severely from the low frame rate.
Among the other games we tried out was Star Wars Battlefront, Elder Scrolls Online, and Grand Theft Auto V. All of these games benefitted from G-SYNC, which allowed for higher graphics settings without worrying about frame rate drops below the refresh rate. Again, the higher the frame rate, the better; however, even fairly significant drops were significantly more tolerable with the technology enabled. Keep in mind that people have different thresholds for tears and stuttering. Some people will benefit greatly from this technology, while others won’t notice much of a difference.
ULMB – the technology and activating it
Ultra Low Motion Blur (ULMB) is an alternative proprietary Nvidia technology that can be enabled in place of G-SYNC on compatible models. This strobe backlight technology uses the mechanism outlined here to drastically cut down on blurring caused by fast motion. The backlight is initially set to turn on for a brief period of time (the “on phase”) and then turn off for the vast majority of the time (the “off phase”). As a result, the eyes spend less time trying to keep up with the action on the screen, and blur is perceived to be less severe. ULMB can only be used with an Nvidia GPU and cannot be used in conjunction with G-SYNC.
Setting the refresh rate of the display to 85Hz, 100Hz, or 120Hz in Windows or the Nvidia Control Panel activates ULMB. Select ULMB for ‘Monitor Technology’ in the Nvidia Control Panel’s ‘Manage 3D settings’ as shown below. In most cases, the monitor will switch to the correct mode automatically, but if it doesn’t, the ‘Display’ section of the on-screen display menu will have the option to enable ULMB.
If you activate ULMB, the image will flicker at a rate proportional to the monitor’s refresh rate, making it obvious that the mode is in use. If you are of a certain age and remember CRTs, you will notice that the display looks very similar to one running at the same refresh rate. In addition, the default ‘Pulse Width’ setting in the ‘Display’ section of the OSD can be changed from the provided value of ‘100. In other words, the longer the “on phase” (or “on” time), the brighter the image will be. The length of the backlight strobe’s “on phase” is reduced at lower settings, which reduces brightness but may increase motion clarity. At the default setting, however, most users should experience excellent motion clarity.
ULMB – the experience
If you turn on ULMB, you’ll see the aforementioned flickering, which is most noticeable at 85Hz but still noticeable to us at 100Hz and 120Hz. Both the recorded and perceived brightness are reduced, making the image appear darker and more subdued. Some people are bothered greatly by the flickering, and by the brightness levels themselves, while others are not bothered at all, or adapt quickly. We have already seen the advantages of this mode in terms of clarity in the photographs we examined at the beginning of the review, but the motion itself on the screen is also noticeably different when it is activated. If you have ULMB enabled, you won’t be able to change the ‘Response Time’ setting. When conducting the subjective evaluation below, we found that the motion clarity was good even at 85Hz, but we preferred a lower flicker rate (120Hz).
We analyzed a variety of games that employ this technique and found that, within a given frame rate, the core mechanics and player experience were consistent across the board. We’ll be focusing on BF4 for this section because we think it does a good job of showcasing the technology. With this mode enabled, motion clarity was superb so long as the frame rate corresponded to the refresh rate of the monitor (i.e. 120fps to match 120Hz). This was noticeable even while sprinting, and it shone brightest while navigating agile vehicles. With ULMB on, it was much less of a hassle to operate lethal drones like the UCAV (Unmanned Combat Aerial Vehicle). Blur is noticeable even at 144 fps when ULMB is turned off, making it harder to keep track of the enemy’s movements and guide the drone to its intended target. Regardless of how chaotic the maneuvering got, ULMB kept everything in sharp focus, so even tiny targets like enemy soldiers were easy to spot, track, and eliminate.
One potential drawback of ULMB is that it forces the display to employ an aggressive pixel overdrive algorithm, resulting in some overshoot in the intermediate range. You can see that this isn’t as blatantly obvious as some overshoot can be in the pursuit photography shots from earlier. The ghosting effect was not as obvious in-game as it was in this UFO Motion test. The phenomenon shows up as a thin, almost invisible shadow or semitransparent trail (getting darker at transitions) behind certain objects. It’s not glaring enough to draw attention to itself, and it appears to be in place instantly rather than lagging behind the object as would be the case with traditional trailing or overshoot. Although it would be preferable if this weren’t present, we don’t think the kind of user who stands to gain the most from ULMB would find it distracting enough to warrant disabling the feature. Even non-ULMB monitors (like BenQ’s “Blur Reduction”) have this feature to some extent. Inverse ghosting is probably the most subtle we’ve seen from a state-of-the-art strobe backlight.
Some people may find the ULMB’s need for a frame rate that precisely matches the refresh rate to be a bigger problem than the technology’s inherent flickering. Deviations from this frame rate result in extremely noticeable tearing (VSync off) or stuttering (VSync on). This occurs because motion blur, which normally hides such flaws, is extremely low. You need to use VSync and accept the latency hit if you want to use ULMB, as even microstuttering and other imperfections caused by frame rate limiters and turning VSync off become very obvious. Due to the incompatibility between G-SYNC and ULMB, the decision must be made based on the player’s personal preference for motion clarity and the reliability with which the player can consistently match the frame rate with the refresh rate. While G-SYNC is more popular, ULMB is still a nice feature to have, especially for competitive gamers and/or those who are used to CRT displays.
3D Vision 2
The Dell monitor is compatible with Nvidia’s 3D Vision (1 and 2) stereoscopic 3D technology, but this is not highlighted on the product page. The monitor does not include an emitter, but it is compatible with the appropriate kit (emitter and glasses). We used the Nvidia 3D Vision 2 kit and the GeForce 361.91 drivers on a Windows 10 machine for our tests. Following the installation steps, the monitor was properly identified and set up as a 3D Vision capable display. This can be accessed through the “Stereoscopic 3D” section of the Nvidia Control Panel. Once the ‘Enable stereoscopic 3D’ checkbox has been selected, the setup process can begin.
We won’t go into detail about the ASUS PG278Q’s 3D performance here because it was very similar to what we saw on this display. Instead, if you’re interested in this, we suggest reading the review’s penultimate paragraphs. Specifically, we will reveal that the monitor’s contrast automatically decreased from the standard 75 to 65 when 3D Vision was enabled. However, if you’re happy with the brightness or prefer a darker screen, ’65’ appears to work nicely as well. Increasing this to ’75’ seemed to have little negative effect and provided a bit of extra brightness.
Interpolation and upscaling
Unlike earlier models like the PG278Q, the S2716DG actually has an HDMI port. Connecting devices like gaming consoles is now possible. As soon as you hook up a DisplayPort-enabled monitor to a personal computer, the G-SYNC module automatically kicks in, and no extra scaler is required. The graphics processing unit is responsible for scaling. It’s as if looking at the world through a soft-focus lens, as the effect is quite noticeable. However, if you connect your monitor via its HDMI port, the scaling can be handled by the display itself rather than the GPU. This is how console gaming will always work, but if you’re using an Nvidia GPU and want to make sure your monitor and not your graphics card is handling gameplay, you’ll need to tweak a few settings. To change the dimensions and placement of your desktop, launch the Nvidia Control Panel and go to Display. Make the necessary adjustments by setting ‘Perform scaling on:’ to ‘Display’ and ‘No Scaling’ to the active option. If you happen to be one of the few people in the world who uses an AMD graphics processing unit and have chosen this monitor for gaming, you can rest easy knowing that the scaling will be taken care of automatically.
Rather than using DisplayPort, which limits scaling to the GPU, the monitor interpolates the 1920×1080 Full HD signal to fill the 2560×1440 physical pixels. The inevitable result of reducing the resolution from 2560 x 1440 to 1920 x 1080 is a degree of softening compared to a native 27″ Full HD display, but this softening is much less pronounced than with GPU scaling. The effect is most noticeable when examining distant game objects and certain textures up close. Things aren’t as sharp or distinct as they usually are. They don’t look great, but they’re not terrible, and the overall effect is very different from GPU scaling. Therefore, as a secondary function, this screen is suitable for use by console gamers, providing them with a serviceable experience. Not the best there is, but not the worst, either.
When the monitor is set to its native resolution of 2560 x 1440, the graphics processing unit (GPU) or software takes care of everything, even if you’re playing 1920 x 1080 (Full HD) content in a movie player or browsing the web. To achieve this, a method of upscaling is used that has nothing to do with the screen itself. There is some blurring as a result, but it’s not much different from the monitor’s native interpolation when using 1920 by 1080 resolution over HDMI. To rephrase, this is not a major problem and you shouldn’t be too concerned about it.
Conclusion
With regards to its primary use case—gaming—we can confidently say that the Dell S2716DG is a top-tier display device.
One of the quickest and most responsive displays available, this monitor features a refresh rate of 144 hertz and a response time of just 1 millisecond. You’ll hardly notice any motion blur, and the action is as smooth as it gets.
More than that, you get a monitor with good sRGB coverage, the clarity of 1440p, and a stand that can be adjusted to your liking without compromising the aesthetic of the monitor itself.
We’ve already established that it has some obvious flaws, so we won’t go into detail. The black uniformity is terrible, with obvious backlight bleed and distracting clouding, and the contrast is below average.
This detracts from the experience as a whole but is easily manageable, especially if performance is your primary concern.
G-Sync has finally been implemented. The monitor costs around $600 from Dell, but you can save a significant amount by purchasing it from Amazon.
There, you can find the S2716DG for as little as $400, making it one of the least expensive G-Sync displays currently on the market.
Having said that, the Dell S2716DG is a specialized product that will primarily appeal to avid gamers who seek the highest level of responsiveness and speed in their gaming experience.
While higher resolution does improve picture quality, a more accurate color gamut and deeper black levels can be achieved by selecting either an IPS or VA panel.
Check out our picks for the top gaming monitors of 2022 if you want to see what else is out there.
Nguồn: https://gemaga.com
Danh mục: Review