In order to ensure that your computer is able to cool down properly, we have compiled a brief and easy-to-follow guide on how to physically clean it.
- 12 Best CPU Cooler Of All Time. What’s Best For You? Update 07/2026
- Best Games Like Legend Of Zelda You Should Play Right Now Update 07/2026
- Best Games Like Slay The Spire You Should Play Right Now Update 07/2026
- Best Games on Nvidia GeForce Now. The Ultimate List Update 07/2026
- What is Best Games Like Crash Bandicoot? 15 Best Games Like Crash Bandicoot Of All Time Update 07/2026
The purpose of this article is to provide you with information and advice to help you maintain a neat and functional gaming environment. If so, what do you use to disinfect your computer? How, more importantly, can you ensure its secure and effective cleaning?
Bạn đang xem: How To Physically Clean Your Computer Update 07/2026
Please read on for the answer to this and related questions.
The Computer Case
The computer case can be easily cleaned. To get into the case, you’ll need nothing more than a can of compressed air, some sort of cloth or brush, and a screwdriver. For fans installed in the case, you might also need cotton swabs and alcohol.
- In order to get to the left side screws, you’ll need to turn a wrench on the back. In some instances, the screws will have a rubber or plastic cover that will allow the user to unscrew them by hand.
- Most dust will settle at the top and bottom of a case, making those areas the dirtiest. Get a damp cloth and wipe all this dust away. There may be a need to use a vacuum cleaner to remove the dust that has settled to the bottom of the case.
- A can of compressed air is an effective tool for cleaning dust from tight spaces. It can be used to clear dust from the front and rear drive racks and fan grilles.
- If your case has a dust filter, you should clean that, too. A brush or can of compressed air will do the trick.
- The accumulation of dust on the fan blades of any case-mounted fans will present the greatest challenge. If the fans are difficult to access, you may have to take the case apart. They can be cleaned with ease by rubbing alcohol on a cotton swab.
The Hardware
Here, we’ll examine the best methods for dust-free operation of your computer’s central processing unit (CPU), graphics processing unit (GPU), and power supply (PSU).
What You Will Need
So that you can clean your computer thoroughly, let’s quickly go over the tools you’ll need. Here are some of them:
- Cleaning the inside of the computer requires the use of a screwdriver, which can also be used to remove parts of the computer or, in a pinch, to disassemble the machine entirely. You can use either a slotted or cross-slotted screwdriver successfully.
- When cleaning a heatsink, a can of compressed air is useful for getting dust out of crevices and other hard-to-reach areas. Never hold it upside down, and keep it steady so that the liquid air inside doesn’t leak out. It is possible to clean a computer without using compressed air, though it will take more time.
- Dust will be removed from circuit boards and heatsinks using a soft brush.
- Tough crumbs of dust can be removed from inaccessible areas using cotton swabs and rubbing alcohol.
The Cleaning Process
You should get to work now that you have everything you need.
The first step is to disconnect the power source. Prior to cleaning, make sure the computer is unplugged and has had time to cool down.
Cleaning the CPU
There is no need to clean the processor itself, but the cooler and socket will benefit from a thorough cleaning. Following is the proper procedure:
- The cooler must be removed from the motherboard, so do that first. Most CPU coolers are held in place with pushpins; if yours uses a different method, refer to the manufacturer’s website or the manual to learn how to remove it safely.
- As someone else holds the fan in place, you can use the compressed air to clean the heatsink. The bearing could be damaged by the high air pressure that causes the fan to spin.
- Remove any lingering dust from the fan blades with a brush.
- Remove any lingering dust from the fan’s blades by dabbing them with cotton swabs dipped in alcohol.
Then, before reinstalling the cooler, use the brush to remove any debris from the plug and its surrounding area. The central processing unit (CPU) is not removed.
Cleaning the Graphics Card
The video card is even easier to clean than the processor. You don’t have to take the card out of the case to clean it, but doing so is recommended for the best results.
To get the card out of the holder:
- Remove the case’s protective screws and carefully pry the card free with both hands. Verify that the safety bracket is not securing the card to the PCIe slot.
- When using a compressed air can to remove dust, you should, as before, hold the fan(s) to stop them from spinning. In order to get the most out of a graphics card’s blower fan, direct the airflow out of the back of the device.
- The backplate can be cleaned with the brush. A card without a backplate requires extra care when cleaning so as not to scratch the circuitry.
- The remaining dust on the fan blades can be removed with cotton swabs and rubbing alcohol.
However, if you’d rather not take the graphics card out of its slot, you can still clean the dust out of the heatsink by blowing compressed air into the back of the card. If you do this, keep the can upright so no liquid air escapes and ruins your graphics card.
Cleaning the Power Supply
The power supply unit can be cleaned with or without opening the case.
Xem thêm : Best Game Controllers for Android. Which Is Best For You? Update 07/2026
With the PSU out of the way:
- Cut off the power to everything else in the room. Make sure there is no safety pin keeping the connector in place before attempting to disconnect it. If the connector won’t budge, gently wiggle it left and right while pressing down on the motherboard.
- Take out the power supply by unscrewing the safety screws.
Purifying the power supply without disassembling it:
- To stop the fan from turning, insert the screwdriver through the grille.
- Clear the air vents with the help of the compressed air can.
- Do this from a variety of directions to ensure that no dust is left behind.
When the PSU is opened and cleaned, it:
- It is possible to remove the PSU cover by removing the screws that secure it.
- The dust inside can be easily removed using the brush or compressed air can.
- Put some alcohol on some cotton swabs and use them to clean off the fan blades and any other dust that has settled there.
Cleaning the Motherboard
Although dust can accumulate on the heatsinks, protruding PCIe and RAM slots, and rear panel ports, the motherboard itself rarely needs cleaning due to its typically vertical orientation, which keeps the dust from accumulating anywhere else. Since the motherboard in a vertically mounted system requires only a gentle dusting, this is the case.
When a motherboard is stored horizontally, dust can easily accumulate in the open PCIe and RAM slots. In this instance, the brush is all that’s required. Sweep the dust out of the ports with a soft brush. Compressed air or a mouthful of air will do the trick, but that’s not always an option.
Other Components
The remaining parts are as follows:
- Neither hard disk drives (HDDs) nor solid state drives (SSDs) require internal airflow to remain cool; all that is required is the occasional dusting.
- Modules of Random Access Memory (RAM) – RAM, once again, has no active cooling beyond the heatsink, which can be wiped clean with a brush.
- Sound cards, network cards, and other PCI Express (PCIe) expansion cards can all be dusted off with a simple brush. If it’s a big card with a working fan—which is highly unlikely to be the case—you can clean it in the same way you cleaned the graphics card.
The Peripherals
Thankfully, cleaning the peripherals is much simpler than cleaning the internal components, mainly because you do not need to handle any delicate hardware.
What You Will Need
The items required in this case are:
- Compressed air in a can
- Embedded cotton swabs
- Brushing gently
- Innocuous-looking fabric
- Use of a microfiber rag
- Pure water or alcohol rub
- Cleaning the display
The Cleaning Process
The Keyboard
You can clean a membrane keyboard in the same way you would a mechanical keyboard, with or without removing the keys. In any event, you’ll require some fabric, some rubbing alcohol, some cotton swabs, and a can of compressed air.
- To clean the keyboard of dust and debris, turn it upside down and use the compressed air to blow it out.
- Wet the cloth with alcohol and use it to wipe down the main body of the keyboard, including the gaps between the keys and the keys themselves.
- In the event that you haven’t cleaned your keyboard in a while and you’d like to clean the space under the keys, you’ll need to take the keys out first. Any thin tool, such as a screwdriver, ruler, or knife, can be used to pry out a key from its lock.
- With the keys removed, you can clean the area with cotton swabs dipped in alcohol.
The Mouse
The mouse is one of the utensils that requires the least effort to clean. A disposable cloth and some isopropyl alcohol are all that’s required. To clean the mouse, just soak a cloth in rubbing alcohol and scrub gently. Once again, you may use a thin object to remove any accumulated grime from the mouse’s nooks and crannies.
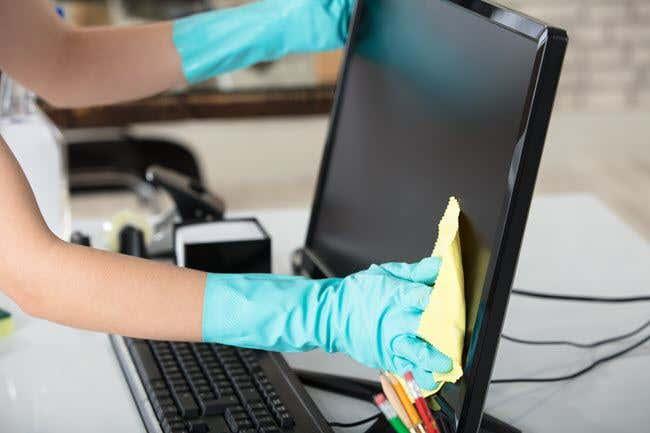
The Monitor
The monitor must be cleaned with a special microfiber cloth to prevent scratching the screen. To get rid of stubborn dirt, you may also need rubbing alcohol or distilled water. An alternative is to use a dedicated screen wipe, which can be purchased for next to nothing at any electronics retailer.
Those who plan on making use of microfiber fabric should:
- Dust can be removed with ease using straight vertical or horizontal motions with the microfiber cloth.
- Avoid using force to remove stubborn dirt clumps. This is a simple way to crack the display. Instead, soak a very small piece of cloth in alcohol or distilled water and gently rub the stubborn debris until it comes off.
- To clean the other areas of the screen, you can use a damp cloth or brush.
Use a screen cleaner if you…
- Similar to the previous method, use a screen wipe in either vertical or horizontal motions to remove the dust.
- Some solutions do not evaporate immediately, so you may need to dry the screen with a microfiber cloth after wiping it down with a screen wipe.
Other Peripherals
A simple brush can be used to remove dust from other devices, such as speakers, headphones, and microphones; a damp cloth and some alcohol can be used to remove more stubborn dirt buildups.
How often should I physically clean my computer?
Xem thêm : Best Monitor For PS5. Everything You Need To Know Update 07/2026
The quick answer is that when dust begins to accumulate on the outside, it is probably time to clean. When it comes to maintaining a clean and efficient computer, most users only need to do so about once every six months.
To be more precise, there are a few variables to consider. To a large extent, it depends on the circumstances in which a computer is used. As an example, a desktop computer running a CNC machine in a cabinet shop would require more regular maintenance than one located in a sterile industrial environment.
While portable devices like laptops are typically protected by carrying cases or bags when not in use, stationary devices like desktops are often left in one place for long periods of time and are therefore more likely to accumulate dust and dirt. How soiled a desktop becomes also depends greatly on its physical location. A desktop that is placed on the floor rather than on a shelf inside the desk will require more frequent cleaning.
Dust filters are easier to access and clean in some cases than in others, but they still collect the vast majority of dust. The idea’s trade-off is that it can be cleaned more frequently and more easily, but this also has its own set of pros and cons. Pets are a further consideration. There’s a chance that their hair will end up in the system if they’re nearby.
Benefits & Advantages of Clean Computer
Personal Health and Hygiene Benefits
The first benefit may seem obvious, but it’s still important to highlight. Allergies and asthma can be traced back to the same root: bacteria, mold, and dust. Computers should be cleaned on a regular basis to reduce the spread of germs and promote health in the workplace.
Advantage of reduction in overheating
In order to keep your computer from overheating, you need cooling fans. Blocking the fan’s rotation with dust and debris prevents it from circulating air, preventing the system’s hardware components from receiving cool air and the hot air from being dissipated. This could cause the hardware to overheat and break. There may be a tendency for the fans to rotate rapidly in order to prevent the system from overheating. It will cause a waste of energy. Battery life will be shortened, especially for portable devices like laptops.
Clear visibility of the monitor display
If you don’t regularly clean your computer’s monitor, the colors will fade. Those using computers with LCD (Liquid Crystal Display) screens should exercise extra caution. In addition to extending the life of your monitor, keeping the screen clean will provide you with a sharper image and less strain on your eyes.
Enhances the life span of the computer
There will be a greater need for frequent hardware replacements and faster repair visits if dust is allowed to accumulate in your computer. Otherwise, you’ll have to spring for a brand-new computer. Maintaining computers on a regular basis helps businesses and individuals save money by extending the life of their hardware.
More Opportunities to Be Hospitable
When a coworker stops by my desk, I may be tempted to go into excessive detail about how I managed to get my computer so dusty and dirty. It’s embarrassing enough, but then I start worrying about what they think of my computer and how that reflects on me as a person. Do not misunderstand me; a spotless computer is not required to win admiration. It doesn’t take long to give your computer a quick once-over every day, and the results will amaze you.
Less Maintenance and Repairs
You can save money on repairs and replacements by taking care of your computer. How, exactly, do you accomplish this feat? Simply by washing them!
A Quick Burst of Physical Activity
My adrenaline is always revved up after a good cleaning session. Physical activity, like that which is required during cleaning, has numerous health benefits. If you hate exercising but still want to maintain your health and fitness, just do what we do.
![How To Physically Clean Your Computer [Ultimate 2023 Guide]](https://gemaga.com/wp-content/uploads/2023/02/how-to-physically-clean-your-computer-img_63e355595b5da.jpg)
Increased Productivity
Having dirt, grime, and dust all over your computer makes it difficult to do anything, let alone be creative, in my experience. When my desk is cluttered with papers and dust, I can’t concentrate long enough to write even one blog post. Keeping your computer clutter-free frees up both your physical and mental space, allowing you to give your full attention to the task at hand.
More Control
If you ever feel as though your life is getting out of hand, just look at your work area. Your thoughts? Is an antiquated machine? Those things have the potential to trigger a great deal of worry and anger.
Sense of Accomplishment
I guarantee that if you take a moment to look at your neat and orderly computer, you, too, will feel a surge of pride in light of your accomplishments. It motivates you to keep up the routine throughout the coming days, months, and years.
The Final Word
Here you have it, a full and detailed instruction manual on how to clean a computer. Following the above instructions will allow you to clean your computer efficiently and safely. In a few quick strokes, your computer will feel like brand new again, with improved cooling, less noise, and increased speed.
Nguồn: https://gemaga.com
Danh mục: Best