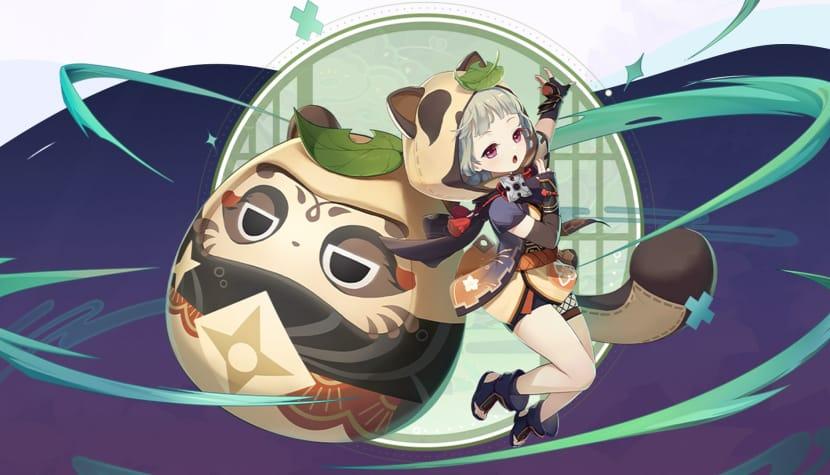
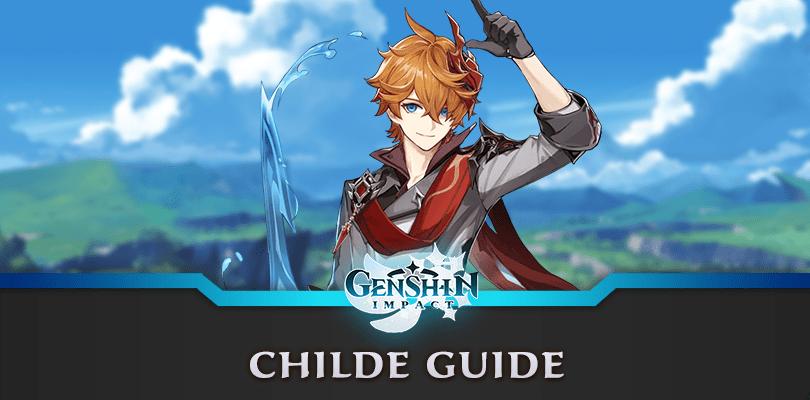
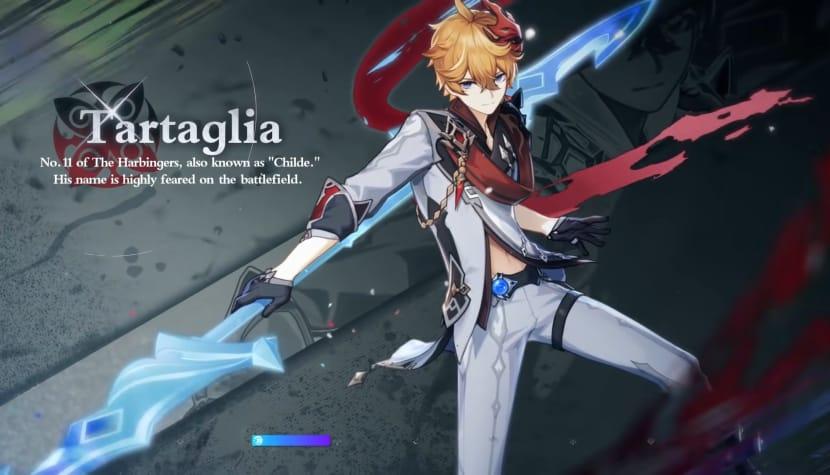
One of the earliest limited 5* characters in Genshin Impact, Childe is also known as Tartaglia, the eleventh of the Fatui Harbingers, Ajax, and (outside of the game) the Rerun Archon.
Childe is a versatile Hydro DPS who stands apart from other limited 5* characters because he has been featured on no less than three banners.
Bạn đang xem: Childe Tartaglia Build Guide Genshin Impact Update 07/2026
Although he isn’t in the same league as the S-Tier characters, his DMG is still formidable. He’s still the only playable character with both a melee and ranged stance, which gives him a lot of versatility and makes him a lot of fun to use.
So, if you want to construct Childe properly, you’ve come to the right place.
Talent Priority
| Talent | Description | Priority |
|---|---|---|
| Common Assault (Torrent of Cuts) |
Standard Attack: Fire up to six arrows in rapid succession from your bow.
With a fully charged attack, you can fire an Aimed Shot with greater accuracy and damage. Hydro’s strength will concentrate on the arrowhead as you aim. A torrent-charged arrow inflicts Hydro damage and applies the Riptide status effect. Riptide: When Tartaglia attacks an enemy, all nearby enemies will take Hydro damage in an area of effect. This type of damage is counted as Normal Attack Damage. As it plummets to the ground, it unleashes a barrage of arrows that deal area-of-effect damage (AoE DMG). |
If you use Childe properly, you can apply Riptide to your foes with a single Charged Attack before engaging them in melee stance.
Normal Attack is the least useful talent for him because his melee attacks have different modifiers. |
| Power Over Nature (Vile Heirloom: Arise, Tide of Evil) |
The user enters Melee Stance and unleashes a set of water-based weapons, dealing Hydro DMG to nearby enemies.
In this Stance, Tartaglia’s regular and charged attacks are transformed into Hydro Damage that is immune to the effects of other elements: During a normal attack, you can land up to six Hydro strikes in a row. Charged Attack: Spends accumulated Stamina on a powerful cross slash that deals Hydro damage. When a Riptide-affected foe is hit with a melee attack, the resulting Riptide Slash deals area-of-effect Hydro damage. This type of damage is considered Elemental Skill damage and can only be inflicted once every 1.5 seconds. This skill will expire after 30 seconds, or when the ability is activated again. Once CD has been reached, Tartaglia will revert to his Ranged Stance. The longer Tartaglia maintains his Melee Stance, the more time the CD has to play. If, after 30 seconds, the character is automatically put back into a ranged stance, the CD will be even longer. |
Childe relies heavily on this as his main tool. When he activates his Elemental Skill, he takes a close-quarters fighting stance and wields Hydro-inspired melee weapons.
With these melee weapons, he has some of the game’s fastest attack animations. The Hydro DMG dealt by these weapons makes some of the best Elemental Reactions in the game readily available to Childe. As long as you can cluster enemies together, you won’t be short on AoE damage thanks to Riptide. There’s no denying that this is Childe’s greatest strength. |
| Explosive Explosion of Elements (Chaos: annihilation) |
Attacks are executed differently depending on Tartaglia’s stance.
Flash of Havoc, the Ranged Stance, rapidly fires a magic arrow infused with Hydro, dealing area-of-effect Hydro damage and inflicting the Riptide status. Provides some of the Energy Cost back after it has been used. Light of Obliteration, the melee stance’s special attack, is an area-of-effect slash that inflicts devastating Hydro damage on nearby enemies and activates Riptide Blast. When the annihilating waters strike an opponent who has been affected by Riptide, it removes the status effect and causes a Hydro Explosion that deals area-of-effect Hydro damage. Damage done in this fashion is classified as Elemental Burst Damage. |
Childe’s Burst is well-known for being the first ability to ever one-shot the Spiral Abyss Level 12 boss.
In spite of the fact that many other characters with potentially stronger Bursts have been released after Childe—including Hu Tao, Eula, and Raiden Shogun—this ability still holds its own extremely well. Those who want to get the most out of Childe in terms of DMG will prioritize this talent. |

Passive Talents
| Title of Talented Individual | Description | Evaluation |
|---|---|---|
| Weapons Expert | The Normal Attack Levels of your own party members are raised by 1. | You won’t find a better Utility Passive anywhere else in the game.
The only current means of increasing a character’s Normal Attack talent beyond 10 is through this talent. However, instead of spending a ton of Mora and Talent Books upgrading a character from level 9 to level 10, you can simply use Childe to increase their multipliers to level 10. |
| Without End | Adds 8 seconds to the duration of Riptide. | This passive isn’t strictly necessary, but it’s nice to have nonetheless. |
| Tornado Sword | When Tartaglia is in the Melee stance of Foul Legacy: Raging Tide, her Normal and Charged Attacks will inflict Riptide on their targets if they land a CRIT hit. | This passive greatly increases Childe’s damage output, especially against groups of enemies. |
These days, Genshin Impact is full of characters sporting their own individual kits. Sara’s equipment is one of a kind, but in a terrible way: it’s heavy and awkward. Sayu’s equipment is interestingly different, not in any profound or life-changing way but as a welcome diversion. However, Childe’s arsenal is both special and potent.
You’ll enjoy this quite a bit if you aren’t against the concept of stance switching and the long cooldown that follows. His Burst DMG is insane, his AOE abilities are superb, and he can even increase his own and other characters’ Normal Attack skill. This is wonderful news.
On the other hand, his constellations fall short of expectations. However, that’s also fantastic for the vast majority of players because, even in the best team, his C6 performance isn’t significantly better than his C0 performance.
Having doubts? Try it out and see.
Constellations
| Name of a Constellation | Description | Evaluation |
|---|---|---|
| Bad Lineage: The Withholder of the Tide | Reduces Foul Legacy: Raging Tide’s CD by 20%. | Although Childe’s effectiveness increases while in melee stance, the longer he remains in that stance, the longer the cooldown for his ability will be. Even though it’s preferable to get out of melee stance as soon as possible by swapping characters and using their abilities, the CD reduction is welcome nonetheless. |
| Bad History: Downstream | Tartaglia recovers 4 Elemental Energy upon the defeat of foes hit by Riptide. | Since Childe is so adept at creating Elemental Reactions, he should never run out of steam. Not even a constellation’s worth of money could make me consider it. |
| Chaos in the Depths; a Whirlpool of Discord | Raise the intensity of the Foul Legacy: Raging Tide ability by 3. The top level of upgrades is 15. |
At C3, we’re big fans of giving characters a boost to their stronger suit, which is exactly what happened to Childe. |
| Hydrosprout: Mayhem in the Depths | Riptide Slash is activated every 4s if Tartaglia is in Foul Legacy: Rating Tide’s Melee Stance, and Riptide Flash is activated otherwise. The time intervals that would normally apply to Riptide Slashes and Riptide Flashes are not affected by, nor do they apply to, Riptide effects triggered by this Constellation effect. | No cost for DM here. In addition, Hydro is used in the Riptide effects, which provides new opportunities. Although not as potent as C3, this constellation still packs a punch. |
| Chaos: Unshaped Sword | Adds a third level of destruction to the havoc level. Obtaining a level 15 upgrade is the highest possible. |
Keep in mind that, with the right setup, Childe’s Burst can deal with some of the game’s content in a single hit. There is no such thing as too much buffing. |
| Destruction; wreak havoc | The cooldown of Foul Legacy: Raging Tide is reset whenever Havoc: Obliteration is cast while in Melee Stance. Tartaglia’s return to his Ranged Stance is required for this effect to take place. |
Here’s another interpretation of the constellation: Childe’s melee stance has a very high chance of being always available. Go nuts! |
The controversial constellations of limited characters began with Childe. Seeing whales effectively get permanent uptime on Childe’s melee stance, the only stance that matters, left many players feeling cheated.
While C6 certainly packs a punch, C1 is undoubtedly Tartaglia’s most potent constellation, with C3 close behind. Furthermore, Childe is a character who improved as more and more characters were added to the game because of how well he can set up and/or proc Elemental Reactions.
Xem thêm : Intel Core I5 Vs I7 For Gaming Update 07/2026
The conversation surrounding Childe has changed drastically since the addition of Raiden Shogun and Yoimiya, two other characters who effectively have a cooldown on their DPS capabilities. Even without the DMG buff from constellations 3–5, he punches above his weight. You don’t need anything more than C0 to make him great if his cooldown fits into your rotation.
But this guide will show you how to give him the tools he needs to succeed, including the right weapons and artifacts, and the best teammates to work with.
Best Weapon
| Rarity of Weapons | Explanation |
|---|---|
| North Star 5* |
Polar Star was clearly meant for Childe, even if it took him three appearances on the limited banner to run with his featured weapon. It provides Childe with CRIT Rate, raises Elemental Skill and Burst DMG, and grants stacking buffs to ATK%. Even though this weapon improves dramatically with refinement, it is actually not Childe’s best choice at r1. For that, we must thank… |
| Vibrating Shockwaves 5* |
In melee stance, Childe’s right-clicks are still considered Normal (and Charged) Attacks, and Thundering Pulse can greatly increase the damage of Normal Attacks. In addition, the CRIT DMG substat is consistently impressive. Even before Thundering Pulse and Polar Star were released, Childe mains had access to plenty of other fantastic 5* weapons. |
| Horizontal harp to the sky 5* |
Childe’s BiS weapon, the Skyward Harp, has lasted a long time. It grants him a higher base ATK than the other 5* choices, as well as a higher CRIT Rate, higher CRIT DMG, and a short AOE DMG burst that fits his playstyle perfectly. |
| Rust 4* |
Many of Childe’s early promotional materials featured him smoking Rust. It’s no surprise, considering that their broken passive can increase the effectiveness of Normal Attacks by as much as 80% after being refined. Rust makes Charged Attacks much more dangerous, so be careful when using them. In any case, this is the best 4* weapon in Childe’s arsenal. |
| The Stalk of Emeralds 4* |
Though not particularly effective for most people, Childe responds remarkably well to The Viridescent Hunt. Not only does he benefit greatly from the CRIT Rate substat, but he also makes excellent use of the bow’s passive to group up enemies and deliver devastating Riptides, setting himself apart from other bow users in the process. |
| Hamayumi 4* |
Hamayumi is like a cheaper version of Rust or Thundering Pulse. Childe appreciates the fact that it increases the damage dealt by both his Normal and Charged attacks. To get the most out of the buff, however, you’ll need to delay using Childe’s Elemental Burst, which is possible but inconvenient. Even so, for newer players and F2P players, this is Childe’s best 4* weapon. |
Best Artifacts – 4-Noblesse Oblige or 4-Emblem of Severed Fate
Childe has no real need for anything else, as the 4-Piece Heart of Depth increases Hydro damage, and the Elemental Skill that activates it also increases Normal and Charged attack damage. It would be an understatement to say that this artifact set was crafted with the intention of boosting Childe’s chances of survival.
The primary statistics—ATK% on the Sands, Hydro DMG on the Goblet, and CRIT DMG/CRIT Rate on the Logos—are all fairly standard primary DPS items. Keep in mind that Childe gains a lot of benefit from scoring crits, so weighting the dice in favor of CRIT Rate can still lead to impressive damage.
If you don’t have a fantastic four-piece Heart of Depth set, you can still get a lot of use out of the two-piece version by pairing it with either the two-piece Noblesse Oblige or the two-piece Gladiator’s Finale/Shimenawa’s Reminiscence.
Elemental Synergies
Hydro is a fantastic element on its own, especially when combined with Pyro and Cryo; however, unlike most other Hydro characters, Childe also has fantastic synergy with Electro.
- You’ll need to use Pyro and proc Vaporize for those insane DMG multipliers if you want to replicate some of Childe’s one-shot kills.
- Childe’s enemies will remain frozen for as long as his melee stance does if he has a constant supply of Cryo. Frozen foes don’t fight back, but it takes longer to kill them.
- Although Childe’s Hydro-infused melee attacks are the fastest in the game, including when paired with Beidou’s Burst, his Electro: Electro-Charged does not deal impressive damage.
There are no negative Elemental Reactions for Childe’s playstyle, but the following elements’ reactions provide less benefit for him.
- Anemo: It’s nice if you can provide some extra Swirl, but it’s not anything to brag about. Not because they are Anemo, but because they can increase Childe’s Hydro DMG or group up enemies, certain Anemo characters can still be very useful on his team.
- Geo: Shields are useful for any melee character, but relying on Crystallize reactions to acquire them is suboptimal.
Best Team Composition
Because of his adaptability, Childe can play on a wide variety of squads. Beidou, Bennet, Diona Fischl, Kaeya, Lisa, Rosaria, Sucrose, Xiangling, and C2 Xingqui all work exceptionally well with him; and that’s just the list of 4* characters! You’ll still need to work around his melee stance and its cooldown, though.
A few of Childe’s best possible squads are:
Free-to-Play
- Childe
- Xiangling
- Bennett
- Sucrose
Xiangling is available for use in the Pyro’s off-field function. In addition, she is the one who will be dealing the most damage. Childe’s high attack speed makes him a natural for setting up Elemental Reaction, which Pyronado can then proc. Simply put, that’s how the game is played.
Bennet is the top-tier four-star character. There is no need to preface this with the word arguably. True enough. His Burst has the potential to heal the team, grant additional attack power to Pyronade and Childe, and activate Pyro Resonance. Why wouldn’t you love it? Kaeya can stand in for Bennet if you find yourself without him. Kaeya’s Elemental Burst can be used in tandem with Xiangling’s Burst to either keep foes frozen or trigger Melt and Vaporize. If you want even more Melt/Vaporize action, however, Xingqiu is the way to go.
The main function of the sugar is to keep the bad guys in one place. The fact that she can provide Childe with the set bonus of Viridescent Veneer is icing on the cake. Because of this, you shouldn’t switch her out for any other 4* Anemo users. Substitute Noelle for Sucrose if you need a shield, or Fischl and Beidou for some Electro-Charged action. Since Fischl can serve as a battery for Beidou, the two are a great match.
For Whales
- Childe
- Xiangling
- Bennett
- Kazuha
You’ll see that there isn’t much of a difference between Childe’s best F2P team and his best Whale team. That’s because Childe can’t survive in the meta without Xiangling. Bennett is a perfect complement to Xiangling. If you want to maximize your Childe’s numbers in the Spiral Abyss, it is imperative that you select these two 4* no matter how big of a whale you are.
Kazuha is there to buff your team with Elemental damage and to help you group enemies for some sweet AoE damage with Riptide.
Is Childe Worth It?
Childe is the only limited 5* character to appear in three different features so far. In addition, Childe keeps getting stronger and stronger, unlike many other characters who have been around since the beginning of Genshin.
The Heart of Depth set had not been added to the game when he first became available. This set of artifacts was the catalyst for his first significant increase in influence. Then, Thundering Pulse was given to him. And now he has a new, improved 5* bow to ensure his continued usefulness. Furthermore, as the game’s faster Hydro applier, Childe develops synergy with a large number of new characters.
Although we cannot rule out the possibility of Childe being power-crept in the future, he is currently on a very successful team.
His star charts are useless, that much we can say. There aren’t many characters in the game that have improved so much since their initial release, but C0 Childe is one of them. If you enjoy his playstyle, then he is unquestionably valuable.
Genshin Impact: Childe/Tartaglia’s Ascension And Talent Materials List
Leveling Materials
Getting to level 90 requires the same number of experience points whether a character is a Fatui Harbinger, the mortal vessel of an archon, or a regular citizen of Teyvat. In order to advance to the next level, the following amounts of Experience Points and Mora are required:
| Level | EXP | Mora |
|---|---|---|
| 1-20 | 120,175 | 24,200 |
| 20-40 | 578,325 | 115,800 |
| 40-50 | 579,100 | 116,000 |
| 50-60 | 854,125 | 171,000 |
| 60-70 | 1,195,925 | 239,200 |
| 70-80 | 1,611,875 | 322,400 |
| 80-90 (max) | 3,423,125 | 684,800 |
| Totals: | 8,362,650 EXP | 1,673,400 Mora |
If you use up too much EXP before reaching an ascension level, you’ll have to start over, so it’s important to use talent materials wisely. One such combination with minimal waste is the following:
| Item | Total |
|---|---|
| Tips from a Wayfarer | 12 |
| The Story of an Adventurer | 11 |
| Cleverness of the Hero | 415 |
Tartaglia Ascension Items
Xem thêm : Harry Potter Rpg Release Date News Trailer And Rumors Update 07/2026
Since there aren’t many playable Hydro characters, less of the required elemental stone, Varunada Lazurite, needs to be mined. Amounts of that and the other items Mora Childe needs to reach the upper levels are as follows:
| Level | Gems | Drops Enemy | The Upper Management Fell | Specialty | Mora |
|---|---|---|---|---|---|
| 20 | 1 x Tiny Piece of Varunada Lazurite | Recruit’s Badge, Multiplied by 3 | – | Three Starconchs | 20,000 |
| 40 | Fragment of Varunada Lazurite, 3 Pieces | Insignia of a Recruit, 15 of Each | Heart Detoxification – 2x | A Star Conch x10 | 40,000 |
| 50 | Fragment of Varunada Lazurite, 6 Pieces | Sergeant’s Badges (12 Pack) | 4x Heart Purification | Twenty Starconchs | 60,000 |
| 60 | Varunada Lazurite Nugget, 3x | A total of 18 Sergeant Badges | Heart Detox 8x | Thirty Starconchs | 80,000 |
| 70 | Varunada Lazurite Nugget (6) | A Lieutenant’s Badge, 12 of Each | 12x Heart Purification | Starconch 45x | 100,000 |
| 80 | Varunada Lazurite Pristine – 6 Stones | A total of 24 Lieutenant Badges | 20x Heart Purification | Sixty Starconchs | 120,000 |
| Totals: |
|
|
46 | 168 | 420,000 |
Gemstones – Where to Find Varunada Lazurite
Varunada Lazurite is required by fewer characters than most other elements, but getting enough of it to elevate Childe or any other character can be challenging. It is a reward for completing all four daily commissions and can be purchased at souvenir shops in Mondstadt and Liyue in exchange for elemental sigils. But the majority of it will be gained by vanquishing bosses.
The Varunada Lazurite is obtainable from these superiors.
- Azhdaha
- Stormterror/Dvalin
- His weekly trouncing ground is Childe/Tartaglia.
- Geovishap the First
- Loch Rhodeia
- Hypostasis of Water
Enemy Drop – Where to Find Fatui Insignias
Strangely, Childe’s ascent will require him to defeat many of his Fatui allies. This is due to the fact that he ascends using Fatui drops, which are essentially their Insignias.
Liyue, Inazuma, and even Dragonspine are covered in Fatui soldiers. The following are examples of the Insignias that can be dropped by Fatui agents of higher levels:
- Rank Indicator: Recruit’s Badge
- Sergeant’s Insignia, Unlocked at Level 40
- Insignia of a Lieutenant, for those level 60
Boss Drop – How to Get Cleaning Hearts
Hydro introduced several playable characters at the start, including Barbara, Xingqiu, Mona, and Childe. This is why everyone is using the Cleansing Heart that the boss gave them to level up. After spending 40 Original Resin, you can claim this item as a reward for defeating Rhodeia of Loch (the Oceanid).
Rhodeia is located in Liyue, but it is in between the two cities of Mondstadt. To the east of Qingce Village, in the middle of the ocean, is a massive platform where the battle against her will take place. It’s worth noting that the player doesn’t fight the Oceanid herself, but rather the Hydro Mimics she summons. In addition, these Mimics are resistant to Hydro damage, so it’s not a good idea to bring characters like Childe, who rely on her boss drop, to this fight.
Local Specialty – Where to Find Starconch
At the moment, Childe is the only character to ascend using Starconch. Although Childe is from Snezhnaya, this item is a Liyue specialty; it may become available in the Cryo region as well.
The beaches of Liyue are the most common places to find these shells. Guyun Stone Forest and Yaoguang Shoal, as well as the connected parts of Dragonspine, are good places to cultivate them.
It is possible to buy additional Starconch for anyone who needs them. The Liyue Harbor vendor Bolai, who has a stall beneath the pier, will sell starconch. Each one costs 1,000 Mora, and he keeps five on hand. He promises to replenish supplies every three days.
Tartaglia Talent Materials
| Level | Books | Regular Falls | Tumbling Mats | Award for Wisdom | Mora |
|---|---|---|---|---|---|
| 1-2 | Three Lessons on Independence | Recruit’s Badge, Multiplied by 6 | – | – | 12,500 |
| 2-3 | Instruction Manual for Independence, Part 2 | Three Sergeant’s Badges | – | – | 17,500 |
| 3-4 | Freedom’s 4x Field Manual | Four Sergeant’s Badges | – | – | 25,000 |
| 4-5 | Freedom’s Six-Fold Roadmap | Six Sergeant’s Badges | – | – | 30,000 |
| 5-6 | 9x Map of Independence | Insignia of Sergeant 9 times | – | – | 37,500 |
| 6-7 | Philosophy of Freedom, Times Four | Four Lieutenant’s Badges | One Piece of a Disgraceful Heritage | – | 120,000 |
| 7-8 | Six Theories of Individual Liberty | 6x Lieutenant’s Badges | One Piece of a Disgraceful Heritage | – | 260,000 |
| 8-9 | 12 Theories on Individual Liberation | 9x Lieutenant’s Badges | Double Piece of a Rotten Heritage | – | 450,000 |
| 9-10 (max) | 16 Freedom Theories | Twelve of the Lieutenant’s Badge | The Ruined Relic, Doubled | One Insightful Crown | 700,000 |
| Totals: |
|
|
6 | 1 | 1,652,500 |
| Amounts multiplied by three: |
|
|
18 | 3 | 4,957,500 |
Talent Books – Freedom
Trounce Materials and Crowns of Insight
Genshin Impact is playable on PC, PS4, PS5, mobile devices, and is soon to be playable on Nintendo Switch.
Genshin Impact: Pro Tips For Playing As Tartaglia
Dual Wielding
Tartaglia is undeniably a hero designed to deal a great deal of damage to adversaries. The party’s attack is increased by 10% thanks to his passive ability, and he can switch between long- and short-range attacks with the press of a button thanks to his double kit. Since his bow doesn’t seem to be as effective in battle, many players will gravitate toward his close-range stance.
Tartaglia’s bow form is most effective when players make careful use of his charged shots. The riptide effect is activated on the enemy upon successful landing of the first charge shot. Inflict further damage on the foe by shooting another hydro arrow at them. Hydro damage in a small area of effect that lasts for 7 seconds; useful for taking out small groups of enemies up close. As long as the player keeps firing charge shots, the riptide effect won’t wear off the enemy.
The ranged burst that Tartaglia possesses is, arguably, superior to the close burst that he possesses. The arrow barrage from the ranged burst falls on enemies in a concentric arc in front of Tartaglia. Prematurely reverting to ranged form for the sole purpose of using this burst is preferable to using Riptide Blast. In addition, the riptide and the bursts do add up to more damage.
If you want to play as Tartaglia, you’ll need an artifact set that can help you deal with his dual damage types.
Raging Tide
If your long-range attacks aren’t doing the trick, switch to the Raging Tide form. While ranged attacks are effective against Ruin Guards, close quarters combat is the most efficient way to eliminate hilichurls and other obnoxious pyro abyss mages. To maximize the devastating effects of your charged shot before switching to this stance, you should aim for multiple targets. This allows Tartaglia to control a battlefield with multiple enemies by dealing additional area-of-effect damage.
If you hold down the attack button, you can unleash a powerful charged attack. While some players prefer to use charged attacks exclusively, the vast majority find that regular strikes are more effective. If you’re using a support character like Fischl who deals elemental damage over time, this is the best form to use together with them. This allows Tartaglia to deal massive reaction damage with his hydro attacks in a short amount of time.
The Raging Tide form’s ultimate ability has Tartaglia summoning a spear to slash the air in front of him, dealing hydro damage in a small area of effect. This attack can deal significant damage, but it is best used to finish off a group of enemies that is low on health or to chase them back after they have been defeated.
Those opting for the close-range variant of Tartaglia will need to keep a closer eye on his health bar. Despite the fact that he isn’t a glass cannon, he can be quickly worn down by stronger foes. Qiqi is a fantastic way to keep Tartglia well stocked and gives him the ability to halt his enemies in their tracks.
Building a Team
A team will need to be constructed around Tartaglia because he isn’t meant to be a support role. Depending on the circumstances, the adversaries, and the player’s preferred course of action, a number of outcomes are possible. The recommended glyphs for use in Tartaglia are as follows:
- Qiqi’s elemental ability, best used at close range, calls forth a whirling orb that deals cryo damage and heals the active character.
- To deal continuous electro damage to foes, Fischl can call upon Oz.
- The elemental skill and the Xiangling’s burst can inflict continuous pyro damage on foes. Targlia’s ranged form can make the most of her skill, while her burst is excellent up close.
- When Kaeya unleashes her burst, ice swords appear all around her target, dealing close-range cryogenic damage.
- With her burst, Beidou can call upon electric eels to deal electro damage in close quarters.
- Lisa – When Lisa explodes, a lantern appears and deals electro damage in an area around her.
- The ganyu is an excellent weapon for both close and far combat. Her ability calls forth a lotus to corral foes, and her burst creates a massive area-of-effect field into which icicles rain down, dealing cryo damage to anyone caught within it.
Tartaglia’s best results will come from a combination of the cryo, pyro, and electro elements he responds to. This makes Tartaglia a flexible character, as you can construct a squad to back him up in either of his guises. Remember that the cryo reaction is a freezing effect that immobilizes the foe for a short period of time but does not cause damage in the same way that the electro and pyro reactions do.
Nguồn: https://gemaga.com
Danh mục: Blog