When it comes to Physical DMG, Eula is a 5* Cryo Claymore DPS with a stellar reputation. Before Eula’s release, a Physical DMG build wasn’t really an option for the most challenging endgame content, but now that she’s here, it not only works, but it looks effortless!
As a result, Eula qualifies as a hypercarry. In other words, she’s a selfish DPS who does nothing but damage and provides no support at all. There are plenty of viable DPS options in the game, so knowing her pros and cons before spending the time and gold required to obtain a 5* version of her is essential.
Bạn đang xem: Eula Build Guide Genshin Impact Update 07/2026
In this guide, we’ll take a look at Eula and see how she stacks up, which characters she works well with, and which weapons and artifacts she should be using.
Now that we have that out of the way, we can get started.
Talent Priority
| Talent | Description | Priority |
|---|---|---|
| Constant Assault (Edel – Bladework by Favonius) |
In a normal attack, you can land up to five blows in rapid succession.
Charged Attack: Depletes Stamina gradually to unleash a barrage of swift cuts. An aerial attack that causes damage to nearby enemies and area-of-effect damage on impact. |
Among the best scaling in the game, Eula’s Normal Attacks are well worth the price of admission. Although her Burst deals more damage, it recharges slowly, so it’s not her primary talent. Instead, focus on her Normal Attacks. |
| Power Over Nature (A Circulating Low) |
Quickly deals Cryo Damage when you press. Eula can gain up to two stacks of Grimheart whenever this attack hits an opponent. You can only accumulate these stacks once every 0.3 seconds.The Grimheart ability boosts Eula’s DEF and immunity to interruptions. Hold: Eula, brandishing her sword, eats all the stacks of Grimheart and slashes forward, dealing area-of-effect (AoE) Cryo damage to her foes. |
By applying Cryo, Eula increases the chance that her Superconduct will trigger when she has Electro as a support, and by reducing her opponents’ resistances when Held, her Burst and Normal Attacks are more effective.
The damage done by this Elemental Skill is not inconsequential, but in a time of scarcity, it should not be your top priority. This is Eula’s least vital ability, but you should still level it up once you’ve mastered her other abilities. |
| Spark of the Elements (Illumination of Glaciers) |
Whacks nearby enemies with her greatsword and creates a Lightfall Sword that follows her for up to 7 seconds, dealing Cryo DMG. With the Lightfall Sword sheathed, Eula is more impervious to distractions. Lightfall Sword can gain an energy stack once every 0.1s when Eula uses her own Normal Attack, Elemental Skill, or Elemental Burst to deal damage to enemies. The Lightfall Sword will fall and explode violently at the end of its duration, dealing Physical DMG to nearby enemies. This DMG increases in proportion to the Lightfall Sword’s energy stacks. The Lightfall Sword will detonate the moment Eula walks off the field. |
Eula calls forth a spectral sword that shadows her for 7 seconds before detonating. Whenever Eula deals damage to an enemy during this time period, the sword will gain a stack, increasing its damage for the next 7 seconds. This Burst’s scaling is completely absurd. An F2P Eula can easily Crit for 300,000 DMG or more, while most F2P characters struggle to do 100, 000 DMG with their Burst in a single hit. She excels most notably in this area. |
Passive Talents
| One of the Talented Names | Description | Evaluation |
|---|---|---|
| Reflection Fit for a Noble | Eula’s chances of getting twice as many Character Talent Materials from her crafting are ten percent higher than average. | You can think of this as getting resin for free, which is always a plus. |
| Flaming Rim | To create a Shattered Lightfall Sword that explodes instantly and deals 50% of the basic Physical DMG dealt by a Lightfall Sword created by Glacial Illumination, you must expend 2 stacks of Grimheart when unleashing the Holding Mode of Icetide Vortex. | Doing what you were planning to do with Eula anyway will net you a sizable DMG buff. |
| Root of All Evil | Eula receives one stack of Grimheart and the cooldown on Icetide Vortex is reset when Glacial Illumination is used. | This passive simplifies Eula’s rotation, ensuring that she deals maximum damage even if she uses Burst at the outset of the fight. |
The aforementioned tables should make it clear that Eula possesses not only massive scaling on her DMG but also a consistent and rhythmically pleasing kit, which is appropriate given the character’s penchant for dancing. Here’s how Eula works once you’ve learned all of her passive abilities: Keep attacking until the Burst explodes, wiping out all nearby enemies, then release the Elemental Skill, cast Elemental Burst, tap the Elemental Skill again, use normal attacks until the Skill is no longer on cooldown, and finally release the Skill. This will allow you to maximize the number of stacks on Lightfall Sword, lowering your enemies’ Physical Resistance with each successful hit.
Of course, if you don’t give Eula the right weapon and artifacts or put her on a team with complementary members, all of this effort will be in vain. Here, we’ll examine the usefulness of Eula’s constellations and then walk you through the entire process from start to finish.

Constellations
| Name of a Constellation | Description | Evaluation |
|---|---|---|
| Wave of Illusion | Eula’s Physical DPS is increased by 30% for 6s whenever a Grimheart stack from Icetide Vortex is depleted. This effect lasts for 6s longer for every stack consumed, up to a maximum of 18s. |
While many DPS characters, such as Ayaka or Raiden Shogun, have weak C1s, Eula is an exception thanks to her powerful first constellation, which grants her a substantial DMG buff that can be kept active at all times. Whether or not it’s worth more than a brand new 5* character or weapon is a decision only you can make, but at least the C1 here isn’t something you’ll have to reluctantly get if you’re aiming for higher constellations. |
| Queen of the Seas | Holding Mode CD from Icetide Vortex is lowered to be on par with Tapping CD. | Despite its apparent simplicity, Eula’s C2 drastically alters your strategy when using her kit. This not only increases her DMG, but also makes it easier for her to keep her best artifact set bonus active at all times. This one is also very useful if the option of going for constellations is being considered. |
| Lineage of the Lawrence Family | Raise the Glacial Light Level by 3. Maximum level of upgrades is 15. |
Elemental Burst is Eula’s primary source of DMG, so having it buffed at C3 instead of C5 is a huge boon. |
| One’s inferiors’ stubbornness | When used against an opponent with less than 50% HP, the Lightfall Sword’s damage increases by 25%. | Since Eula’s Normal Attacks are already quite powerful, her Burst’s explosion at below 50% HP shouldn’t pose much of a problem for her foes, marking a significant increase in power. |
| Element of Chivalry | Raise Icetide Vortex by a factor of 3. Maximum level of upgrades is 15. |
Because her Elemental Skill’s resistance shard doesn’t improve past level 10, this constellation is subpar. If you’re set on getting C6, then by all means, go for it. |
| Respectful Duty | Glacial Illumination’s Lightfall Swords come pre-charged with 5 stacks of power. The Lightfall Sword has a 50% chance to gain an extra stack of energy whenever it is hit by a Normal Attack, an Elemental Skill, or an Elemental Burst. | When comparing a C5 Eula to a C6 Eula, the difference in strength is enormous. No other character experiences such a dramatic boost in strength between these two stars. Since Eula’s Burst will still deal significant damage even if she is replaced by another character immediately after she casts it, this allows her to be used in a quick-swap team. |
The constellations of Eula are difficult to judge. It would appear that many of her DMG opportunities are hidden behind the stars. Except for C5, each constellation significantly improves her DMG or simplifies her playstyle in some other important way. But even with all that going against her, Eula is surprisingly potent at C0. Since every constellation looks better than the last one, it’s hard to find a good stopping point. But apart from C6, C2 is the most impressive constellation here because it allows Eula to keep her best artifact set at full effectiveness at all times (more on this later).
Best Weapon
| Rarity of Weapons | Explanation |
|---|---|
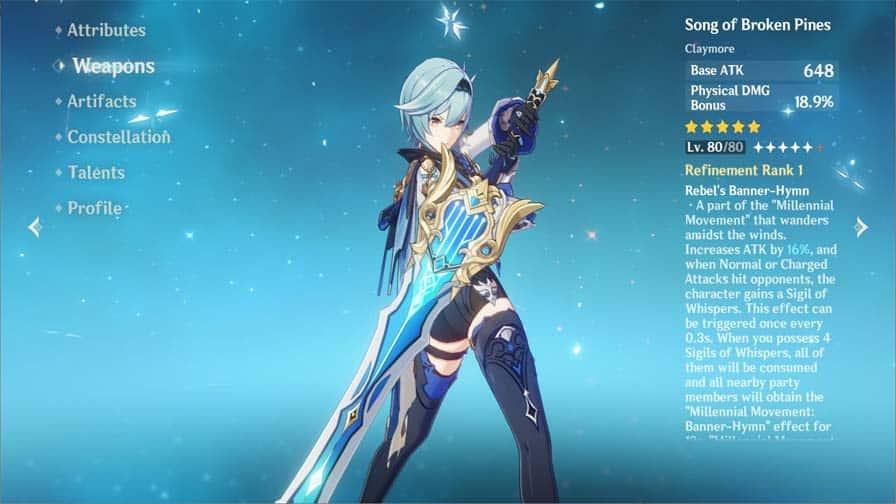
| Singing in the Pines 5* |
It should come as no surprise that Eula’s best-in-slot weapon is her signature weapon. It has the highest base attack speed of any weapon in the game, and its passive ability can make her attacks even more frequent, potentially allowing you to build up more Burst stacks and deal more damage. Without refinement, this is challenging, but the weapon is a perfect fit for Eula. |
| The Unforged Wolf’s Tombstone 5* |
Wolf’s Gravestone’s DMG is on par with that of Eula and Song of Broken Pines, despite the former’s superior visuals. Even with the passive activated, its damage increases, but this is of little use when facing off against lone Boss enemies. In addition to these two weapons, the Unforged can compete so long as a shield is kept up. It loses a lot of value if you don’t have Zhongli (or a very powerful Diona). |
| Pride to the Skies 5* |
While DPS characters typically avoid Skyward Pride, it is a viable choice on Eula. The weapon’s passive deals Physical DMG, which Eula can increase in a number of ways, and she also gains the benefit of the Energy Recharge. As a result, you won’t lose as much overall DMG as you might think if you make the tradeoff between Burst DMG and Burst consistency. |
| Spine of a Serpent 4* |
Serpent Spine can compete with 5* options while their passives are down in terms of DMG output, but keeping stacks on it can be difficult without a powerful shielder. |
| Akuoumaru 4* |
When used in a team that can fully take advantage of its passive, Akuoumaru’s damage bonus to Eula’s Burst is insane. Although your Normal Attacks won’t compare to those of a 5* character, your Burst Damage will. |
| Greatsword of the Skies 3* |
You didn’t expect to find a 3* weapon, did you? While the Skyrider Greatsword has a relatively low base attack, its Physical Damage substat scales extremely well, and its passive quickly activates to boost Normal Attack Damage by 40%. When compared to other 4* alternatives, this one is superior at r5. If you’re wondering where Snow-Tombed Starsilver is, it’s because it’s been replaced by the superior Skyrider Greatsword. |
Best Artifacts – 4-Pale Flame
Eula can only be constructed with one set of primary statistics: attack percentage on the Sands, physical damage on the Goblet, and critical rate on the Logos. The Logos can be attacked with Critical Damage if you have enough Critical Rate.
Yes, we really do mean a lot. Eula can feel very unimpressive when her Burst fails to CRIT because most of her DMG is locked behind its one-time explosion. When using Eula, you can disregard the standard recommendation of keeping the ratio of CRIT Rate to CRIT DMG at 1:2.
Substats of utmost importance include CRIT Rate and CRIT DMG. Value can also be placed on ATK percent and Energy Recharge.
There are two possible set bonuses.
One option is to try to complete the 4-piece Pale Flame set for the bonus. To gain 50% Physical DMG and an additional 18% ATK, Eula is one of the few characters who can keep stacks on the 4-piece bonus. This bonus is achievable for a C0 Eula, but the timing is extremely strict. If you have C2 Eula, you have nothing to worry about.
You can also choose to combine the benefits of the two-piece Pale Flame and bloodstained chivalry sets. Without worrying about stacks, she will always have a 50% Physical DMG bonus from this. Even though the DMG cap is lower this way, it’s still a viable option for players with only C0 or C1 Eula due to its consistency and ease of execution. Take the combination with the best substats, even if you have a C2 Eula.
Substatistics are, as always, a very important consideration. You should go with the second option if it improves your substats (especially your CRIT Rate and CRIT DMG). If you don’t have enough good substats for the two best artifact builds, you can also combine a 2-Piece Pale Flame or 2-Piece Bloodstained Chivalry with a 2-Piece Gladiator’s Finale or 2-Piece Shimenawa’s Reminiscence. Since this build is more accurately defined as something you’ll equip and use while farming for one of the two best builds, we don’t count it as the third best build.
Elemental Synergies
Remember that while Cryo works well with Hydro and Pyro, Cryo DMG isn’t Eula’s strong suit. Instead, the majority of her damage is physical. That’s why there’s only one truly powerful Element she needs to thrive:
- Superconduct requires Electro to trigger, lowering the Physical Resistance of enemies in range and increasing Eula’s damage.
All the other Elements are fine, or at least not problematic for Eula’s play style. Everything will be fine as long as they don’t stop you from Superconducting.
Best Team Composition
Free-to-Play
- Eula
- Diona
- Fischl
- Beidou
The goal of this composition is to give Eula the highest possible percentage of time in the field by using off-field support to debuff enemies, heal and shield her, and deal some extra damage.
Xem thêm : Monster Hunter World Iceborne Best Weapons Update 07/2026
For Eula, Diona is without question the best 4* support available. She can shield Eula from harm and heal her when things get rough, and she’s a good source of Cryo particles (especially if you give her a Sacrificial Bow). Any 4* Cryo user will do in place of Diona, including the ubiquitous free Kaeya. Since using Eula’s Burst requires 80 Energy, all F2P teams must have access to a Cryo battery.
Superconduct is being set up by Fischl. No other 4* character is better suited to this role than she is because of her ability to provide consistent off-field Electro DMG. However, the other 4* Electro support characters can do a fine job as well, even if Fischl is the best Superconductor facilitator for Eula. Lisa is a great choice because she can provide DEF shred, one of the rarest and most valuable debuffs in the game, and the Electro Traveler is fantastic because they can hasten Eula’s Energy recovery.
Due to Eula’s high off-field damage output, she is frequently paired with Beidou, a 4* Electro character. Beidou’s high energy needs mean that she works best when paired with Fischl, the best Electro battery. However, you are not required to use another Electro character in this slot since it is a flex slot. Find the gaps in your team’s strengths and improve them. A healer like Barbara or Bennett may be necessary if you don’t have Diona. Or, you could go with Rosaria, who can provide Eula with extra CRIT Rate if you need another Cryo battery to ensure her Burst uptime.

For Whales
- Eula
- Lord Shogun Raiden
- Zhongli
- Jean
How Eula’s whale team competition works is a little different. In this case, you don’t want to keep Eula on the field for as long as possible, preferring instead to focus on Raiden Shogun whenever her Burst is active.
They complement each other perfectly, Raiden Shogun and Eula. Eula’s Energy is replenished whenever Raiden Shogun uses her own Burst, and she can keep enemies Superconducted with ease. Due to the game mode’s design, both Eula and Raiden Shogun serve as primary damage dealers, switching places whenever one of them is ready to cast a Burst.
It’s no surprise that Zhongli does so well given that he is the best unit in the game. What makes Zhongli so valuable to this team, though, is that he offers yet another method of lowering the opposition’s Physical Resistance. In addition to protecting your team, he also boosts Eula and the other Electro Archon’s damage.
Jean is not required for the team to function, but we think she is a fantastic addition. Jean can help your team stay protected from Bleeding and Corrosion effects, which have become increasingly important in recent patches. Her second benefit is that she can equip the Raiden Shogun with the four-piece Viridescent Venerer set, which increases its damage per hit (DMK). You can, of course, substitute any other suitable support. While Bennett and Diona perform admirably, it is becoming increasingly clear that the team needs Jean for her ability to burst heal everyone at once.
Genshin Impact: 12 Mistakes Players Make When Using Eula
Missing Out On Raiden Shogun And Yun Jin
After her initial release, Eula fit in well with the other playable characters. Many updates later, however, more modules were added, and today Eula can choose from a wide variety of backends. Options like Raiden Shogun and Yun Jin are available. Raiden Shogun, with her Elemental ability, can increase the Spindrift Knight’s initial damage. The Electro Archon can easily replenish Eula’s Energy with her Elemental burst as well.
When the Reconnaissance Captain uses a Normal attack, Yun Jin can significantly increase its damage. Using Yun Jin’s constellations in Genshin Impact, Eula’s Normal attack speed can be increased, which in turn increases her Elemental burst damage.
Not Utilizing Cryo Resonance
Cryo characters are renowned for their proficiency even when their Crit Rate is at its lowest. This is because acquiring their entire set of artifacts can increase your Critical Rate by as much as 40%. Therefore, a common upgrade for these units is Critical Damage. Using Eula on Cryo artifacts is not recommended, but Ganyu and Ayaka can be played with 4-Blizzard Strayer.
However, Cryo Resonance’s 15% increase to Critical Rate is still available to Eula. Players should consider fielding a second Cryo unit if they are having trouble achieving their Eula Crit.
Underestimating Eula’s Constellations
Eula is a great powerhouse even at C0, unlike many characters in Genshin Impact who can’t function without certain Constellations. As a result, many players fail to prioritize Eula’s Constellations the way they do other buffs, such as Hu Tao’s C1.
Should You Root for Yae Miko or Wait for Raiden Shogun? – Genshin Impact
However, Eula possesses excellent Constellations that can increase her damage per second. Her C2 is the most vital of these. It facilitates the use of Pale Flame artifacts’ passive effect.
Not Leveling Up Her Normal Attacks
Some players may choose to ignore Eula’s Normal attacks in favor of her Cryo damage, or even play her as a support unit for Cryo applications, because she is a Cryo unit.
Superconduct reaction, which Cryo and Electro have ready access to, reduces opponents’ Physical resistance. When added to the resistance reduction provided by Eula’s Elemental skill, the Vengeance Queen becomes capable of inflicting devastating amounts of Physical damage. Players who want to see Eula at her best shouldn’t ignore her Normal attacks, as they have one of the highest multipliers in the game.
Not Using Her Hold Skill
Since Eula’s main source of damage is her Elemental burst, her Elemental ability is often overlooked.
Eula’s Elemental talent is not her only source of support, but she must make use of it. Enemy Cryo and Physical resistance can be weakened by using this skill. It’s meant to be used right before Eula goes on a killing spree. When Eula uses Elemental burst, the cooldown on her Elemental skill is reset, allowing the Reconnaissance captain to use it again.
Not Playing Her With Physical Build
Since the Lightfall Sword is the true damage dealer of Eula’s burst, a Cryo build would reduce the effectiveness of her Elemental burst. The Lightfall Sword is a Physical weapon with an impressive potential of over 100,000 damage.
Xem thêm : Doom Eternal Hardest Enemies Update 07/2026
Because of this, players should not build Eula on Cryo despite her low skill cooldown and high Cryo multiplier. If you do this, Eula won’t be able to deal any more Physical damage.
Not Using The Right Combo
Players often find themselves repeatedly using Eula’s attacks because they all deal significant damage and she always wins in the end. However, some locations, such as Spiral Abyss, require careful planning before an attack.
CONNECTED:The 10 Biggest Mistakes That New Genshin Impact Players Make
It is recommended that players use Eula’s hold ability before unleashing her Elemental burst. When she uses her Elemental burst, the cooldown on it begins again immediately. Put her tapping ability to use right away. Then, within the next seven seconds, players can spam Eula’s Normal attack to build as many stacks as possible. When her ability becomes available, use it to unleash the devastating Physical damage of Lightfall Sword.
Using The Wrong Artifacts
Eula’s artifact build can be perplexing because her damage comes from both Cryo and Physical sources. The player should prioritize Attack, Physical Damage, Critical Rate, and Critical Damage when selecting artifacts. She should prioritize Crit Rate, Crit Damage, and Atk when crafting her artifacts.
Eula’s best artifact set is the 4-Pale Flame set. However, she can also be built with 2-Pale Flame and 2-Bloodstained Chivalry if players don’t want to rely on the 4-Pale Flame’s effect procing. It’ll give her a 50% increase in Physical damage.
Using The Wrong Weapon
Finding the optimal weapon for Eula’s set is crucial for increasing her damage output. Eula’s Cryo application is compatible with the passive of a 4-star Claymore such as Snow-Tombed Starsilver. Blackcliff Slasher, on the other hand, has a higher Crit Dmg% than Snow-Tombed, allowing it to deal more damage.
If Eula’s shield is always up, the best 5-star Claymore for her is The Unforged due to the large Atk% bonus she’ll receive. Wolf’s Gravestone and Song of Broken Pines are her best 5-star Claymores if she doesn’t have a shield. Serpent Spine, Blackcliff, and Snow-Tombed Starsilver are the finest 4-star Claymores.
Neglecting Eula’s Team Composition
Eula’s gear functions best when used with the right team. Since the game’s mechanics are based on cooperation between party members, pairing her with a couple of damage dealers like Diluc and Xiao would be bad for all of them.
Genshin Related: Diona Mistakes Players Make
Eula has terrible Energy Regeneration and could use a battery to recharge her burst more quickly. The Elemental burst ability of the Raiden Shogun can be used for this purpose. To initiate the Superconducting reaction, she also requires an Electro unit, such as Raiden, Beidou, or Fischl. The Spindrift Knight, lastly, requires the aid of a healer or shielder. Diona excels at both assignments. The Kätzlein is not only a fantastic battery for Eula, but it can also initiate Cryo resonance between Eula and the Vengeance Queen.
Using The Wrong Reactions
Because of their widespread use, the melt and vaporize reactions are automatically associated with Hydro, Pyro, and Cryo units. Building Eula to deal Melt damage is unnecessary because her own abilities and faster reflexes can accomplish the same goal.
Eula’s best reaction, superconduct, greatly improves all of her abilities. In combat, her ability to freeze her opponents is a useful reaction. Even though they appear to be frozen, enemies hit with Electro will cause a Superconduct reaction. When Eula uses Normal Attacks against foes who have been frozen, Shatter will activate automatically, increasing the damage she does.
Using Her Charged Attack To Fill Lightfall Sword
When Eula uses her Elemental burst, the Lightfall Sword appears, and players must continue attacking to charge it and deal more damage. Since her Charge attack fills up quickly, some players may favor it. This strategy does not improve the Lightfall Sword in any way and is therefore useless.
To stack the Lightfall Sword, she can only use Normal attacks, Elemental skills, or an Elemental burst. Additionally, the Lightfall Sword has a cooldown on its stacks, so hitting multiple foes at once does not add stacks.
Genshin Impact is out now for mobile devices, computers, PS4, and PS5 consoles. The Switch version is currently in production.
Is Eula Worth It?
Eula isn’t an S-Tier character, as you can see from our Character Tier List. Even so, Ayaka and Ganyu surpass her in terms of Burst DMG capabilities and sustained DPS, respectively, and she can compete with other S-Tier DPS characters with the right supports. These are C0 comparisons; Eula scales much higher with constellations than the other two mentioned characters, but most players don’t care about that.
Remember that Eula needs a lot of time out in the field to do her thing. You won’t like Eula if you prefer to use fast-switch teams that switch between Elemental Skills and Bursts and rarely use Normal Attacks. However, if you’re looking for a “hypercarry,” Eula is one of the best choices you have. She has massive modifiers, isn’t picky about her teammates, and can make effective use of all 5* weapons (a F2P feature not shared by many other hypercarries).
In case you missed it the first time, we’ll stress that she doesn’t have particular preferences when it comes to her team mates. Since most other hypercarries in Abyss rely on a mix of Bennett, Xingqiu, Xiangling, Kazuha, and Zhongli to maximize their DMG, she becomes an invaluable DPS character for your second team. However, Eula shines when paired with less popular supports like Diona, Fischl, and Beidou. She appreciates Zhongli’s shield and Bennett’s attack boost, but she doesn’t need them to keep up with the other characters.
If your current DPS characters are constantly bickering over the same overpowered supports whenever the Spiral Abyss is to be cleared, then yes, we’d say Eula is worth it. However, you probably don’t need Eula if you already have two competent hypercarries. Know that, at the very least, if you want to use her, you’ll have to put one of them on the bench.
Nguồn: https://gemaga.com
Danh mục: Blog