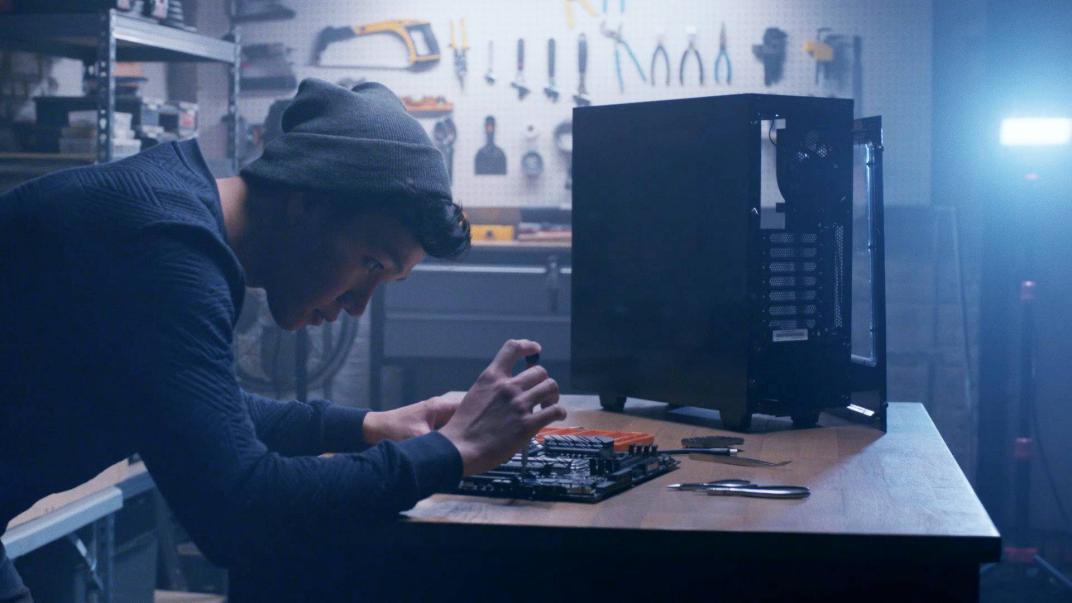
Building your own gaming PC is an enjoyable challenge that gives you complete say over the hardware you use. Those who aren’t familiar with PCs may find the process intimidating and decide to buy one already assembled. But if you fall into that category, you may be surprised to learn that assembling a personal computer from scratch isn’t as daunting a task as it once was. You can learn everything you need to know to construct your own gaming computer with the help of this handy guide. Here are some sample builds for both high-end and low-cost gaming PCs that you can use as guides.
First things first: this tutorial is focused on the computer itself. For starters, you’ll need a computer screen, keyboard, and mouse to use it effectively. Our reviews of the best gaming keyboards, best gaming mice, best PC gaming headsets, best PC controllers, and best cheap gaming monitors should help you make an informed purchase decision.
Bạn đang xem: How To Build A Gaming Pc Update 07/2026
A look at some gaming PC builds
Obtaining and storing the necessary components for your PC is a necessary step before we can move on to constructing it. It can be time consuming and costly to figure out what you need. Building a gaming PC can range from $500 to several thousand dollars. Naturally, more expensive parts usually mean more power, but the biggest challenge for novice builders is often finding a suitable build within their budget. Numerous models, specifications, and compatibility needs exist across the many required components.
Due to the potential complexity of this, we have provided sample builds using current-generation hardware. The first is an expensive system capable of cutting-edge gaming performance, while the second is a more reasonable $1000 build that can handle most games at respectable settings.
Nonetheless, please take our sample workstations as examples rather than loadouts, as many online retailers are currently experiencing product shortages and shipping delays due to the worldwide chip shortage. We cannot promise that every item on our lists will always be in stock or at the same price. In that case, look at example builds on websites like Newb Computer Build or PC Part Picker to see what parts might work.
One final note: our sample builds cover only the PC itself, but they include everything you need for modern PC gaming. Optical drives are not included, but they are required if you want to play games or watch movies from disc. While we didn’t cover peripherals, our guides to the best gaming mice, best gaming headset, best capture card for streaming, best gaming keyboard, and best budget gaming monitors should help you round out your setup.
High-end gaming PC build
To be exact, the cost is $3,400.
- MSI’s GeForce RTX 3070 for Gamers — $1,290
- Processor with an Intel i9-9900K core — $750
- Motherboard for gaming rigs Gigabyte Z390 Aorus Ultra — $316
- Two Crucial PCIe M.2 1TB NVMe SSDs, at $130 apiece
- Memory Sticks (RAM) of the G.Skill Ripjaws V Series, 32GB ($134)
- Cooling system for MSI MEG CoreLiquid S280, made by Liquid – $243
- Power Supply Unit EVGA SuperNOVA 1000 G3 — $168
- Cost of a Fractal Design Meshify C case
- Cost of Windows 10 Home: $139
$1,000 gaming PC build
The precise sum is $1,053.
- Microsoft’s $359 MSI NVIDIA GeForce GTX 1650 Ventus XS
- One hundred and eighty dollars for a processor with an Intel Core i5-12400F core
- Motherboard for MSI’s ProSeries B560M-A: $98 (MSI)
- Pricing for a 500GB Crucial P1 NVMe M.2 SSD (at the time of this writing): $63.
- A 16GB stick of RAM from Corsair’s Vengeance LPX line costs $69, and it’s called the Vengeance LPX.
- CPU Cooler by Cooler Master, the Hyper 212 Evo, for $35
- 500-watt ATX power supply by EVGA — $50
- Case: Zalman S4 ATX Mid Tower, $55
- Microsoft Windows 10 Home, $139
Please be aware that the aforementioned prices were correct at the time of publishing, but may have changed since then.

Tools
The majority of your build can be done with a No. 2 Phillips screwdriver, but installing M.2 SSDs into your motherboard will require a smaller No. 1 Phillips screwdriver.
Flashlight:
You’ll need a flashlight to see clearly when you’re working inside your case, but luckily, most modern smartphones have this feature.
Insulating compound:
A tube of thermal paste will help maintain a cool CPU. Most CPU coolers already have thermal paste on them, so there’s no need to buy any more. In any case, you can remove the cooler’s paste and replace it with your own if you decide to purchase a tube of thermal paste.
Terms to know
We’ve tried to make this guide as user-friendly as possible, but if you’re unfamiliar with PC hardware, you may have questions about some of the terms used. To help you follow along, we’ve provided a quick rundown of some of the key components and terminology we’ll be using. Use this section as a resource while you construct.
A graphics processing unit (GPU) is a type of graphics card. Your computer’s image display needs will be met by this. These images, the more intricate and complex they are, the more processing power your graphics card will need to display them accurately. The two leading manufacturers of graphics cards are Nvidia and AMD.
CPU: Your computer’s central processing unit (also called a processor) is responsible for running all of the programs and performing all of the calculations. You can get an Intel or an AMD processor for your computer.
The motherboard is the main circuit board of a computer, onto which all the other parts are screwed.
Similar to USB, SATA is a data transfer protocol used by hard drives and solid-state drives (SSDs).
PCIe is another type of connection, typically utilized for video cards and M.2 solid-state drives.
The NVMe connection protocol is one that M.2 SSDs may be able to use. The process of storing and retrieving data is sped up considerably.
M.2 solid-state drive (SSD): A tiny stick that gives your computer extra space for data. Both SATA and PCIe M.2 SSDs are available, with the latter offering NVMe support.
Data and information being processed by the CPU are stored in RAM (random access memory). In general, the more RAM you have installed alongside a high-quality processor, the quicker your computer will be able to perform its many tasks.
Protection against the CPU overheating is achieved by means of the cooling system.
The PSU, short for “power supply unit,” is what delivers electricity to the various parts of your computer.
An OS is an operating system. Windows 10 is highly recommended for gaming PCs, but some users may prefer Linux.
How to build a gaming PC
Step 1: Prepare your motherboard
Xem thêm : Hbm Hbm2 Hbm2e Update 07/2026
Hardware components used Motherboard
The whole process will go more smoothly if you build the motherboard outside the case. The rule of thumb is to put everything else together before screwing the case together. Keep your motherboard’s instructions handy before beginning any work on it, as different models may have different recommendations for where and how to install various parts. Not all components can be plugged in with the same amount of force; some will need to be pushed in, while others will simply need to be pushed in. Before attempting to set up your new parts, please read the following directions carefully.
First, make sure you’re working on a level surface when putting together your PC. Don’t put it together on a carpet, as the static electricity from the carpet could harm your PC’s internals. Even though this is highly improbable, we recommend touching your metal case every so often to keep yourself grounded and safe.
The alternative is to construct your rig in a room with hardwood or laminate floors, such as a dining room or kitchen; we went as far as removing our socks before beginning construction. Put your motherboard on a flat surface after you’ve removed it from its packaging. We put it on top of the box it came in to protect our desk from any potential scratches, but you can put it down directly on the table if you prefer. You’re all set to get going now.
Step 2: Install the CPU
Central Processing Unit and Motherboard
The installation of our AMD Ryzen CPU is the first and simplest step in your build. A piece of plastic shielding the CPU socket on your motherboard will be accessible once you lift the tray. The metal arm holding the tray can be withdrawn with a light push. Lifting it up will release the plastic cover over the socket once it is no longer resting in the tray. If your motherboard ever stops working, you’ll need to send it back to the manufacturer, so hold on to this plastic piece just in case.
Assuming you have opened the CPU socket tray, you can now install your processor onto the motherboard. Miniature half-circle indentations in the motherboard of your central processing unit are required. The central processing unit socket is shaped to fit into these depressions, making it simple to align the CPU before installing it. Assuming you have figured out how to insert your CPU, be very careful when doing so. While it may take some force to close the tray and ensure the metal arm is locked into place, no direct pressure on the CPU is necessary.
Step 3: Install M.2 SSD(s)
Components: M.2 solid-state drives, motherboard
Installing an M.2 SSD is a similarly painless process; just make sure to consult your user manual to determine which M.2 slots are prioritized. The M.2 slots on your motherboard may be protected by thermal shields; remove them before installing a drive. After removing any protective covers from the motherboard, M.2 SSDs can be inserted. These require light pressure to slide into their designated slots; however, you shouldn’t apply too much force, as they should go in with little difficulty. After the M.2 SSDs have been inserted into their slots, the opposite ends should be angled upward at a 45 degree angle. Screw each M.2 SSD into its designated socket using the appropriate screw (typically provided with your motherboard). When you’re done, you can replace the thermal guard’s screws and set it atop each M.2 SSD.
Step 4: Install the RAM
Used components include RAM and a motherboard.
The order in which the RAM should be installed is specified in the motherboard’s manual, which you should consult at this point. Your motherboard’s manual will tell you which two slots to put your RAM in if you have four of them, but if you only have two sticks, you should put them in slots one and three. Achieving maximum performance from your processor is as simple as spacing out your RAM. To begin, you must lower the plastic tabs on either side of each slot you intend to use. More force is needed to insert the RAM, but you should begin with a light touch and gradually increase the force applied. The RAM is properly installed when you hear a click. If you do this, the plastic clips that hold your RAM in place will flip up. Your RAM might not be securely installed if the clips haven’t flipped up.
Step 5: Get your case ready for your motherboard
Components: Case
It’s almost time to install your motherboard into your case, but before you do, you’ll need to install some standoff screws onto which to rest the motherboard. When you receive your motherboard, look for the standoffs it includes and begin fastening them into your case. About a dozen openings are needed for the standoffs. If you need help locating the screws, check the case’s manual. When the standoffs are securely fastened, the motherboard can be installed.
Step 6: Install your motherboard into your case
Used components include a motherboard and a case.
The standoffs will make installing your motherboard into your case a breeze, but you still need to wait before you begin screwing it in. There needs to be room on the rear of your case for the motherboard’s expansion slots and other I/O connectors. It will take the shape of a rectangle, and you’ll need to insert your motherboard into it with care so that all of its ports remain accessible. The motherboard can then be screwed onto the standoffs using the appropriate screws once everything has been checked for fit. It is important to remember that screws should not be tightened to the point where they break. You can proceed with your work once all the screws have been properly tightened by turning the screwdriver in the appropriate direction.
Step 7: Install your power supply (PSU)
Components include a battery, a case, and a motherboard.
In most cases, you won’t have any trouble at all installing the power supply into the case. The instructions for your particular case will tell you how to do this, but in general, it’s not hard. We began by screwing the power supply mounting bracket into the back of our case. A fan, used for ventilation, is also visible on your power supply. You can point this fan down if your finished gaming PC will be sitting on a hard desk or floor, or up if it will be resting on carpet.
After determining the correct orientation for your PSU and attaching the mounting bracket, you can simply slide the PSU into your case and tighten the screws. Depending on the available space, you may want to wait to secure your PSU’s screws until after all of its power cables have been connected.
Step 8: Connect any SATA hard drives/SSDs
Drives, a case, and a power supply are all SATA components.
Connect any SATA hard drives or SSDs now that the power supply has been set up. Your case must have a designated bay for such storage devices. Find this spot and investigate the left and right sides of each bay, where you’ll find metal clasps. To remove the bay, first squeeze the clasps and then pull it out. This is where you can secure your SATA hard drive to the inside of your case with screws. After that, you can reconnect the bay to its housing and connect the hard drive via SATA and power supply cable. Locate the corresponding SATA slot on your motherboard and insert the corresponding cable end into it. Once your computer is booted up and running, you will need to format the drive you just installed.
Step 9: Plug your case and power cables into the motherboard
Used Components: Housing, PSU, and Motherboard
The time has come to begin connecting your motherboard’s various ports and cables. A little patience is required here, as the cables inside your case are minuscule and can be jumbled up in the process of getting them in the right places. During this process, you should consult the instructions that came with both the case and the motherboard. Our Aorus Ultra motherboard, like many others, has a bus for connecting the case cables before they are installed on the board. This simplifies the process greatly.
The power button and the various front-panel ports are all accessible thanks to the cables in your case. If your power supply unit (PSU) is not connected to your motherboard, pressing that button will have no effect. The 24-pin ATX and EPS12V cables must be connected to the appropriate headers on the motherboard and power supply. Fans, SATA drives, and the entire cooling system will have cables that plug into the PSU.
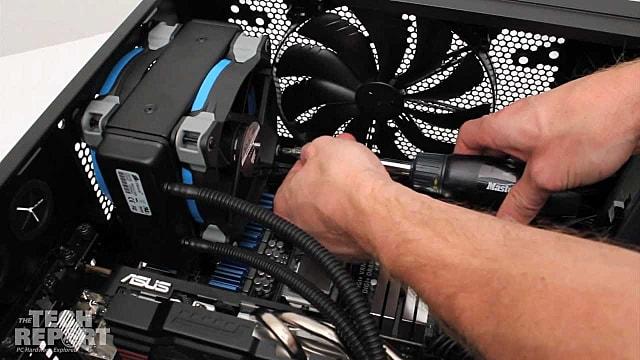
Step 10: Install your CPU cooling system
Used Components: CPU, Motherboard, and Cooling System
The most nerve-wracking part of installing your cooling system is probably applying the thermal paste, but rest assured it’s simpler than it sounds. You should start by attaching the system’s bracket to the motherboard. Because you will be screwing a section of the motherboard tray to the tray’s back, you will need access to the tray’s back. This will provide you with mounting holes for the cooler’s pump on the central processing unit and motherboard. However, there are some prerequisites that must be met first.
The radiator of a liquid-based CPU cooler, complete with its accompanying fans, should be screwed into your case. Inevitably, you’ll have to plan out where you’ll put it. Since it improves airflow, it’s best to screw it into the top grill of your case; however, some cases don’t have top grills and require installation on the back of the case instead. Screw the radiator into the grill once you’ve decided which orientation you prefer. After you have completed these steps, you can connect the pump.
Xem thêm : Ips Vs Led Update 07/2026
Before anything else, you need to spread some thermal paste. In the case of coolers that already have thermal paste applied, you may be able to skip this step if the paste is adequate for the task at hand. If you’d rather use thermal paste that you purchased, the cooler’s paste can be removed with a dry cloth. Put a dollop of thermal paste the size of a pea right in the middle of your central processing unit. In this stage, it is preferable to work on a smaller scale than a larger one. After the thermal paste has been spread across the CPU, you can press the cooler down onto the assembly. Don’t worry if you think you may have used too much thermal paste by accident. Try again after cleaning the central processing unit with a dry cloth and some rubbing alcohol.
After the pump has been installed, check that the wires leading to the cooling system are connected properly. To use our cooler, we had to connect a micro-USB cable from the pump to the motherboard.
Step 11: Start cable management
Components: Case
We’re almost done with the hardware portion of your PC build, but before we move on, you may want to tidy up by organizing your cables. In addition to allowing for better cooling and future upgrades, this also provides easier access to your components. Even though most cases already come with Velcro straps or zip ties, I always have a bag of Velcros on hand. Our chosen case, the Meshify C by Fractal, features a fantastic Velcro-equipped area for cable management. It can be found behind the motherboard. All of our wires and cords fit neatly into this area, and they’re now securely fastened.
When it came to our CPU cooling system’s many, thin wires, zip ties were the only solution. This allowed us to more easily guide them through the case’s openings in the direction we needed. Keep in mind that if you tighten your zip ties too much, you could end up breaking your cables.
Step 12: Install your graphics card
Used Components: Motherboard and Video Card
We’ve reached the part you care about most, so let’s talk about it. Incorporating the video card into your system is a breeze. In order to install your graphics card, you must first remove the required number of expansion slot inserts from the rear of your case. Our MSI GeForce RTX 2080 Ti requires two slots, though this varies depending on the GPU you choose. After taking them apart, you’ll need to determine which PCIe Express slot your new card will go into and then flip the plastic tab with the notch at the end of the slot down. Having located the PCIe Express slot on the graphics card, all that remains is to push down until the plastic notch flips up and clicks. The graphics card needs to be pushed into its slot until you hear a click; again, this does not require a lot of force. When you hear that, it’s time to use the expansion slot’s screws and holes to secure your graphics card’s mounting brackets inside the case.
You should now connect your graphics card to the computer’s power supply. (If you’re using a low-end graphics card, this step is optional.) Connect the power supply to the graphics card using the cables provided with the power supply. Make sure each port on the graphics card has a cable plugged into it, even if some of the cables will go unused.
Step 13: Install your OS
Useful components: USB flash drive and protective housing
After making sure all your cables are neatly organized and tucked away, you can hook up your computer to a monitor via an HDMI cable. Connect the power supply unit (PSU) to the outlet and turn the power switch on your computer to the “On” position. If your computer turns on when you press the power button, you are nearly finished setting it up.
You’ll now need a second computer and a speedy USB drive of at least 8 GB; we recommend the SanDisk Extreme Pro. The next step is to visit Microsoft’s site and carry out the instructions there. Using this method, your USB drive can be transformed into an installation tool that can be inserted into your computer before it boots. When you turn on your computer, Windows 10 should automatically begin installing. If you want it, you can just follow these instructions and sit back and wait for it to install. You should be good to go after that, though you will need to purchase a valid Windows 10 license from Microsoft. This will be activated immediately if done from your new computer. Now that everything is set up the way you want it to be, you can begin using your computer, with the possible exception of installing an optical drive.
If your PC doesn’t turn on
Don’t fret if your computer won’t start up: Thankfully, this is not the end of the world. There are a few different reasons why a computer might fail to boot up the first time you try, but with the exception of hardware failures, all of them are simple to fix. Here are some steps you can take to restore power to your computer.
Things to consider for your Gaming PC
Figuring out which desktop computer is ideal for gaming requires weighing benefits and drawbacks. Different games make wildly inefficient uses of the computer’s hardware, including the central processing unit (CPU), graphics processing unit (GPU), random access memory (RAM), and storage. Even within a single game genre, such as first-person shooters, platformers, or simulations, optimization levels can vary greatly, making it impossible to generalize about resource usage. Gaming (production of material, and PCs are the noisy, defiant toddlers of the consumer electronics world; they need constant attention and can be very frustrating if you don’t keep an eye on them. As soon as you think you have them under control, they go completely off the rails.

5 PC racing games you should be playing right now
26:13
Here are a few things to think about as you set up your gaming rig:
- As a practical matter, the use of a computer is what distinguishes a “gaming system” from other types of entertainment technology graphic processing unit that is completely separate from the main system, which means AMD Radeon for the time being or Nvidia GPU support for GeForce architecture. That’s why it (should) be obvious that integrated GPU (GPU) configurations (iGPUs) should be avoided at all costs. Make sure there is room for a GPU upgrade in the PC’s expansion slots and power supply if the best gaming PC you can afford right now is an iGPU-based system. However, Thunderbolt 3 ports are still not widely available on desktop computers.11th-generation Intel chipsets for desktop PC gaming together with backing for Rapid-Fire Weapon Number Four have also been announced.
- If you must upgrade your CPU, always go for the most recent model. This is typically denoted by the first digit of the CPU model name. Therefore, in this context, theIntel Core i, now in its tenth generation (like the i7-10700K) and the newest generation for AMD Ryzen (such as Ryzen 7 5800X) Usually, they improve performance slightly without a significant price premium from generation to generation thanks to efficiency gains. New Intel processors have better heat dissipation (allowing them to maintain higher speeds for longer) and restore hyperthreading, which Intel disabled in its ninth-generation chips. In many cases, you can save money by going down a class, so instead of getting an i7, you could get an i5; just make sure you don’t go below four cores.
- Before you begin configuring, consider what games you play the most and do some research on the internet to see if they require a supercomputer-level CPU or a lot of GPU cycles to run smoothly. For instance, do they noticeably benefit from 4K resolution, or do they look the same as in HD, but with an unplayably huge drop in frame rate? Is the increase in world complexity from using a faster, higher-core-count CPU worth the reduction in frame rate from using a less powerful GPU (typically in simulations or role-playing games)?
- Contrarily, once you reach a certain threshold, you shouldn’t worry too much about frame rates. However, comparing results from different benchmarks and game genres can help you understand the strengths and weaknesses of different setups. However, what you really want is fluid gameplay, which can be anywhere from 60 frames per second (fps) to 240 fps (or more) depending on the game and your monitor’s capabilities, at a quality level that suits your tastes and doesn’t break the bank.
- Dual graphics processing units are still not worthwhile. The dual-GPU Falcon Northwest and Origin PC systems I’ve tested have consistently produced over 200 frames per second in 4K. Doom because they are being used in that game. But I would be dying just as spectacularly at 120fps in 1440p (2,560 x 1,440) and would have happily traded some of those frames for more reliable performance in Adobe’s programs.
- When deciding between Intel and AMD processors, you have few, if any, options for mixing and matching configurations unless you buy a custom build or assemble your own PC. Typically, manufacturers pick configurations based on what they anticipate customers will want to pay at various price points. Determine your budget for the central processing unit after you’ve selected the graphics card you prefer. AMDs typically have slower clock speeds, with higher base clocks and lower boost clocks, but superior multicore performance at the same price. As a general rule, older games don’t use more than four cores (if that many) and will get the power they need from Intel’s fast individual cores. Newer AMD processors have greatly reduced the performance gap with Intel’s in single-core tasks, and nearly all of them allow for overclocking (whereas only Intel’s K series processors do).
- Identify the type of tech support customer you are. Do you spend hours banging your head against a problem rather than calling the company for help? Or would you rather have access to real people who can assist with any problems immediately? Since you have to pay more for more personalized human help and because the configurations are highly individualized, large manufacturers typically have active user forums dispersed across the web for user-to-user help and knowledge-bases with some troubleshooting help; boutique builders, on the other hand, do not.
- The Corsair or Origin PC is a good option for those who want a more hands-off approach to streaming. Elgato and Corsair are both owned by the same company, and the latter is responsible for providing almost all systems with Elgato cards.
- It is important to consider the power supply, available space in the case, and cooling system if you intend to upgrade the graphics card at a later date. Most mid-range and budget PCs have 500-watt power supplies, but high-end graphics cards of the future typically need much more. Moreover, next-generation, longer cards may not fit in compact cases, and liquid cooling systems must often be replaced (or at least drained) before a new card can be installed.
The Best Gaming PCs
HP Pavilion Gaming Desktop
Best inexpensive gaming PC
To appeal to the same “casual” gamer as Dell’s Inspiron Gaming or Acer’s Nitro lines, HP’s Pavilion Gaming Desktop is a compact, budget-gaming friendly, spare-me-the-flashiness model. This $650 entry-level gaming PC comes equipped with an Intel Core i5-10400 processor, a GeForce GTX 1650 graphics card, 8GB of RAM, and 256GB of solid-state storage, so you can play relatively light games in 1080p without risking permanent damage to your eyes. Those are the typical specs for a budget gaming PC, but if you have the extra cash, go for 16GB of RAM and a larger solid-state drive.
Corsair One Pro i200
Best small PC for gaming and creation
While the Corsair One Pro I tested was designed with content creation in mind, it was otherwise identical to the PC gaming models aside from the fact that they were powered by Intel’s X series processors rather than the more expensive K series. Gaming-wise, the Corsair One i164 is the i200’s equivalent; it’s equipped with an i9-10900K rather than an i9-10940X and costs $900 less at $3,300. The base i145 model costs $1,900 and features an i7-9700F and a GeForce RTX 2080 Super, making it a fairly well-equipped machine. Because of their compact design, Corsair One models may not extract maximum performance from their components. Features such as front-facing HDMI and USB ports make this layout ideal for virtual reality use.
Maingear Turbo
Best combo of size, speed and gaming flash
With its stunning aesthetic and ability to keep high-end components like an AMD Ryzen 5950X and Nvidia GeForce RTX 3080 cool, quiet, and running at peak speed for 4K gaming and heavy-duty simulation gameplay, Maingear’s Apex liquid-cooling system is a no-brainer. Even though it isn’t the smallest small-form-factor desktop, it’s still smaller than a midtower and is only slightly bigger than two Xbox Series X consoles. However, the base model 1080p system is rather boring, so you’ll need to spend more to get the flash and the speed.
Falcon Northwest Talon
Best midtower for customizers
Since Falcon Northwest is a custom builder, you can choose from a wide variety of configurations and aesthetic paint jobs for its midtower (38 liter) Talon case, now known as the “2020 Anniversary Edition.” This tested configuration was quick and reliable. It’s an investment, but it ought to serve you well for quite some time.
MSI MEG Trident X
Best gaming performance in tight spots
With its slim chassis (roughly 5 inches wide) and impressive level of silence given its considerable power, the Trident X is a formidable piece of hardware. Furthermore, it has a more noticeable gaming aesthetic than the understated Corsair models. Although the RTX 30-series models are not yet available for purchase, a system with a 10th-generation Core i7, 32GB of RAM, an RTX 3070, and a 1TB solid-state drive can be had for around $2,400.
HP Envy 32 All-in-One
Best all-in-one for gaming (Update: Currently Unavailable)
Considering that the integrated displays are locked at 60Hz refresh and that they use mobile components, I’m not sure that an all-in-one is the best option for gaming. However, HP’s RTX 20-series-equipped all-in-one is unrivaled for PC gaming on a large (32 inches) 4K HDR screen, which may have a significant impact in games like simulations. Our review unit was the RTX 2060 variant; cheaper options start at the GTX 1650 price of around $1,700.
FAQS
Is the power supply plugged into an outlet?
It’s easy to correct this. In order to get your computer working, all you have to do is plug it into a wall socket.
Is the power supply’s switch turned on?
You must ensure that the switch on the power supply unit (PSU) is in the “On” position before turning the unit on. This is a simple problem with an equally simple answer.
Are your power supply cables seated in the motherboard properly?
The following is the next thing you need to verify. Perhaps simply reconnecting the cables will allow electricity to flow to your computer.
Are your case’s cables plugged into your motherboard properly?
Getting this step right is crucial because pressing the power button on your case won’t turn on your computer if the appropriate cable isn’t plugged in. In order to connect your case’s cables to your motherboard, some motherboards feature a serial bus.
Are your parts installed correctly?
This should be the last thing you check because it can take the longest. It’s possible that the issue can be fixed by reconnecting the RAM and CPU, or by moving the RAM modules to different RAM slots.
If all this fails, then your components may be defective.
This is a possible outcome, unfortunately. In the process of building a computer, you may discover that one of your parts is defective. Your next step is to get in touch with the product’s maker and inquire about a refund or exchange. You can rest assured that most major PC component manufacturers offer refunds for faulty products through their return policies. The time it takes before you can start playing games on your brand-new computer may be longer than you expected.
Nguồn: https://gemaga.com
Danh mục: Blog