There are a number of aspects to consider when selecting the best gaming monitor for your needs. Prices and overall performance and visual fidelity of a monitor are intertwined, with the former being mostly determined by the panel it employs.
- BenQ EW3270U Review. Everything You Need To Know Update 07/2026
- ASUS MG279Q Review. Everything You Need To Know Update 07/2026
- Creative Sound Blasterx H6 Review Update 07/2026
- Phasmophobia Review. Everything You Need To Know Update 07/2026
- Turtle Beach Stealth 600 (PS4) Review. Everything You Need To Know Update 07/2026
The Samsung C27HG70 is a great monitor for individuals who don’t want to compromise on either visual quality or performance but don’t want to spend a lot of money. It has a good balance of all three of the previously mentioned characteristics.
Bạn đang xem: Samsung C27hg70 Review Update 07/2026
The Pros:
- Display resolution of 1440 x 900
- a great deal of contrast and vibrant hues
- Astonishingly effective for a VA panel
- HDR (High Dynamic Range) support
- FreeSync 2 from AMD
- Stand with a great deal of flexibility
The Cons:
- An extremely limited field of view
- Clouding and poor black uniformity are both present.
- a few stray ghosts
- a hefty stance
The Design
It’s hard to see much from the outside how the monitor works. In terms of design, it has a plain gray frame that doesn’t exactly scream “gaming” and can be used in any space, from a bedroom to a living room to a study.
The display, on the other hand, is a very different story. Because of its innovative dual-hinge construction, it’s not so much a flamboyant exterior as it is.
Indeed, the display can be tilted from -15° to 5°, swiveled from -15° to 15°, and pivoted from 5.7in/14.5cm to -15° to 15°.
It may take some time to get used to this design because it occupies a lot of area behind the monitor.
It’s for this reason that placing it on a desk near a wall is unlikely.
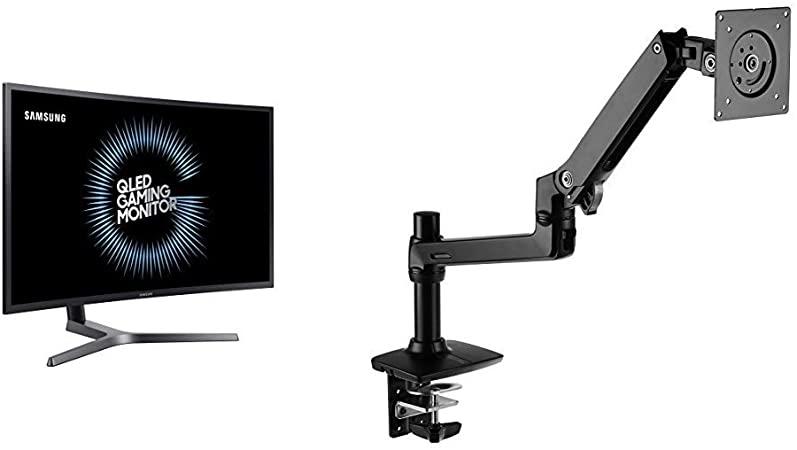
For those who want to replace the default stand with another or just mount it to a wall, this model supports the standard 100×100 VESA pattern.
Specifications
The screen is 27 inches wide.
16:9 aspect ratio
PanelsVA
Resolutions2560×1440
144 hertz of refresh rate
4 milliseconds
350 cd/m2 of brightness
Contrasts3000:1
AMD FreeSync 2 VRR VRR
A pair of HDMI 2.0 ports
DisplayPort 1.4 on a single computer
USB 3.0 ports, each with two ports
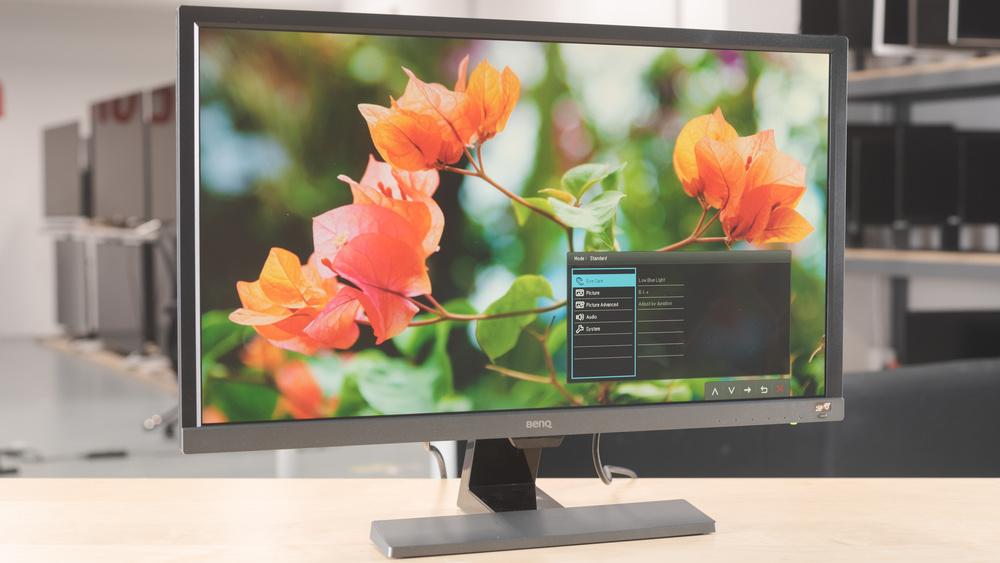
The Display
Let’s go on to the monitor’s most appealing feature: the screen.
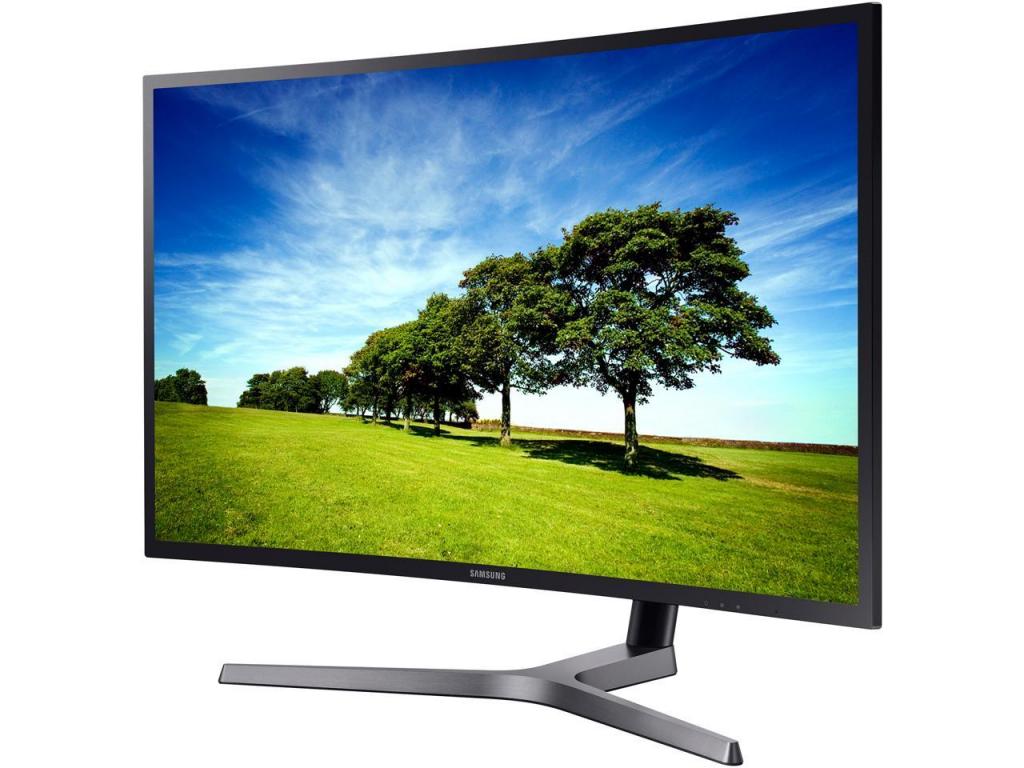
As a 27-inch widescreen curved monitor, the Samsung C27HG70 is ideal for desktop use. In a 16:9 monitor, the 1800R curve doesn’t make much of a difference; in a 21:9 ultrawide monitor, however, it does.
Inside, we’ve got a strong VA panel that does what VA panels do best: it offers outstanding contrast with blacks that are deeper than those of IPS or TN panels.
To that end, gamers won’t find much to complain about in terms of visuals, thanks to the great color reproduction that can almost rival certain IPS panels, and the kind of clarity that 1440p can give.
In addition, the C27HG70 is an HDR-compatible monitor, and it performs admirably in this regard, thanks to its superb contrast and acceptable brightness, as we shall see.
Even though it lacks the brightness of a premium HDR TV, it’s adequate for desktop work.
Even yet, no monitor is completely error-free, and this one is no different. The Samsung C27HG70’s biggest flaws are its poor viewing angles and inconsistent black levels.
The viewing angles are really poor, and they look more like those of a TN panel than a VA one. Although the adjustable stand and the curved screen help, this isn’t going to be a deal-breaker for most people.
It’s another matter entirely when it comes to the terrible black uniformity. In dark scenarios, especially if you use the monitor in a dark or dimly-lit environment, there is some noticeable clouding, which is usual with VA panels.
Lastly, we should mention the monitor’s performance, which is one of its best features.
As can be seen by its high refresh rate of 144 Hz, the monitor boasts excellent response times for a panel of this sort while also offering fluid and responsive gameplay.
The C27HG70 is an exception to the rule when it comes to response times for VA panels, as it has very little motion blur.
There may still be some obvious ghosting in darker areas, but it’s not going to be anything out of the ordinary.
AMD FreeSync 2
Since the display supports HDR, AMD FreeSync 2, an HDR-compatible update to FreeSync, should be included.
As far as FreeSync 2 is concerned, it doesn’t alter much from the first FreeSync – since AMD doesn’t force OEMs to pay license costs, unlike Nvidia, it’s a preferred choice for the more affordable HDR monitors.
C27HG70 FreeSync works in the 48-144 Hz range over DisplayPort 1.4, which is a reasonable expectation for a monitor in this price range with a FreeSync feature.
If you need higher framerates than HDMI 2.0’s 48-100 Hz range can provide, you’ll have to employ digital projection (DP).
For Starters, a Sturdy Stand
The 32-inch Samsung CHG70 monitor is also available, but PC Labs hasn’t had a chance to test it yet. This review refers to the 27-inch version of the CHG70, hence all other mentions to the 27-inch model are omitted from the text.
In terms of size and weight, the CHG70 measures 15.4 by 24.6 by 21.9 inches (HWD). The screen’s bottom has a 0.7-inch border, while the top and sides have a thin half-inch bezel. Designed with ergonomics in mind, the stand’s shaft and joint-attached arm extend from a wide V-shaped base, allowing for four-way adjustment in height, swivel, tilt, and pivot. With a footprint of 20 inches across by 11.5 inches from front to back, the panel feels solid and can be easily adjusted.
The CHG70 has a native resolution of WQHD, which is 2,560 pixels wide by 1,440 pixels tall. Samsung’s version of Quantum Dot (QLED) technology is used in the 27-inch VA panel. For additional information on QLED, see this primer.) It features a 16:9 widescreen aspect ratio.
Its pixel density is 109 pixels per inch at this screen size and resolution (ppi). When viewed from the same distance as the Samsung CHG90 or the Asus ROG Strix XG32VQ, this should produce a more detailed image. The luxurious Acer Predator X27, a recent Editors’ Choice, offers a higher pixel density (163ppi) than the CHG70, but it costs more and requires a more powerful graphics card to function at its native resolution at respectable frame rates. If you’re interested in 4K gaming, check out our guide to the top graphics cards.
With an 1800R curvature rating, enough CHG70 27-inch monitors arranged side-by-side to form a full circle would offer a radius of just 1,800mm, or 1.8 meters, if that’s what you’re looking for. The Samsung CHG90 has a similar curve, but this one is even tighter. Only the Samsung 34-Inch CF791 Curved Widescreen Monitor has a curvature rating of more than 1500R among the monitors we’ve evaluated. The extreme curvature of the screen provides a more immersive gaming experience than a flat display.
In terms of brightness, the CHG70 is rated at 350 nits, however it performed slightly better than that. I used a Klein K10-A colorimeter and SpectraCal CalMAN 5 software to do quantitative testing and measured 372.1 nits in sRGB mode. Despite the fact that its rated contrast ratio is 3000:1, I measured its contrast ratio at 2432:1.
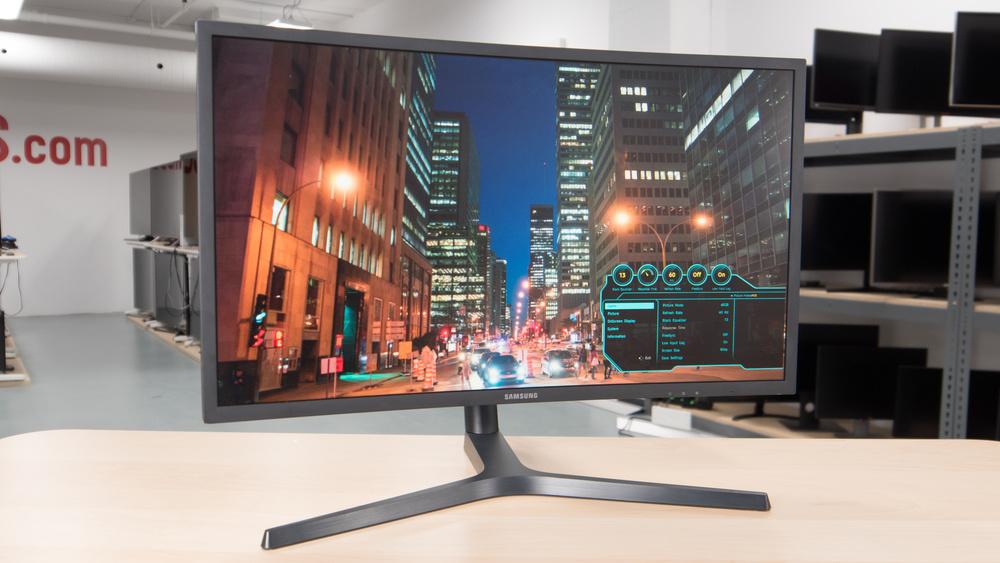
Controls, Menus, and Ports
Four tiny buttons on the bottom right corner of the display body serve as the monitor’s physical controls. There are four buttons on the rear of the device: three are downward-facing and provide access to the onscreen display’s (OSD) settings, while the on/off button serves as a miniature directional joystick. The brightness, contrast, and sharpness, as well as the display mode, can all be adjusted with these buttons (sRGB, Cinema, Custom, and High Brightness, in additional to FPS, AOS, RPG, and RTS gaming modes). Customizing multiple settings within a mode is also feasible.
With two HDMI 2.0 connectors, a DisplayPort (1.4), two USB 3.0 ports, and separate audio-in and microphone jacks, the CHG70 has a wide range of input options.
The CHG70 is backed by a three-year parts and labor guarantee from Samsung.
A Wide Color Gamut
In our tests, we found the CHG70 to have excellent color accuracy.
The red, yellow, green, aqua, and purple color measurements (represented by the colored dots) are all significantly outside the triangle depicting the usual bounds of the CIE RGB color space (represented by the boxes), as seen on the chromaticity chart below with the CHG70 tested in sRGB mode…
Any point outside of the triangle signifies an expansion of the typical RGB color gamut, since the region enclosed by the triangle represents all the colors that may be exhibited by combining the three main colors. CHG70’s chromaticity chart generated in first-person shooter mode looked very much like that of the standard RGB color gamut, although the color range was still much larger (albeit slightly so).
On the CHG70, I watched a slew of videos, several of which supported HDR (selected from the YouTube HDR channel). The display did a good job showing bright scenes while maintaining shading in both very bright and very dark places.
Xem thêm : Steelcase Leap Review. Everything You Need To Know Update 07/2026
Compared to the CHG90’s ultra-wide aspect ratio, the CHG70’s widescreen format is preferable for viewing ordinary movies. There are no black pillars, stretching, or vertical cut-off issues to worry with while playing back videos not specifically designed for the CHG90’s unusually broad panel shape. You may notice some dimming and discolouration at extremely extreme viewing angles with the CHG70, but this is to be expected since the curved screen makes you less likely to be offsides in the first place.
An Immersive Gaming Experience
There may not be much to notice about the Samsung CHG70 27-inch Curved Monitor at first look. Unlike the Editors’ Choice Acer Predator X27, it lacks the extreme brightness settings or 4K UHD resolution. G-Sync adaptive-sync technology from Nvidia, which helps minimize visual tearing and other abnormalities on the company’s more popular late-model GeForce cards, is also not supported. CHG70 costs less than the Acer model and other G-Sync screens, however. AMD’s Radeon RX or RX Vega cards may be had for less than the difference in price, allowing you to take advantage of FreeSync 2 and HDR compatibility.
In terms of HDR, the CHG70 performed quite well in our testing even without the benefit of FreeSync 2 or a Radeon card. Even though the Dell 27 Gaming Monitor (S2719DGF) was reviewed immediately before this model, it does not include HDR capability. If you’re a gamer searching for a future-proof display, HDR compatibility in AAA games is a feature to keep an eye out for, and its inclusion helps a monitor.
If you’re looking for a gaming display, the Samsung CHG70 27-Inch Curved Monitor is an excellent choice. Even better, it may also be used as a high-quality video display.
Features and aesthetics
Compared to other high-end gaming displays, this monitor appears to be relatively subdued from the front. At the top and sides, the bezels measure 14mm (0.55 inches) and 15.5mm (0.61 inches) respectively, while at the bottom they measure 15.5mm (0.61 inches). Users prefer this stand’s wide Y-shaped stance to the ‘pointless disc’ featured on models like the C24FG70. We’ll learn more about the 1800R curve and the anti-glare light matte screen surface later.
When it comes to OSD (On-Screen Display), a joystick (referred to as the ‘JOG button’) is used to operate most aspects of the display. In the lower right corner, there are three ‘Game Setting’ shortcut key keys that face downwards. The OSD lets you save three different sets of ‘Game’ and ‘Picture’ settings, which you can then access with the buttons on the side. Additionally, the monitor has a power LED on the front, but it is always off when the display is turned on. Using the power button, it glows blue while the display is “off” and blinks when the monitor loses signal to the computer. When the display is on, you can have the OSD set to show an illuminated status bar, which will disappear when the monitor is turned off. In the video below, you can see how the OSD works.
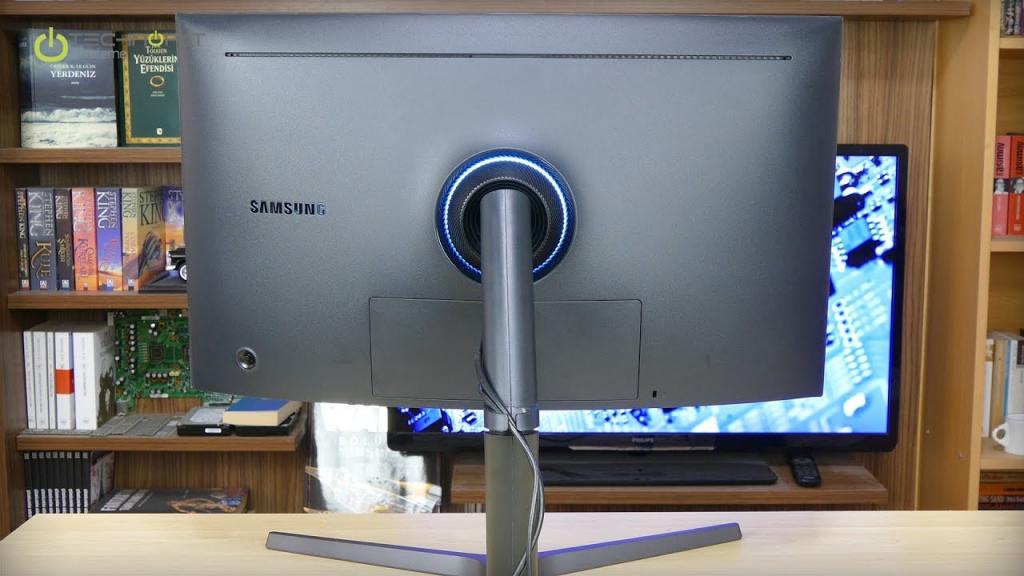
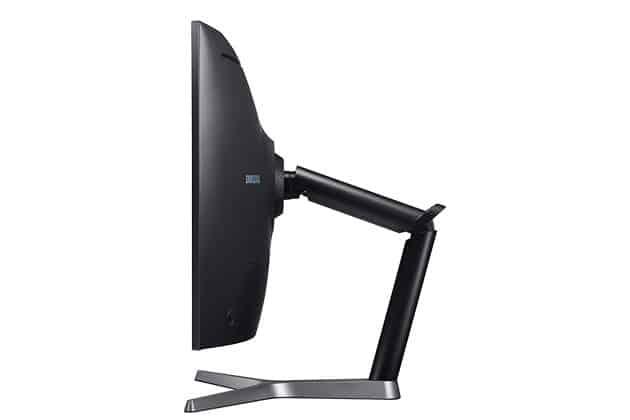
With plenty of matte black plastic on the back, the monitor appears sturdy from this angle. A dual-hinged flexible arm neck design makes it a mere 15mm (0.59 inches) thick at its thinnest point. Tilt (-5 to 15 degrees), height (145mm or 5.71 inches), swivel (15 degrees left, 15 degrees right), and pivoting (90 degrees clockwise rotation into portrait) are all easily adjustable features of the stand. With this stand, you may lower the screen to a more comfortable viewing height while still having the elbow joint of the stand farther back. At its lowest setting, the screen’s top is 411mm (16.18 inches) above the work surface, clearing the desk by a distance of 45mm (1.77 inches). With the monitor in this position, the monitor’s overall depth is approximately 360mm (14.17 inches). Increasing the monitor’s height by 145mm causes the cable tidy loop at the elbow to protrude backwards, resulting in a depth increase of 385mm (15.16 inches).
Matte black plastic is used liberally on the screen’s back panel as well. The stand and the plastic that surrounds it are both removable after they have been attached in the center. This reveals 100 x 100mm VESA mounting holes, which can be used in place of the supplied screws if desired. The stand connection point is surrounded by a ring of cool white LEDs, which serves as a sort of ambient light source. Even though this “Arena Lighting” is not a bias light, the mild glow it emits can be noticed against light-colored walls directly in front of the screen in a dimly lit environment. The monitor’s light will pulse and get brighter as the audio gets louder if you have it connected to your computer. In the OSD, it can be turned off if desired. The LED ring can be seen in action in the following segment of the OSD movie.
This has a beautiful silver-colored Samsung logo on the left and a K-Slot on the right. An elbow joint cable tiddler and the JOG button can be seen on this stand’s bottom left. Ports are hidden by a plastic port cover that can be removed. A USB 3.0 port (bottom one with fast-charging), USB upstream, an external DC power input (a “power brick”), and two HDMI 2.0b ports (DP 1.4, 3.5mm headphone jack, and 3.5mm microphone in/out ports (top/bottom) are included). In this case, “bottom” refers to the photo, while “top” refers to the port on the monitor that is closest to the screen’s front. If you need to totally turn off the monitor’s power source, the “power brick” (adapter) used to supply the monitor with electricity has a “zero watt” power switch integrated. Turning the monitor off with the power button keeps it in a standby condition and only offers a trickle of power, making this a more energy-efficient option.
AMD FreeSync and HDR are both supported by the HDMI and DP ports when using compatible AMD GPUs, as is AMD FreeSync. In addition to FreeSync and HDR being supported on compatible gaming consoles through HDMI 2.0, Samsung has also informed us that the scaler fully supports 4K UHD signals from such devices, even if the monitor itself will only run at 2560 x 1440 pixels. DP 1.2(+) or HDMI 2.0 is supported by compatible GPUs from both Nvidia and AMD (b). As a standard, a power cable and adaptor are included. A USB 3.0 upstream cable and a DP or HDMI cable (or maybe both) are normally provided with the purchase of the device.
Calibration
Subpixel layout and screen surface
Notepad was used to take the snapshot, and ClearType was turned off to make it a macro shot. Typing the letters “PCM” into the screen’s white space reveals the actual subpixel layout and a rough idea of the screen’s surface, highlighting any potential text rendering issues caused by unusual subpixel structure An anti-glare screen surface with a light matte finish is used, which reduces glare while maintaining a sharp image devoid of’smeary’ graininess. Even the 31.5″ variant of this panel has a somewhat rougher screen surface texture than some VA models, including the UltraWides. We don’t think most people will mind a small graininess in the whites and other light colors, so don’t worry about it. Light matte screen surface benefits (with the image seeming “near to surface” rather than as though you are looking through a dirty window) are still very much obvious.
RGB (Red, Green and Blue) stripe subpixel pattern is used in the display pictured above. Modern operating systems, such as Microsoft Windows and Apple MacOS, anticipate this to be the default. For Mac users, text fringing from non-standard subpixel layouts isn’t a problem, and Windows users don’t have to use ClearType – although you can if you want to. The subpixels are a little squat, as is typical for this style of panel, with somewhat “thick” black areas above and below each row. However, the monitor’s pixel density is high enough to keep these black gaps from becoming noticeable. Some subpixels, for example, have a completely ‘on’ top or bottom half while the other half is completely ‘off’. As a result, the letters have little ‘gaps,’ rather than a blended appearance, reducing text and fine-edge clarity marginally. On some VA models, the partial subpixel illumination can also be seen at the top and bottom edges of letters, but this is a much lesser effect. While most users won’t even notice or give a second thought to it, a few will.
Testing the presets
Custom, High-Brightness, FPS (FPS), RTS (RTS), RPG (AOS), SRB (sRGB), and Cinema (Cinema) are just a few of the picture modes available on this display. Other options include three ‘Gamma’ settings, a ‘Eye Saver’ mode, and a variety of ‘Color Tone’ options. Presets that have the greatest practical applications or are otherwise noteworthy will be highlighted, as will a selection of additional options. Datacolor Spyder5ELITE colorimeter measurements and general observations are shown in the following table. Readings were taken after the monitor had been running for at least two hours. On a Windows 10 PC with a Club3D Radeon R9 290 royalAce FreeSync-enabled GPU, the device was attached. The included DP cable was used to connect it through DisplayPort. An Nvidia GTX 1070 connected via DisplayPort (DP) was used for additional testing. The results were nearly identical when using GPUs from either manufacturer for the purposes of this table. In its “plug and play” form, the monitor did not require additional drivers or ICC profiles. The default settings are assumed to be in place.
We followed the instructions in the user handbook to upgrade the monitor’s firmware. The most noticeable change in later firmware versions is an increase in the range of FreeSync. The USB stick is plugged into the monitor’s USB port that is the furthest from the screen, and a file is downloaded. Pressing JOG and holding the joystick down for around 5 seconds will bring up the fast menu, which you may navigate from there. The firmware we used was version 1016.2, or to provide its full title ‘Upgrade File(USB type) (m-HG727CCAA-1011.2.zip) ver 1016.2, All Windows (ENGLISH)’, which was the most recent version that was readily available. For most PC users, a white point of 6500K and a gamma of 2.2 are good targets to aim for while examining the numbers in this table. Personal preferences and the lighting situation all play a role in determining what a given target should look like.
The C27HG70 was able to generate a bright and lively image with a good white point balancing right out of the box (aside from a minor green push). The monitor is pre-calibrated in its default ‘Custom Color’ setting, and each device is given with a factory calibration report. The first graphic below illustrates this. We can see that our Spyder5ELITE gamma curve is quite near to the intended ‘2.2’ curve, which is seen in the second figure below. When using the monitor in this setting, the image is less saturated (less saturated) and more accurate (more accurate) in sRGB color space.
Some useful Low Blue Light (LBL) settings were also available, including ‘Warm2’ that maintained good contrast while producing a warmer image (‘Warm’). The ‘Eye Saver Mode,’ on the other hand, lowered contrast to a fraction of its previous value with deliberate intent. Intentionally, the image appeared to be flooded, but some people may find this more comfortable, while we favor the alternative ‘Warm2’ setting with more contrast. When it came to switching between daytime and nighttime settings, we found it convenient to have three hotkey buttons on the underside of the monitor, which made it simple to do so. The ‘Test Settings’ and the ‘Warm2’ LBL settings were used in our circumstance.
Test Settings
As part of our testing, we reduced brightness and made some minor color channel tweaks. Although there was a slight green hue, the white point was well-balanced right out of the package. As a result of this change in lighting, the balance has to be tweaked significantly more. Please be aware that individual units and preferences can vary, so these settings may not always be the best for all of your devices or your users. We’ve also included the ‘Response Time’ and ‘FreeSync’ settings that were used for the majority of the testing (with the exception of the strobe backlight option, which was examined separately). As previously said, we ran several tests on a GPU that does not support FreeSync, namely our Nvidia GPU. The ‘Contrast’ and ‘Gamma’ parameters, among others, were kept at their default values. However, with the “FreeSync” setting to the “Ultimate Engine,” a little driver modification was required to connect the monitor via DP. There is a minor problem with color processing by default, which results in undersaturated images. This may be done by simply switching the “Color Temperature” option to “6500K” instead of “Automatic” under “Radeon Settings” (the little icon near the top right).
You’ll see that we’ve included the HDR content’s brightness setting. HDR content seemed too ‘dull’ and didn’t give the intended experience when viewed at a lower brightness setting, so we switched to a higher brightness setting. The monitor’s power consumption and heat production increase with higher brightness settings, however this model doesn’t approach excessive levels. HDR mode prevents access to the ‘Color’ and ‘Response Time’ menus. Full control over the monitor’s backlight and the way it maps shades is not possible for material like this. HDR and FreeSync (GPU dependent) can still be used on this panel, though. All of our testing, save for the HDR part, was done in the standard SDR state of the applications and the monitor.
Intensity = 20 (according to preferences and lighting) HDR material requires a brightness of 100. (according to preferences and lighting)
R is equal to 48.
G is equal to 45
Assume that B = 52.
Response time is the standard
Infinite Power = FreeSync (AMD GPU only)
144 Hz refresh rate
Contrast and brightness
Contrast ratios
Static contrast ratios might be computed from white and black luminance levels using a BasICColor SQUID 3 (X-Rite i1Display Pro). Using a variety of parameters, including those described in the calibration section and a few additional, this data is shown in the table below Except for the modifications already described in the calibration section, assume that all settings were kept at their default state. With and without ‘Local Dimming’, black highlights represent the highest white luminance, the lowest black luminance, and the highest contrast ratio recorded. Under ‘Test Settings,’ the results are highlighted in blue.
Adjusting merely the brightness resulted in an average contrast ratio of 2377:1. Although it falls short of the stipulated 3000:1, this LCD still falls under the “VA only” category. ‘High Brightness’ was used to record a contrast ratio of 2750:1 utilizing a looser calibration and to maximize static contrast. The’sRGB’ mode maintained a high level of contrast (2481:1). Our ‘Test Settings’ reduced contrast marginally, but it remained rather strong at 2175:1 despite the modifications made to the color channels. When using strobe backlights, the monitor maintained a good contrast even in the “faster” and “faster” settings. The ‘Warm2’ setting (1575:1), which makes major alterations to color channels but also lowers the contrast slider, lowered it by a significant margin. To save your eyes, the ‘Eye Saver Mode’ purposefully lessens contrast (58:1). On this table, ‘Local Dimming’ was disabled, and the brightest white brightness was recorded at 440 cd/m2 while the lowest white luminance was 43 cd/m2. The adjustable luminance range was an impressive 397 cd/m2.
In addition, there is a ‘Local Dimming’ setting on the display, which can be compared to a more powerful version of the Dynamic Contrast mode. The monitor is divided into eight dimming zones, each of which has its own light source. In other words, the backlight can be set to a high or low intensity depending on whether or not a zone contains mostly light or dark content. Even if you don’t use HDR, you can still take use of this feature by activating the HDR mode when you’re viewing conventional content (SDR or Standard Dynamic Range). For this, we used a small test patch (i.e. measurement zone) of either ‘pure white’ or ‘pure black’ surrounded by either a white or black background for the measurements to take place In order to encompass the colorimeter’s sensor and contact area, the test patch we employed was as small as possible (60mm2 or 2.36 inches2). We tried a variety of backgrounds and test patch sizes, but considered the results recorded in the table to be a good indicator of how the monitor performs while viewing conventional SDR content.
Whatever the background color or how long we waited before taking the measurement, the black luminance level stayed at 0.17 cd/m2 regardless of the conditions. In the absence of the feature, the white luminance recorded for the black backdrop was 612 cd/m2. An average of 408 cd/m2 was measured for the white background, matching the monitor’s maximum brightness when this function was disabled. For the record, the 612 cd/m2 was a brief burst of brightness, lasting for around 10 seconds. After then, it returned to its normal range of 400 to 410 cd/m2. However, if the square were moved between zones, the following zone would pulse to the same intensity (612 cd/m2) as the previous zone. The other thing to keep in mind is that the monitor’s brightness level dictates both the black and white luminance levels, as well as the brightness the monitor pulses to. As a result, lowering the monitor’s brightness will bring both readings down. There is a noticeable increase in contrast, with the setting recording 3600:1 in our fake test. In the future, we’ll see how this mode works best with HDR material, which has more dynamic and responsive zones and allows for more dramatic brightness shifts. It’s true that the dark point descends more quickly at times. We were unable to reliably record brightness levels with the colorimeter in an HDR setting since we lacked a trustworthy way. To be fair, we did put the ‘Local Dimming’ setting to the test in both HDR and SDR situations.
PWM (Pulse Width Modulation)
PWM (Pulse Width Modulation) is not used to control backlight brightness on the Samsung C27HG70 at any level. Direct Current (DC) is used for backlight brightness control, hence the monitor has been labeled ‘flicker-free’. This is good news for those who are sensitive to PWM flickering or other PWM side effects. When the monitor’s response time is adjusted to ‘Faster’ or ‘Fastest,’ this is not the case. The ‘Impulsive Scanning’ strobe backlight mode is on, causing flickering at the display refresh rate.
Luminance uniformity
Backlight bleed and clouding were visible on the bottom of the screen to the left of center when the screen was completely black. A dark room was used to take this image, which was taken using our ‘Test Settings’ and camera settings that accurately reflect what the human eye sees on the screen. The ‘VA shine’ was eliminated by taking the picture from a suitable distance away. From a regular viewing position, this silver-purple light can be seen toward the bottom of the screen in particular. The blooming effect is more noticeable when viewed from a closer distance. Unlike the ‘IPS glow,’ it is less distracting and doesn’t reduce the amount of detail as much. In contrast to other VA versions we’ve tested, this model has a more robust battery life. The amount of backlight bleed varies from one unit to the next.
The screen has excellent brightness uniformity. Quadrant 4 to the left of center recorded the highest brightness (169.0 cd/m2). Quadrant 8 below the center (154.8 cd/m2, or 8 percent darker) showed the highest departure from the norm. In other places, the variation ranged from 2% to 7%, which is excellent. Consider the fact that individual units can vary in regularity and that there may be additional deviations beyond the points tested. However, we were pleased with our unit’s performance in this test. The contour map below depicts the variations in a visual manner. In comparison to lighter shades of gray, darker grays have a lower brightness, and as a result, deviate further from the center of the image.
The same 9 quadrants were used to evaluate color temperature (white point) deviations. DeltaE values are used to represent deviations from the D65 daylight white point target, with higher values indicating greater divergence from the target than lower ones. Below, a contour map depicts this, with darker colours indicating more deviance from the 6500K target temperature. Here, a DeltaE value greater than three indicates a considerable deviation that can be easily detected by the naked eye by the majority of users.
There were no substantial variances in this study’s outcomes, which was encouraging. However, inter-unit variation is to be expected in all elements of homogeneity. Furthermore, it is expected that there would be variations from the measured points. Visual shifts due to poor viewing angles can also be discerned with VA models of this type. We noted that the extreme edges of the screen appeared substantially cooler than the remainder of the screen when we viewed it from a regular viewing angle. Backlight homogeneity issues and a magnified effect due to a wide viewing angle are likely to be to blame for this.
Contrast in games and movies
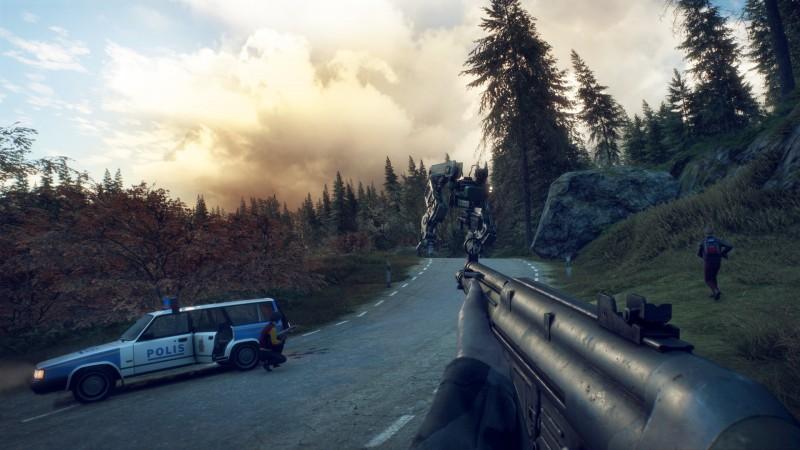
The overall contrast performance of Battlefield 1 (BF1) was excellent. Dark colors offered a lot of depth, and the bright colors interspersed throughout the design were very striking and stood out. Due to the screen surface, the lighter colours were slightly grainy, but there was no evident ‘layer’ of smeary graininess. The overall amount of detail in dark stuff was excellent. Because of the ‘black crush,’ some of the finer features were lost. Very dark (almost black) hues can appear darker than they really are on VA panels like the ones used here because of a phenomena known as perceived gamma. Observing the screen at a sharp enough angle or turning the shades towards the screen’s periphery rather than its center reveals some of the information that would otherwise be obscured. We were pleased to find that the level of “black crush” on this monitor was the lowest we’ve ever seen on a VA panel of this size. Lower down the screen, there was some ‘VA glow,’ which made black and other dark colours appear lighter. As far as we’re concerned, models with alternative panel types fall far short in terms of overall contrast and dark shade representation for the centre portion of the screen. Although the model’s ‘VA glow’ is a little greater than desirable.
Similar strengths and disadvantages were found in Dirt Rally. A lot of contrast may be tested in the nighttime stages thanks to the game engine used. In general, the depth of field offered by the monitor was excellent (with the exception of the area affected by ‘VA glow’). Car tyre tread patterns and wrinkles in interior materials were also clearly seen in the rendering. However, they are still clearly discernible even when viewed from the center of the screen. The moon in the sky and the headlights of other automobiles showed out brilliantly. There was a slight graininess to the screen this time around, but nothing that was bothersome or distracting.
We watched the new Star Wars: The Force Awakens Blu-ray to conclude our subjective assessment of contrast. High-contrast visuals abound in this title, with bright components juxtaposed against black backdrops. Explosions and light sabers, in particular, looked great on the display, which gave the scenes a proper sense of depth in the creepy darkness. A 16:9 letterbox format with black bars on top and bottom made ‘VA glow’ less noticeable in this title’s overall presentation. With this “VA shine,” other panel types simply don’t measure up to the CHG70 in this regard.
Lagom contrast tests
Using Lagom’s contrast tests, it is possible to identify specific shortcomings in contrast performance. The following findings came to light as a result of the research.
-
- Most of the time, the contrast gradients had identifiable brightness increments. However, the darkest blue ring was a little too easy to blend in.
-
- Overall, the black level testing went well. From a regular viewing position, the first three or four blocks faded into the background. In any case, if a monitor accurately matches the gamma curve of 2.2, the first two are likely to do so. If you looked at these blocks from a different angle, their visibility enhanced. ‘Black crush’, a common problem with VA panels, is to blame for this issue. The remaining blocks had unambiguous brightness gradations, with no evidence of dithering to be found. Another usual feature of VA panels is that the blocks take on an oil-slick appearance when you move your head, which has an almost glossy feel to it.
-
- The white saturation test showed good results. Checkerboard patterns were unique from the white background in every way possible. The final pattern was noticeable, albeit weak. Despite the graininess on the screen, most monitors would be unable to display it in any way that’s noticeable.
- No noticeable banding or dithering could be seen in the greyscale gradient, which was extremely smooth. For certain of the gradient’s shades, a very little amount of well-masked temporal dithering may be seen.
Colour reproduction
Colour gamut
This comparison shows the difference between the sRGB color space (green triangle) and the Samsung C27HG70’s (red triangle) color gamut (red triangle). This reveals the monitor’s natural color gamut, which is used in our ‘Test Settings.’ You can see from this diagram that the monitor provides 100% sRGB coverage, as well as a moderate expansion beyond this in the green and red sections. This boosts the monitor’s ability to display the full range of colors found in the sRGB color space. For the display, Samsung specifies a color space of 95 percent DCI-P3 (Digital Cinema Initiative standard). Based on our measurements and the fact that the Spyder5ELITE tends to under-report the gamut when it’s this wide, we have no reason to question this. In the near future, HDR-capable displays like this one should encompass 90% of the DCI-P3 gamut, but this one goes above and beyond. Even if Rec. 2020 has a much broader scope, current commercially viable backlights cannot support it. Rec. 2020 is the longer-term goal.
Color gamut is seen in the image below, which displays the monitor’s sRGB emulation mode in action. As a result, the sRGB color gamut is narrowed to just a sliver of under-coverage (98%) and a very limited extension beyond the sRGB reference area. This may provide more accurate shade reproduction at the sacrifice of vibrancy, but if you’re concerned about color accuracy, keep in mind the limitations of the VA panel’s color consistency, which are discussed elsewhere in the article.
Colour in games and movies
Colours on Battlefield 1 (BF1) were colorful and varied, with a considerable deal of ‘pop’. The landscapes had a really organic feel to them, with earthy browns and lush, rich greens. Some colors appeared a little more saturated than they should have. The sands of the desert had a reddish cast to them, rather than being more sand-like, while the vegetation’s more subdued greens were more striking than they should have been. More dynamic aspects in the game, such fires, sparks, and explosions, were rendered in brilliant yellows, reds, and orange hues. Because the monitor had an even broader color gamut (Adobe RGB+), it was free of the sort of oversaturation associated with watching content like this on a display with an even wider color spectrum. Typical of VA panels, there was a loss of saturation in the peripheral areas of the screen, which is connected with changes in perceived gamma as you move across the screen. The entire image was far from ‘washed out’, though, since most shades maintained good saturation even at the screen’s edges and bottom. In addition, this game includes an HDR option, which is supported by this monitor and enhances the accuracy of color mapping. Keeping vivid colors where they belong, but avoiding oversaturation in the more subdued ones. Later in the review, this is discussed in more detail.
On Dirt Rally, we noticed the same thing. Things appeared to be extremely vibrant, with only a slight loss of saturation toward the margins and the bottom of the screen. Once again, there was no cartoon-like oversaturation associated with wide gamut models. Greens ranged from deep and lush woodland greenery to more muted and dusty tones in other parts of the landscape. It was possible to see a few overly reddish browns here and there, but they weren’t overpowering (like on some of the tree trucks). Overall, the environments appeared to be authentic and believable. Neon pinks and colorful reds and greens were also shown on the monitor, as well as a variety of car liveries in bright colors. For vehicle liveries, for example, the relatively high saturation levels meant that some yellow colors appeared more golden-orange than intended while other oranges appeared slightly red. This is something that doesn’t happen if you increase saturation levels using software (like Nvidia’s Digital Vibrance or a saturation slider, for example): the shade variety was still extremely well maintained. Due to the fact that it only pushes colors closer to the color spectrum’s edge, rather than expanding the color range. However, on this monitor, colours have a fair “spacing” across the gamut, which means they can possibly be more saturated and aren’t squashed together in this manner.
Finally, we put Futurama: Into the Wild Green Yonder on Blu-ray to the test. As with most animations, this is a tough test of color consistency. As a result, vast swaths of individual shade cover the screen, emphasising differences in saturation levels, for example, Some colors lost a little bit of saturation at the bottom and the sides of the screen. We’ve seen nothing like this from a VA model of this scale, however, and the shades were as consistent as we’ve ever seen. Neon colors were vibrant on the monitor, while pastel colors appeared more subdued. While some of the colors were overly saturated, a wide range of tones was still present. Because of the limited viewing angles (which alter how gamma and saturation are perceived at various spots on the screen), small changes in hues like skin tones weren’t as prominent as they could have been. There was a gratifying amount of variation in the hues, yet they all preserved some of their unique characteristics.
Viewing angles
Colour consistency and viewing angle performance can be studied with the use of Lagom’s testing procedures for viewing angles. The following observations were made with eyes around 70cm from the screen in a normal viewing position.
-
- To begin with, the purple block seemed lilac in the center, with a pinkish cast toward the edges and the bottom.
-
- Towards the bottom of the screen, the red block appeared less saturated (with a more pinkish tone).
-
- There was some yellowing at the bottom of the green block, which was lime green all the way through.
-
- The color of the blue block was consistent throughout.
- For the most part, the Lagom typography appeared to be a combination of grey with a green tint to the striping. Green tint was strongest but still modest in the center of the screen, while red tint appeared in the periphery areas of the screen. There seems to be a correlation between head movement and a brighter centre green tint in the striping. In spite of this, there were no clear bursts of bright orange or green. This shows that the gamma curve of the monitor has a modest impact on the viewing angle, which is typical of a VA panel. As you can see in the image below, the camera’s tints to the text striping impacted the Lagom text’s appearance.
The Lagom text test, a mixed desktop background, and a dark desktop background are all shown in the following video from various vantage points. The contrast of the composite image is maintained pretty effectively until very steep angles are reached by the monitor. You’ll notice a decrease in contrast and a shift in color as you get further from the center. While there is no ‘color inversion’ vertically on a TN panel, there is still a noticeable difference. Towards the end of the video, you can clearly see the ‘VA glow,’ as described earlier in the review, which becomes more apparent at closer ranges of focus. When compared to, say, the Samsung C34F791, the ‘VA glow’ on this model is more obvious.
Interlace pattern artifacts
Interlacing patterns can be visible on some monitors during certain transitions, such as when light shades appear on the screen (muzzle flashes, explosions, etc.). Pixel inversion artifacts are another name for these. Some shades show as faint horizontal bands of a slightly brighter and slightly darker version of the original shade in static interlace patterns, as an alternative. While moving the monitor, we noticed a faint’mesh’ effect, in which some shades appeared to have a grid of small polygons in the backdrop. If the screen is situated at a suitable distance from the viewer, this won’t be a problem for most people. Some hues, particularly oranges and reds, appeared to have subtle static interlacing. For the sake of completeness, we’re listing these bands, which were so weak that most users would not have noticed them even if they were pointed out. Regardless of whether or not FreeSync is enabled, these issues persist.
Responsiveness
Input lag
Over 30 repeat readings of the C27HG70’s latency were taken using a simple utility called SMTT 2.0 and a sensitive camera. We were able to determine an input latency of 3.88ms (slightly over half a frame at 144Hz) by employing this technique. With the OSD’s Low Input Lag option enabled, this value was recorded. A FreeSync-compatible GPU with FreeSync activated in the OSD and a 60Hz panel resulted in a comparable observed value. Even though the “Low Input Lag” option is greyed out, enabling FreeSync actually activates it. However, in the changeable refresh rate and frame range context that FreeSync would operate in, we have no method to accurately quantify input lag. In an HDR context, we can’t measure the input latency with precision either, but just turning on ‘Local Dimming’ had no discernible impact on the value we measured. As you can see, the input lag is determined by both the elements you can “see” (pixel responsiveness) and the elements you can “feel” (the latency) (signal delay). An outstanding “connected” feeling was achieved because of a reduced signal latency, as we will see in the next section..
Perceived blur (pursuit photography)
Monitor responsiveness is one of the topics covered in our article on responsiveness. The concept of ‘perceived blur’ is one of the most essential ones discussed here, and it’s a combination of the monitor’s pixel responsiveness and your eye movement as you track movements on the screen. We’ll talk about a technique called ‘pursuit photography,’ in which a moving camera is used to take pictures of moving objects on a monitor in such a way that both the apparent blur and the movement itself can be seen. There’s more to this than just pixel-to-pixel reactivity.
The following photos were shot while the UFO Motion Test was running at 960 pixels per second to look for ghosts. This is a reasonable speed for obtaining such images, and it emphasizes both the perceived blur and the motion. Display refresh rate matches the frame rate of the UFOs as they move across the screen. The monitor was adjusted to 60Hz and all three background shade levels were used. At 60Hz, all but the ‘Standard’ response time setting could be tried. To offer an idea of how things should look in terms of pixel responsiveness in a 60Hz reference panel, the final image depicts the Dell S2417DG.
Xem thêm : SteelSeries Arctis 5 Review. Everything You Need To Know Update 07/2026
As you can see in the 60Hz photos above, the item seems blurry and fuzzy, indicating that the eye movement is responsible for the blur. A similar soft main image lacking clear detail may be seen in the reference image. Overshoot (inverse ghosting) is clearly apparent behind the object in the CHG70, and is particularly noticeable on dark and medium backgrounds, where it appears as a brilliant and colorful trail. pixel overdrive is to blame for this issue (grey to grey acceleration). All ‘Response Time’ parameters are taken into account in the figure below, which illustrates performance at 100Hz and 144Hz. The Dell S2417DG, AOC AG251FG, and Samsung C24FG70 are all included in the reference column.
At 100Hz, the amount of blur caused by eye movement is less than at 60Hz when using the ‘Standard’ response time preset. You can clearly see that the object has shrunk in size and focus. Pixel reaction times are slower than ideal in the dark background, leading to a noticeable lag. Only a very slight amount of overshoot may be seen in the softest backdrop. In fact, the C27HG70’s medium cyan backdrop (the middle row) seems remarkably similar to the S2417DG’s reference image. One can easily confuse the “Faster” and “Fastest” settings. The image now seems noticeably clearer, indicating a significant decrease in the amount of blur that can be perceived. Due to the ‘Impulsive Scanning’ strobe lighting feature, which will be explained in detail later, these response time values enable this mode. For dark and medium backgrounds, there is a notable amount of trailing behind the object that appears as a bold repetition of the object. This is because the pixel transitions are moving too slowly to keep up with the strobing at 100Hz. For the S2417DG reference shot, I used ULMB, an alternate strobe backlight mode that doesn’t yield the best results due to a small amount of overshoot. As a result of better pixel responsiveness, the object’s details appear a little sharper in this reference image.
Compared to the ‘Standard’ setting at lower refresh rates, the 144Hz ‘Standard’ preset sharpens the image even more. It also appears to be a tad more compact. Again, this is due to reduced eye movement, which reduces the perception of blur. Compared to 100 Hz, the following behind the item isn’t terrible, but it’s a little bolder for the medium and darker backgrounds. Pixel reaction times may have slowed down a bit, but this will be more significantly influenced by the fact that the pixel responses simply can’t keep up with the responsiveness needs of the increased frame rate and refresh rate. Slight variances in black-and-white contrast between the two settings can only be attributed to the camera’s settings and not to human perception. With the same reaction time settings, the image seems slightly crisper and has better details than with 100Hz. However, the ULMB reference shot has a better level of detail than this one. While the ‘Standard’ setting has less trailing, the fragmented nature associated with strobe backlight operation makes the trailing for the dark background particularly apparent, the trailing under the ‘Advanced’ setting is somewhat different.
We made observations at additional refresh rates, which were not included in this study. While the pixel response was comparable to that of 144Hz, the object appeared to be between 100Hz and 144HZ in terms of focus. The AOC AG322QCX, which uses a bigger model of the same panel, has a better 144Hz pixel response performance, which is worth comparing. Due to space constraints, we did not include it in the reference images. However, when selecting the ‘Weak’ response time setting on this Samsung, the performance is almost close to that of the AOC. With the exception of the AOC’s light background, which appeared to be somewhere between ‘Medium’ and ‘Strong’ (which is good). Using the ‘Medium’ option, the AOC appears to have a slightly better adjusted pixel overdrive. There is more control over the strobe backlight with this model’s “Response Time” feature, which Samsung does not. As a result of this, these TestUFO images only look at some of the transitions between pixels.
Responsiveness in games and movies
Our 144Hz monitor was clearly visible when playing Battlefield 1 at high frame rates (the higher the better, up to 144fps). There are two primary advantages to using a monitor, and this one included them both. Since a 60Hz panel only displays 60 frames per second, the gaming world felt significantly more responsive thanks to the higher refresh rate of the monitor. This was especially obvious while using the mouse, which helped with precision and gave us a “connected sense” while playing games.. In addition, because of the high refresh rate and high frame rate, the overall blur was reduced greatly. As you move across the game world, objects remain more sharply focused and detailed, making it easier to track and combat foes. Fast enough for an ideal or near-optimal performance, the pixel transitions made effective use of this refresh rate. A little powdery trailing might be seen in some of the more frequent transitions (between various’medium’ shade brightness levels) on this game. This was a very subtle blur, but it was enough to make things appear a little blurrier when they were moving quickly. Also, there were some semi-transparent (snail slime) traces here and there, but the trailing overrun was so subtle that it was difficult to discern any conspicuous brilliant or dirty-looking dark trails.
There were some noticeable pixel responsiveness issues with the VA panel, as is often the case with VA panels. With darker colours transitioning into lighter shades, the most significant of which occurred when darker shades were present in the backdrop. However, they can also be found on brighter maps in darker interiors or if dark metal items are juxtaposed against a bright sky on these maps. The transitions are more common in some titles (Mass Effect Andromeda being an example). In certain cases, you might see a longer “smeary” trail. Unlike some VA models, this did not appear to be smoke billowing from the object like we’ve observed on others, but it is something that certain people may notice and find bothersome. We also noticed some ‘break-up trailing’, whereby dark shades would have glimpses of a certain color, such as red or blue, that aren’t evident in the actual object. In contrast, the trail looked to split from the object as if wet fountain pen ink had been applied on paper. It is important to realize that these flaws would not be enough to annoy or divert all users. Even at 144Hz, the display still looks sharp and makes effective use of the panel’s high refresh rate. As a whole, we’d say it’s on par with AOC AG322QCX and ASUS XG32VQ for some transitions, a bit slower for others. However, the reduced trailing is made more contained and compact by the higher pixel density. The CHG70 has some issues with pixel responsiveness, as you can see in the segment of our video review below.
Due to our thorough review of BF1 above, we don’t have much to say about Dirt Rally. Again, the pixel transitions in this game were well-balanced. Furthermore, we found that the 144Hz refresh rate was helpful in decreasing the appearance of motion blur at high frame rates (although this was less true for us because we are keyboard newbies on this game). The flaws found in BF1 and TestUFO were still apparent, especially when driving in the dark. Some of the ‘powdery’ and’smeary’ with the ‘break-up’ trailing could be found. In the darkness of night, these flaws were clearly visible. Overshoot was also present, depending on the color of the sky (some courses had a purple tint to the sky). It’s not particularly vibrant or arresting, but it’s still there. We didn’t notice any of this lagging when racing, however it’s subjective and some users may find it annoying.
Additionally, we examined the pixel responses of our Blu-ray film titles, which are capped at 24 frames per second. At such low frame rates, fluidity and pixel reaction speed are constrained by the ‘broken up’ action. It’s possible to set the monitor to operate at 24Hz to eliminate judder when watching video like this. Alternatively, a multiple of frequency (such as 144Hz) will provide acceptable performance in this regard as well. Even at higher frame rates (such as 60 frames per second), you may see some of the weaker pixel transitions. The only time overshoot was a problem was while using the monitor at 60Hz, as we discussed in the FreeSync section and was also brought up by TestUFO.
FreeSync – the technology and activating it
FreeSync is an AMD-specific alternative to Nvidia G-SYNC, a variable refresh rate technology. There’s plenty of information on variable refresh rate technologies and their advantages in the papers referred to above, so we won’t go over it all again. The monitor’s refresh rate is dynamically adjusted to match the content’s frame rate wherever possible. Stuttering and tearing and juddering caused by refresh rate and frame rate incompatibilities can be avoided with this method (VSync on) or avoided (VSync off). FreeSync also claims to reduce latency while running in a variable frame rate environment compared to running with VSync enabled.
The Club3D Radeon R9 290 royalAce GPU we utilized in our testing was compatible with FreeSync. Currently supported GPUs may be found here, with the assumption that future AMD GPUs will be able to utilize the technology. ‘VESA Adaptive-Sync’ must also be supported by the display in order for FreeSync to be used on it. HDMI 1.4a+ and DP 1.2+ are both supported by the C27HG70. The display supports ‘FreeSync 2,’ which includes HDR support and a wide variety of variable refresh rates. ‘FreeSync’ needs to be set to either ‘Standard Engine’ or “Ultimate Engine” in the OSD. ‘Ultimate Engine’ has a wider range of variable refresh rates for FreeSync, which is the fundamental difference between the two. Samsung advises users to switch to the ‘Standard Engine’ if they notice any flickering when using the ‘Ultimate Engine’. ‘Ultimate Engine’ did not exhibit any flickering difficulties during our testing.
The display driver must also be properly configured when the OSD setting has been enabled. If a suitable GPU is connected to the monitor and the monitor is in its ‘FreeSync mode’, the technology should be activated automatically by the latest AMD drivers, which include Radeon Software Crimson. Open ‘AMD Radeon Settings’ and click on ‘Display’ to see if it’s working. The first slider, ‘AMD FreeSync,’ should be set to ‘On.’ If you hover over this, it will also reveal the display’s ability to support varied refresh rates. A separate monitor’s display is shown in the image below, but it is only for illustration purposes.
Installing the graphics driver from scratch may fix this problem for you if you followed these instructions and have an appropriate FreeSync GPU. Variable refresh rates of 48 to 144Hz are supported via the DisplayPort and HDMI inputs respectively, with a lower maximum of 100Hz via HDMI. This implies that if the game’s frame rate fluctuates between 48 and 144 frames per second, the monitor’s refresh rate will adjust accordingly. To maintain 144 Hz refresh rate, even when the frame rate is above 144 FPS, you can enable or disable VSync in the graphics driver, and the display will stay at 144Hz. In order to avoid the latency penalty associated with VSync, the frame rate cannot exceed 144fps when the option is enabled. As long as the GPU can deliver more than 144fps, ‘VSync off’ will allow the frame rate to soar as high as possible. AMD LFC (Low Framerate Compensation) is supported by this model when the ‘Ultimate Engine’ option is enabled. As a requirement of FreeSync 2, the refresh rate will stick to a multiple of the frame rate when things fall below the 48Hz (48fps) floor of operation. In order to reduce tearing and stuttering to a minimum, the monitor would be running at 64Hz, rather than 32Hz, while the game was running at 32Hz. Because LFC is always employed, regardless of VSync, the VSync option has no effect on performance over a certain point (144fps in this case).
‘Wait for Vertical Refresh’ is the setting name for VSync in the Radeon Settings menu under the ‘Gaming’ heading. Alternatively, you can adjust this for each game individually under ‘Global Settings’. In most games, VSync is turned off by default, and only activated if the game itself offers an option to do so, if such an option is available. Instead of simply ‘VSync,’ this setting may be referred to as’sync every frame.’
There are a few things to keep in mind. To begin, make sure the program is running in full screen mode rather than in a window (borderless or otherwise). You can see information about FreeSync on your monitor’s OSD when it is linked to a compatible GPU and that GPU’s OSD setting has been enabled. A ‘FreeSync 2’ logo is also displayed on the monitor. When a 3D application is running in fullscreen mode, FreeSync should be activated. However, this does not mean that it is now operational. You’ll notice that the refresh rate changes in real time if FreeSync is enabled and the frame rate varies. It’s a good sign that technology is at work. Remember that FreeSync only fixes judder and stutter caused by frame rate and refresh rate incompatibilities. It can’t make up for things like network latency or a lack of system RAM that might bog down a game’s performance.
FreeSync – the experience
With the C27HG70’s FreeSync capabilities, we tested a variety of games, such as Hitman, Star Wars Battlefront II and Call of Duty WW2. Due to a lack of differentiation between these games, we’ll be concentrating our efforts on one: Battlefield 1. (BF1). Even if we spend a lot of time playing it, this is a nice title to utilize because it has a wide range of visual options. FreeSync’s whole range of refresh rates and frame rates can be tested in this manner. We had to keep our graphics settings very low on our Radeon R9 290 in order to maintain high frame rates. As you approach 144 fps, the monitor’s responsiveness benefits may be fully appreciated. In terms of perceived blur and connectedness, there was a lot less of the latter. The frame rate fluctuated a lot, and it never stayed at the FreeSync maximum of 144 frames per second (144Hz). The frame rate and refresh rate will frequently be out of sync if FreeSync is not enabled. In certain cases, we see clear tearing and juddering with VSync disabled, or obvious stuttering with VSync enabled. Using FreeSync, there were no hiccups in the game’s performance.
For example, as the frame rate approached 100fps, the blur became more apparent and the “connected sensation” diminished. In all cases, though, we felt that the experience was still quite strong. Regardless of whether or not you use FreeSync, frame rates are always superior when it comes to gaming. But with the technology enabled, these decreases in frame rate are much less unpleasant. That being said, increasing our graphics settings made the frame rate drop even lower, and we began to see that the monitor’s potential was being wasted. Low frame rates, even with FreeSync enabled, were uncomfortably slow for us because of the inverse relationship between frame rate and connectedness.
As the frame rate decreased, we noticed increasingly noticeable and even “in your face” pixel responsiveness variations. When it comes to adjusting pixel overdrive to a wide variety of refresh rates, we find FreeSync devices to be weaker than G-SYNC models. Even with the use of ‘FreeSync 2’ here, it appears that the tendency has not changed. We noticed some visible overshoot and bright trailing at frame rates lower than roughly 80fps. It may not annoy everyone, and it isn’t as extreme as we’ve seen on certain models, but it is something that simply wasn’t there at substantially higher frame rates. To demonstrate this, we’ve included a video of the monitor’s LFC (Low Frame Rate Compensation) feature in action in the following section of our video review. When the frame rate dips below 45 fps, the monitor’s refresh rate is based on multiples of the frame rate.
Impulsive Scanning (strobe backlight)
Impulsive Scanning, which is activated by changing the display’s response time to either “Faster” or “Fastest,” is a backlight feature on this monitor. This causes the illumination to flash on and off at a frequency that matches the refresh rate of the monitor, decreasing eye movement and thereby lowering apparent blur. Using the UFO Motion Test for Ghostly Pursuit Photos, you can see the visual advantage of this in terms of blur reduction. 100Hz, 120Hz and 144hz are all options for activating this feature. You can’t utilize FreeSync and strobe lighting technology like this at the same time. You don’t have to worry about it working with AMD or Nvidia GPUs because it is a Samsung feature (called ‘ULMB’).
Activating this function causes the screen to flicker in rhythm with the refresh rate, just like a CRT monitor would on a retro computer monitor. Some people find flashing annoying, while others find it innocuous (particularly at 100Hz). As previously indicated, the brightness control is disabled, however the ‘Contrast’ setting allows you to reduce brightness while maintaining contrast. With this setting enabled, the monitor looks to be a lot brighter. This feature was used to test a wide variety of games, but as is customary, we’ve chosen to focus on just one to avoid duplicating our efforts. That game will be Battlefield 1 (BF1), which has been extensively tested to evaluate the CHG70’s performance to this point in the evaluation. The ‘Faster’ and ‘Fastest’ settings didn’t make any noticeable difference to us, thus this subjective testing can be used to either option.
It’s just like we saw with TestUFO, the blur is greatly reduced with this setting on. Despite the game’s quick speed, the characters, objects, and surroundings all maintain their high levels of clarity and detail. For example, if you’re in a car, you can swiftly round a corner, or if you’re on foot, you can move your mouse quickly. The frame rate must perfectly match the refresh rate in order for the mode to work effectively, which is more of an issue for graphically demanding games like this (depending on settings and hardware). Stuttering and juddering are more obvious when using the strobe lighting option since there is less motion blur to hide them.
As a result, while there was a significant reduction of overall perceived blur, the performance was not exceptionally ‘clean. There was some overshoot, as shown in TestUFO. Semi-transparent resemblances of the object were seen behind the actual thing. Most of the transitional shades seemed grayed-down versions of the original colors, which made them less noticeable than the primary object. Occasionally, the overshoot might be more colorful (purple). The strobe backlight function causes the tail to be fractured. To add insult to injury, some of the pixel transitions were sluggish enough to produce a “smear” like what is seen when using strobe illumination. These flaws were present irrespective of the refresh rate, although the distance between the object and the fragmented trails grew when the refresh rate was dropped (to as low as 100Hz). As a result, the jumbled trailing became more apparent.
When the strobe lighting is turned on, many monitors (including this one) display indicators of weakness (especially overshoot). This is not unusual. These flaws were noticeable when compared to other monitors that utilise this technology, including the C24FG70. Nevertheless. Strobe backlighting may provide some drawbacks for some users, but the benefits in terms of perceived blur reduction will outweigh these drawbacks for others. Flickering, the absence of FreeSync, the absence of HDR, the locked brightness, overshoot, and the requirement that the frame rate equal the refresh rate are all things that other people could find limiting.
HDR (High Dynamic Range)
Using HDR (High Dynamic Range) as a term for monitors, it refers to the capacity to display both extremely black and extremely bright shades at the same time. A wide range of colours must also be shown, from the most subdued to the most flamboyant. The ideal monitor would have a backlight with hundreds or perhaps thousands of dimming zones, known as FALD (Full Array Local Dimming). It would be even better if it used a light source for each pixel (like OLED technology). By decreasing the illumination for dark material and increasing it for brighter content, the monitor would be able to display images that contain complex combinations of bright and dark content. HDR monitors’ ultimate purpose is to provide a wide color gamut (Rec. 2020). The UHD Alliance has recommended a more realistic short-term goal of 90% DCI-P3 coverage (a Digital Cinema Initiatives standard colour space). HDR content requires a display with at least 10-bits per channel for color processing, which provides the necessary precision for HDR material to be properly mapped.
We’ve already discussed how some HDR systems essentially respond to HDR content in the same way as a Dynamic Contrast option on a normal display.. Fake High Dynamic Range (HDR) photography. Control the backlight as a single unit, with a maximum luminance that falls short of the DCI-P3 color space. A Windows feature dubbed “HDR and enhanced color” should be avoided by Windows 10 users who have the ‘Creator’s update’. ‘Display settings’ (right-click the desktop) may have this option activated by default, just in case you forgot. You might think the monitor is broken if everything appears to be overflowing on the desktop. As long as you’re using an HDR-capable display, this function will automatically switch to HDR mode for any fullscreen applications that support HDR regardless of whether or not this feature is active. The graphic below depicts this switch in action.
On the PC, HDR software support varies widely, as we’ve previously noted. Mass Effect Andromeda is an example of a game that doesn’t support it at all, while Mass Effect Andromeda is another. The Samsung C27HG70 is compatible with HDR material from both AMD and Nvidia GPUs. Due to previous HDMI and DP revisions being used, we had to use our Nvidia GTX 1070 to test the feature because our AMD Radeon R9 290 didn’t support HDR. There is no FALD backlight solution or comparable in this model, although the illumination may be dimmed in several zones. ‘Local Dimming’ must be turned on or automatically turned on in the OSD’s “System” section. Although Samsung hasn’t explicitly said how many dimming zones the backlight has, our testing and that of others leads us to believe there are at least eight. It’s possible that some of these regions could be blazingly bright while others will be pitch-black (or in between). The maximum luminance with ‘Local Dimming’ activated is little over 600 cd/m2, which is higher than the display’s normal maximum luminance. Backlight zones never dim properly if the functionality is enabled when you are viewing SDR (‘standard’) content. Zones become more responsive and dim to lower levels in HDR, which is a good thing!
So, how does this actually work? The image below, taken from Battlefield 1 using HDR10 (the current PC standard for HDR), demonstrates how the HDR functionality of the monitor enhanced this type of scene. This is only to set the stage and get your creative juices flowing; it is not represent the scene as seen through the CHG70’s perspective. Also keep in mind that we examined a few other HDR-enabled games, including Hitman, which we found to be extremely stunning. This section will be brevity-focused by using Battlefield 1 as our sole example. For HDR testing, we used our Nvidia GTX 1070 connected via DP.
When using only a few dimming zones, we noticed that the changes in brightness between them were smooth and not abrupt in the way that they would be with a higher number of dimming zones. With HDR enabled, the monitor’s ‘100’ brightness output remained noticeably darker than in the darkest portions of the image. Small details on rocks could be seen more clearly than they would have been if HDR had been disabled, which would have resulted in an overpowering backlight. The stars should appear as bright as pinpricks in the sky, and the sky itself should appear somewhat deep in ideal circumstances. What happened was that it would have required a lot more dimming zones to simulate effectively—ideally per-pixel lighting. This isn’t how things worked out.” The monitor, based on the average luminance in those areas, compensates for this. In some respects, staring at it in a darkened room was like staring at the real moon: dazzling and almost retina-piercing. Contrastingly, the character’s right side was covered with black boulders that covered a different fading zone. Lowering the brightness will lessen the penetrating effect of bright components such as the moon. Just to get the full effect, we used ‘100’. If you’re gaming in a dark environment, we don’t advocate turning up the brightness that high unless you’re looking for a really dazzling effect. Most of our testing was done with some amount of ambient light in the room.
Even more impressive than these situational gains was our inability to recognize that the lighting had been divided into zones. Not to mention that it was constantly altering their brightness. In our opinion, traditional Dynamic Contrast modes, in which the entire screen reacts, are highly obtrusive while providing little to no value to the user. This approach appeared to be seamlessly integrated into the overall experience without having any distracting side effects. That said, we’re sure that not everyone will agree with this evaluation, but we do appreciate the addition of even 8 dimming zones. And if you don’t want to use them, you can just disable the ‘Local Dimming’ function in the OSD and turn them off.
Even if ‘Local Dimming’ is turned off, there are still advantages. Precision of 10-bits per channel made it easier to distinguish between bright and dark hues that were almost identical. As long as the monitor can handle this bit depth, HDR can make advantage of it at the software level. As a result, its wide color range can be more accurately mapped with this bit depth. Please see the image below for a quick reminder of our ‘Test Settings’ native color gamut. Due to the limitations of the Spyder5ELITE sensor, it appears to be under-represented in this diagram. In terms of DCI-P3 coverage, the monitor has a 95 percent rating, which is higher than the 90 percent standard set by the UHD Alliance.
The monitor can offer a 10-bit subpixel gamut, so keep that in mind. The gamut results to some oversaturation with regular SDR content, as we’ve seen in the review’s “Colour Reproduction” section. HDR content, such as BF1 with HDR10 activated, provides a more accurate representation of the shade saturation in the environment. Instead of being too brilliant or saturated, the greens of plants appear more natural, with more muted hues appearing more dusty and ‘pastel.’ Excellent variety is maintained, and where appropriate, there are many luscious hues with some that are significantly deeper than the sRGB color space would represent. In addition, there is a more realistic depiction of khaki colors. The desert sands have lost their little excessive reddish hue as well; it is still there where the devs intend, but it isn’t as broad or vivid as before. Strong saturation and outstanding vibrancy remain where they’re needed. Flames’ orange, red, and yellow hues, as well as the bright reds of poppy flowers, are two examples of this.
As a whole, we found the CHG70 to be a great HDR display, and we think it handled the content well. Because of the lack of dimming zones and a reasonable but not extreme color range, it wasn’t quite as immersive as you might expect. The’real HDR’ it displayed was far superior to the ‘fake HDR’ used by some monitors, and it offered us a taste of what HDR material will look like in the future. With more widespread support in both software and hardware, it’s a trend we believe manufacturers will continue to promote. Gamers will benefit greatly from this.
The 27″ 2560 x 1440 curved experience
Curved displays of varying sizes and steepness of curvature have been tried by our team to see what the curve adds to the user experience. The 27-inch screen of the C27HG70 boasts a 2560 x 1440 (WQHD) resolution and an 1800R curve. The advantages of this resolution above Full HD (1920 x 1080) are well-known to most users. A good but not excessive pixel density and clarity in games, movies, photos, and text is provided by this screen size, making it an excellent choice for most people. Without having to first seek for the Windows scaling slider. They get a little nervous when they think about the curve, especially if it’s 1800R (which is a lot steeper than previous models, which were around 3000R to 4000R). They expect things to appear twisted, strange, and downright incorrect. Images of screens, where the curvature may be seen as a key aspect, might sometimes reinforce these preconceived assumptions.
Similar thoughts crossed our minds when we first started using curved monitors at our desks. The 1800R curve on the 27″ CFG70 is a very modest addition that is very easy to adapt to. For Samsung, the curve’s viewing comfort is a significant selling point, and the company may reference research to back this up. To ensure a more consistent viewing experience, the screen’s outer edges have been pushed closer to the user’s eyes. Our eyes, on the other hand, are curved instead of flat. If you’re looking for a monitor that’s easy to use, this one is definitely up there. As a visual aid, the photos below tend to exaggerate the curve. With the WQHD in action, you’ll get a lot of valuable desktop “real-estate,” as well. Compared with the 31.5″ version, we appreciate the clarity of this model’s finer pixel density (108.79 PPI – Pixels Per Inch) (93.24 PPI). We can understand the appeal of the 31.5″ screen, but it’s a matter of personal preference.
In terms of gaming, the curve added an extra layer of complexity. It’s difficult to define and, like I said, very subtle, but it serves to further immerse you in the game’s world. Wider screens, especially UltraWides with a similar or steeper curvature, have a more pronounced influence, but this is more subtle. Even so, it’s still a part of you. Additionally, the more uniform viewing distances at various spots on the screen and the decreased amount of eye movement necessary to scan the screen’s periphery regions are both considered advantages. The photographs shown below are for illustration purposes only and tend to exaggerate the curve a little bit.
Interpolation and upscaling
The native 2560 x 1440 (WQHD) resolution isn’t going to be used by everyone all the time. Some systems, such as gaming consoles, may not be able to display the required resolution. Another possibility is that games and other resource-intensive apps don’t work well on it. An interpolation procedure is used when the monitor resolution is reduced to 1920 x 1080 (Full HD or “1080p”). You must have an HDMI connection and a 60Hz refresh rate to use this method, as there is no scaling capabilities on the monitor itself for higher refresh rates or via DP. HDMI interpolation should be handled by the monitor, not the GPU, for best results. When gaming with an AMD GPU, the monitor handles this for you by default. Users of Nvidia graphics cards should go to ‘Display – Adjust desktop size and position’ in the Nvidia Control Panel. If they want to avoid any scaling, they should pick “No Scaling” and “Perform scaling on:” should be set to “Display”.
When compared to a native Full HD display of the same size, the interpolation method gives the image a softer look. There is a loss of finer texture detail, and edges appear softer and less defined when viewed from a great distance. However, it’s not as bad as we’ve seen on other models because the images don’t appear to be soft-focus filtered. OSD sharpness can be increased to a value of ’64’ by some users if they so want. In our opinion, this results in an artificially crisp (but still lacking definition) image, but it’s a matter of personal taste. Interpolation mode is fine if you need to utilize it (on a non-UHD games console perhaps), especially if you’re sitting back from the screen so that the faults are less noticeable.
A video streamed over the internet or from a Blu-ray disc is upscaling to 1920 x 1080 if you’re using movie software to watch it on your 2560 x 1440 monitor, as normal. Unlike when watching Full HD content on an actual Full HD monitor, there is some image softening, but it isn’t drastic and shouldn’t disturb most people.
FAQS:
Is Samsung 27 inch monitor good?
Even though it lacks some of the features of the best gaming monitors on the market, the Samsung CHG70 27-Inch Curved Monitor has a lot going for it—enough to win it an Editors’ Choice. Even better, it may also be used as a high-quality video display.
Does Samsung CHG70 have speakers?
Even though the monitor has two built-in 3.5 mm audio connectors, it doesn’t have any built-in speakers, so you’ll need to use headphones or a gaming headset to connect to the display.
Does Samsung CHG70 support G Sync?
In addition to the 48-144 Hz/FPS range, the Samsung C32HG70 VRR works with compatible NVIDIA GPUs (GTX 10-series or newer). FreeSync/G-SYNC, on the other hand, can cause some users to suffer a flickering brightness.
How About Its Gaming Chops?
A 120Hz or 60Hz refresh rate can be set in the on-screen settings to limit the CHG70’s 144Hz native refresh rate, which can only be achieved via a DisplayPort connection. As an alternative to a strict refresh limit, the CHG70’s adaptive sync feature, AMD’s FreeSync 2, can help reduce screen tearing while gaming.
HDR content is better supported by this new version of FreeSync than the original. Allows for changeable frame rates between 48 and 144Hz through DisplayPort and 48 to 100 over HDMI with FreeSync 2. AMD’s Low Framerate Compensation technology is also supported by the CHG70, ensuring a fluid gaming experience even at frame rates lower than 48Hz. FreeSync 2 can only be used on PCs with AMD graphics cards that support it. Only a limited segment of consumers will care about AMD’s FreeSync-capable Radeon cards, given their current market share of only a small portion of the overall market.
As measured with a Leo Bodnar Lag Tester, the panel’s gray-to-gray response time is rated at 1 millisecond, and its input lag was measured at 11.7 milliseconds, which isn’t much longer than the BenQ SW2700PT, which is still our top pick.
With HDR enabled in Hitman (2016), Shadow of the Tomb Raider, and Far Cry 5, I put the CHG70 to the test in various scenes and benchmark sessions. Playing games on this monitor is a joy. There were no noticeable glitches in the visuals; the colors were vibrant and the contrast was good even in the darker parts.
Conclusion:
As a gaming monitor, the C27HG70 from Samsung is one of the best you can get for your money.
A curved screen, 1440p, 144Hz, an excellent reaction time for a VA panel, reliable color accuracy and contrast, HDR support, and a highly adjustable stand make it appear to have it all at first glance.
When it comes to buying a new monitor, these are all things that gamers tend to prioritize, and they’re not that pricey either.
In addition to the poor viewing angles and inconsistent blacks that we’ve already established, this could be a problem for a large number of viewers.
A little clouding here and there, but nothing that can’t be dealt with, and there’s a degree of luck involved, for better or for worse.
In our opinion, the good exceeds the negative when it comes to the Samsung C27HG70, which is why it remains on our list of the best monitors of 2022. So, if you don’t like this particular model, there’s a good chance you’ll be able to find a different one.
Nguồn: https://gemaga.com
Danh mục: Review