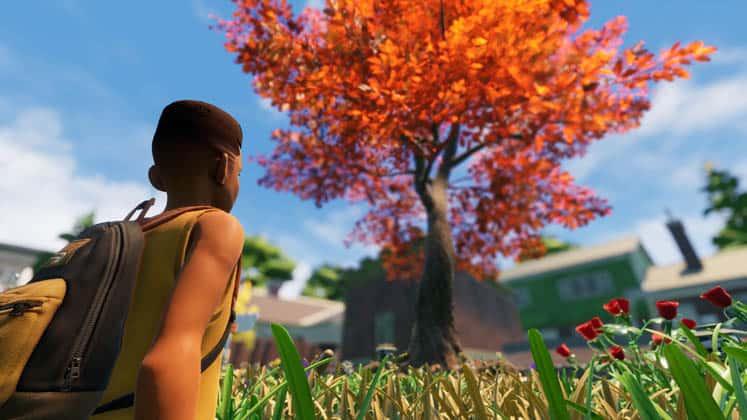
There is no doubt Animal Crossing: New Horizons has been a smash hit on the Nintendo Switch and its successor, the Nintendo DSi. It’s possible that you’ve already played it.
In any case, it’s possible that you’ve only recently acquired it, or that you have plans to do so in the very near future. Please read on for some helpful advice for newbies. Following the initial loading of the great game, here are ten pointers to get you started on your island. Enjoy.
Bạn đang xem: Animal Crossing: New Horizons Guide – Special Tips and Tricks Update 07/2026
Choose your starting map wisely
There are four randomly generated islands to choose from when you initially start Animal Crossing: New Horizons. However, if you don’t like the look of any of them, you can quit the game, restart and see if there are different options on offer.
You should pick a place that has at least one vast open space near the sea and is bordered by a river because you won’t be able to go to everywhere when you first start off.
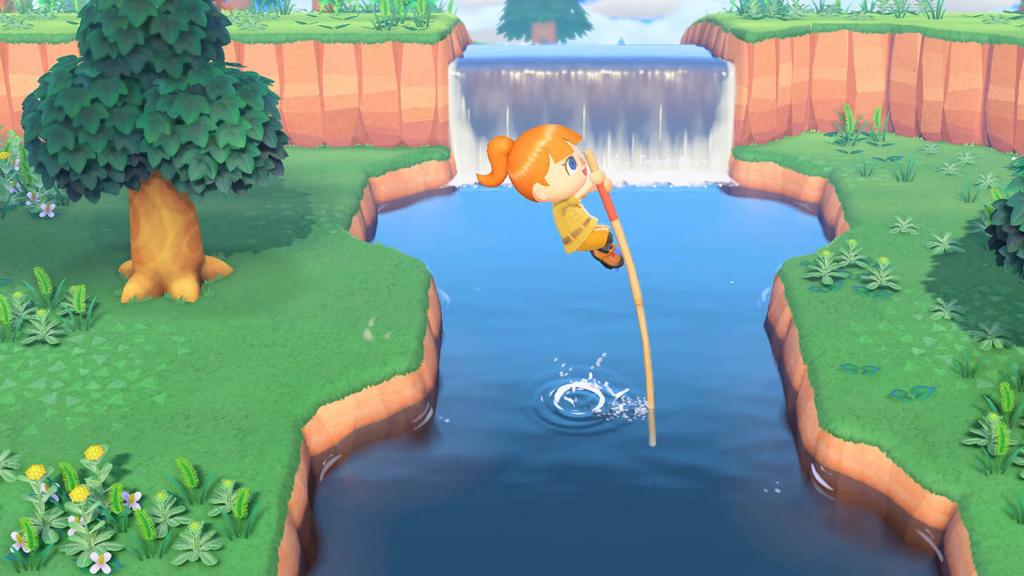
Crafting a vaulting pole and a ladder will be necessary to cross rivers and reach higher ground. You won’t be able to get your hands on the latter for some time.
Aside from that, choose an island based on its appearance. For those who plan on using the same Nintendo Switch as a family to play, they should have a say as well, as they will be stuck with the same area, even though multiple people can settle there.
It’s okay if, after some exploration, you don’t like the island layout, but if you don’t like it, you may go back and change it before the training missions are completed. Tents should be well-spaced.
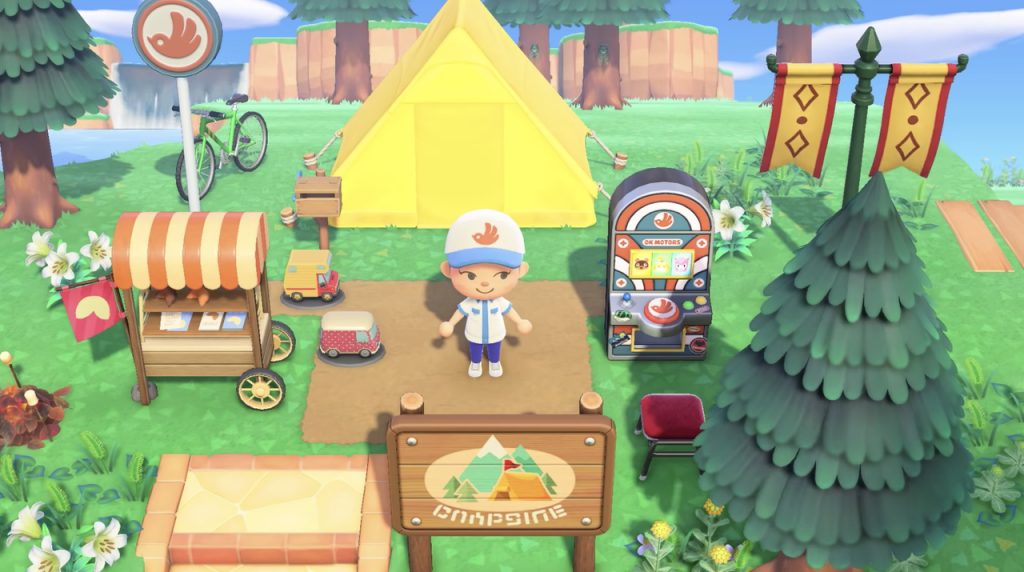
Once you’ve made it to your island, Tom Nook will hand you over a tent and some basic supplies, and it’s up to you to find a location to put them. Make sure you have enough room to grow your tent into a house and garden after you’re done with camping.
In the next step, you’ll be required to locate land for a couple of your neighbors. Where to put Nook’s Cranny shop, the museum, and the visitor center later on. Try to envision how each plot will look when it is larger than a tent when placing them.
Make sure that the museum tent is not placed immediately in front of your house. From a straight on isometric view, it will be one of the tallest structures in the city when completed.
You don’t need to find a natural clearing to set up any of the initial tents or buildings. You’ll be able to clear the route by chopping down trees that are in your way once you’ve mastered the art of making a solid (and not fragile) axe.
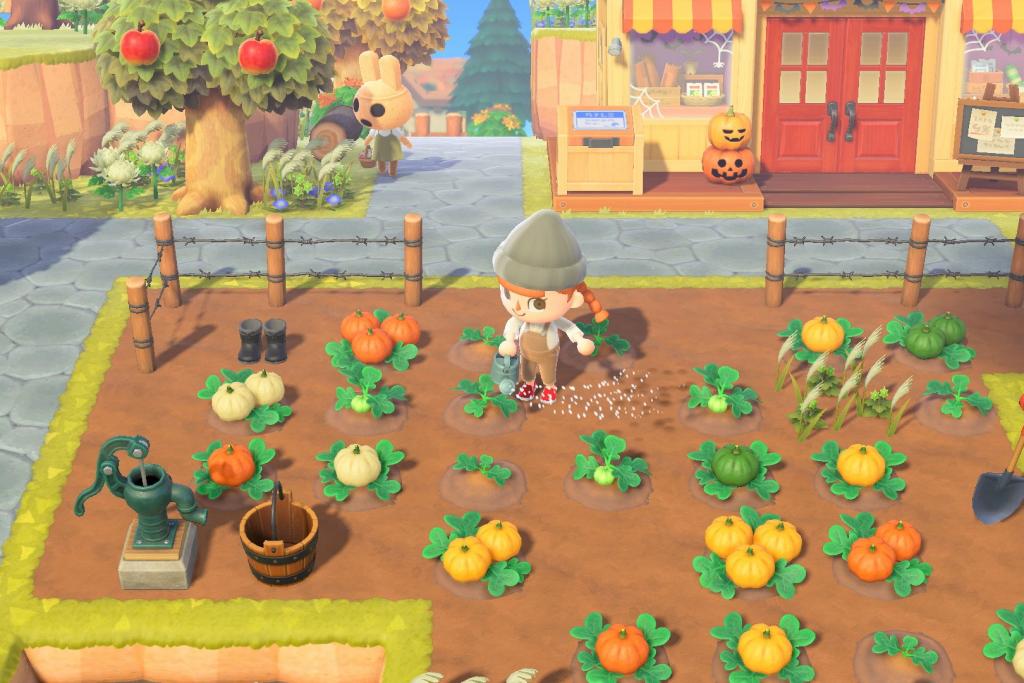
Collect everything, new resources appear daily
Animal Crossing: New Horizons’ first objective is to repay a borrowed tent and moving expenses. For every activity that you take on the island, you are rewarded with a new currency called Nook Miles. The NookPhone’s Nook Miles sheets can be filled in even by plucking weeds, so you shouldn’t have a problem.
However, once you’ve paid back the initial loan, you’ll be required to make a much larger payment to purchase your first residence (and other, gradually more expensive amounts for each further step up the property ladder). In addition, future loans must be repaid in Bells instead of Nook Miles.
However, everything on the island has monetary value, and Timmy and Tommy Nook will gladly pay you for anything you bring them. They’ll buy it, no matter what it is.
The quickest approach to generate money is to keep track of what customers are willing to spend the most for, and then look for those goods more frequently. You’ll never be short on money, though, because they’ll buy weeds, pears, and other seasonal produce.
Donate every unique item, sell everything else
Keep every fossil or original bug or fish that you catch in mind when shopping for products to sell. Museum blathers won’t pay you for your blathers, but they’ll look fantastic in the museum’s collection.
They need to be handed over to Tom Nook as soon as he lands on the island.
You’ll see jagged crosses on the ground showing the location of fossil holes once a day (about four on your island) and just a few turn out to be doubles in the beginning. They’re not all that common, but when they are, they can raise a lot of money – or look great on your mantelpiece.
Keeping items for crafting is the only other exception to selling them. There are three types of wood, as well as sticks, stones, iron nuggets, clay, and other island materials that may not be necessary for the first few DIY recipes, but they may become important later on.
One piece of advice: don’t sell anything made of iron or clay. Few days in, they become increasingly difficult to locate and necessary in large quantities.
Manage your “pockets” inventory wisely
There are plenty of inventory slots in your “pockets” at the beginning of New Horizons because there are just a few tools available to you. However, as your crafting talents develop, you’ll find that they increase. If you ever travel to other islands, make sure you have enough vacant spaces to accommodate whatever you find there.
Fortunately, dropped objects around your island will remain there permanently, so you can always pick them up later — even if it’s on a completely other day.
When you move from a tent to a house, you gain access to a place to store all of your belongings.
Look for guest visitors and listen out for surprise packages
Additionally, you may come across some visitors who may give you easy fetch quests in addition to Nook, his nephews, and a few other residents.
If you look for these often (some occur more than once), you’ll always find useful things for your home or wardrobe.
Also, make an effort to interact with your neighbors on a regular basis. They may have something for you as well.
It’s not uncommon to see multiple shipments come in one day. A whooshing wind sound indicates the presence of a present box attached to a balloon, so keep an ear out for it. To send the cargo plummeting to the ground, you’ll need a slingshot.
Don’t pop the balloon over water, just to be safe. Your package will be lost, but you will receive Nook Miles as compensation.
Visit other islands using Nook Miles
Despite your best efforts, some resources remain elusive on your own island, no matter how long you search. However, if you like, you can search for stuff on other randomly produced islands.
The only thing you need to do is head to the airport and exchange 2,000 Nook Miles for a ticket. Using the Miles ticket, you can request to be transported to another island, where you can obtain additional resources that you would otherwise be unable to obtain on your own (though it is likely to have a different size and layout).
A rudimentary crafting station is available in case you lose all of your tools. However, we do recommend cleaning your pockets of unnecessary items before embarking on a trip, as you’ll want to fill them with new insects or fish.
Remember to collect a variety of fruits from the nearby trees since they may be different from the ones you were given at the beginning of your adventure.
Keeping this in mind, you should make sure you don’t forget anything crucial before you leave the island.
Plant fruit you find or receive
So, if feasible, harvest as much fruit in other islands so that you can use it to develop certain trees on your own.
If you want to have a tropical beach, you can plant coconut-laden palm trees. Plant one of the fruits you collected, and in three to five days, a new tree will have sprung, bearing the same fruit as the one you brought back.
If you wish to have more fruit trees across the island, you can always harvest from the newly planted trees and transplant the seeds.
Don’t leave any stone unturned and eat fruit to become more powerful
Even in the strangest of locales, resources and creepy crawlies can be found The centipedes, for example, will only show up if you hit a rock with your axe..
Moreover, you may be startled by what you catch on your line. A shoe or tin can, for example.
Xem thêm : How To Fix Steam Download Stopping? Effective Ways Update 07/2026
Animal Crossing: New Leaf allows players to build using even the most trashy materials, unlike prior games. Do not discard anything.
Watch out for spiders and wasps
Final advice: don’t expect your island to be completely kid-friendly. Shaking too many trees could result in a wasps nest being loosened, resulting in a painful sting and the need for immediate medical attention.
Also, tarantulas crawling around at night may entertain you, only to surprise you by lunging at you and delivering a terrible shock.
This is a gaming phone that has been built from the ground up to provide the greatest possible performance.
That’s all I have time for right now. Our helpful ideas above are simply the tip of the iceberg; there is still enough for you to explore for yourself in Animal Crossing: New Horizons. It’s possible that they’ll help you out at the beginning. The rest is up to you..
What to focus on first
Animal Crossing: New Horizons can be intimidating when you first start playing. You have nothing and yet desire everything at the same time. How do you decide which portions of your island to focus on first?
Here is a list of things you should focus on, in the order in which you should focus on them, after you have completed the tutorial:
- Pay Tom Nook your first debt. Selling fish, bugs, and shells is a simple way to get started. Many of the game’s features are unlocked once you leave your little tent.
- The Museum can be unlocked. Additionally, the Vaulting Pole and several other features become available as a result of completing this quest. By providing fish and bugs until Blathers shows up, and then to Blathers until he has built a Museum, you will receive this item
- Interact with the creatures of other abandoned islands. As soon as possible, invite them to join you on your island and live there permanently. You’ll need this to get access to more town features.
- When Tom Nook tells you to, hand in the materials needed to build Nook’s Cranny. To find iron ore early on, you may want to explore abandoned islands and hit rocks there.
- What you choose to focus on after that is entirely up to you. To keep your town growing, be careful to set up your new residents’ homes as soon as possible. The Stalk Market and collecting fish and bugs for Bells are good options if you desire a bigger dwelling. Explore more DIY recipes if you want to get creative. As soon as Nook’s Cranny is built, the game expands tremendously!
Get the tool wheel and better tools quickly
The tool wheel and the recipes for better quality tools are two quality-of-life boosts that you should receive within the first several days of playing.
Tom Nook’s tent contains a kiosk where you may buy both with Nook Miles. For 800 Nook Miles, you can purchase a Tool Wheel. Using the “up” button on the D-Pad, you may quickly switch between different tools by pressing the “up” button. Simply going to your inventory to get your ax is a tedious and time-consuming process.
The kiosk is where you’ll find the second. As a result, you’ll be able to make a better shovel, fishing pole, axe and net with the Pretty Good Tools Recipes improvement. Flimsy versions of these must be made first, and then upgraded with more materials to create the more robust models If you can, make your own whenever possible because they are significantly less likely to break.
Visit other islands often
Whatever your long-term ambitions are in the game, you’ll want to visit other uninhabited islands with Nook Miles tickets frequently.
Because of this, there are a number of causes. There are a few reasons why you’ll want to do this as soon as possible, but the most important is that this is the only method to gain access to a few more animal villagers. Invite them to join you on your island by speaking to them twice around campfires on uninhabited islands.
It’s also abundant in raw resources, including wood, stone, and even weeds. In the beginning, you’ll need more of these minerals than your island can supply, so you’ll want to make sure you visit other islands and collect what you can.
Finally, visiting one of these islands is a convenient way to bring in non-native fruits and flowers. It’s easy to plant new trees on desolate islands if you bring back fruits that you don’t have at home. You’ll want to grow a lot of these fruits because they’ll command a much higher price when sold than your local fruit.
Play with friends
Rather than offering advice, I’d like to make the proposal that you play with a group of pals. Look for communities on social media if you don’t have any friends who play Animal Crossing.
In order to gain Nook Miles, you can play with people, find new furniture and DIY recipes and go shopping and collect fresh fruits, as well as locate more raw materials and inspiration from other town designs. Using New Horizons’ online features and Nintendo Online App integration makes it easier than ever to play the game. Try it out!
Fish and hunt bugs for Bells
Make sure you’re fishing and looking for bugs and fossils on a regular basis to earn Bells. The basic materials you’ll need for your own DIY projects and other milestones should not be sold.
If you find more than one specimen of a species, it’s best to donate the first one to the Museum, but after that, you can sell the rest. Some rare species, such as the Oarfish and Tarantulas, will be particularly valuable upon the game’s launch.
The availability of fish and bugs is affected by factors such as the time of day, season, and weather. Changes in these variables affect what’s on the market. Take advantage of the island’s diversity by hunting wildlife in a variety of weather and time zones.
In addition to this, fishing in the rain gives you a chance to catch the rarest of all fish, the Coelacanth. All the best!
Canvas your island for materials daily
There’s a good chance you’re playing Animal Crossing: New Horizons on a daily basis (though that’s fine too). Creating a daily pattern of “chores” across your island is an important part of this game’s flow. And one of those responsibilities should be the gathering of resources.
Water your flowers and weeds daily if you want to create hybrid varieties from the wood you take from trees. You should gather these resources every day, even if you aren’t currently striving to attain a specific goal or produce a specific DIY recipe.
Doing numerous jobs will quickly deplete resources like Wood and Iron Ore. To ensure you’ll have plenty when you need it, harvest daily and store what you don’t use in your house’s storage room.
Engage with everything
You may have a hard time accumulating Nook Miles at first. Animal Crossing games have long been known for requiring players to focus on only a few aspects of the experience; in the past, this might have meant only hunting bugs or decorating your home.
Many different tasks are rewarded in New Horizons, which makes the game more enjoyable. The best way to catch up on your Nook Miles is to look at the game and consider what you haven’t done recently. Is there a friend’s island you’ve yet to visit? Alternatively, what if you sent cards to other creatures? Is there anything else you’d like to add? Take a few of those, please. Conduct you like to decorate or do your own home improvement projects?
A good rule of thumb is to check your Nook phone to see what hobbies you haven’t done in a while, then try one of those. If you participate, there’s a good chance you’ll get something in return rather shortly.
How to time travel (and why you probably don’t need to)
If you’re looking for an easygoing Animal Crossing: New Horizons experience, this is the game for you. You’ll ultimately hit a point when the things you’re doing aren’t worth as much as they used to be. If you prefer, you can do so without any problem at all. There will be something new to see tomorrow.
It’s possible to “time-travel” in order to skip days and achieve milestones (such unlocking stores and houses, refreshing resources, etc.) faster if you insist on doing so.
If you want to have a good time, don’t do this! It’s fine if you do it, though. In New Horizons, time travel is simple:
- It’s time to quit the game. Please do not open or suspend it.
- Select System from the Home menu on your Nintendo Switch.
- Take your pick of a day and time.
- Turn off the Internet clock synchronization option.
- Change the time and date. In New Horizons, it’s possible to schedule a one-day or multiple-day trip to the next day, as well as months, years, and even decades in the future.
- Restart the game. You can now go as far ahead in the game as you want.
WARNING: Taking a leap of faith can have negative consequences for your game. It’s likely that weeds will proliferate in abundance, and residents may leave without noticing you’re still there.
You should also be aware that you will not be able to move ahead to take part in in-game holidays or events. When these events are released, Nintendo will add them to the game’s online features. There is no need to rush things for Toy Day, so don’t bother. That won’t be for another couple of weeks.
More little tips
- The crafting animation can be sped up by repeatedly tapping A during it.
- Allow a few tree stumps to remain unearthed, rather than removing them. Some bugs are exclusively found on stumps, and you’ll be able to lounge around on them!
- A wasp nest could fall out of a tree if you shake it too hard. Escape is possible if you run into a nearby building, or if you’re quick, you can catch them with your net.
- Every day, check in with the animals who call your home. If you see them working at a crafts table, don’t be afraid to ask for a new DIY recipe from them!
- Every day, take a stroll around your neighborhood. Bottles on the beach (which may contain DIY recipes, special visits, fossils, or other unusual treasures) should be kept an eye out for.
- Keep a slingshot on you at all times and use it whenever possible. Shoot down balloons with attached goodies.
- Press A rapidly to make a wish if you spot a shooting star at night! The next day, you’ll get a reward.
- As soon as the opportunity arises, begin construction on a campsite. It gives you the opportunity to meet new people and make new neighbors.
- Put flowers of the same variety in close proximity to one another and water them frequently. This is how unique flower hybrids are created.
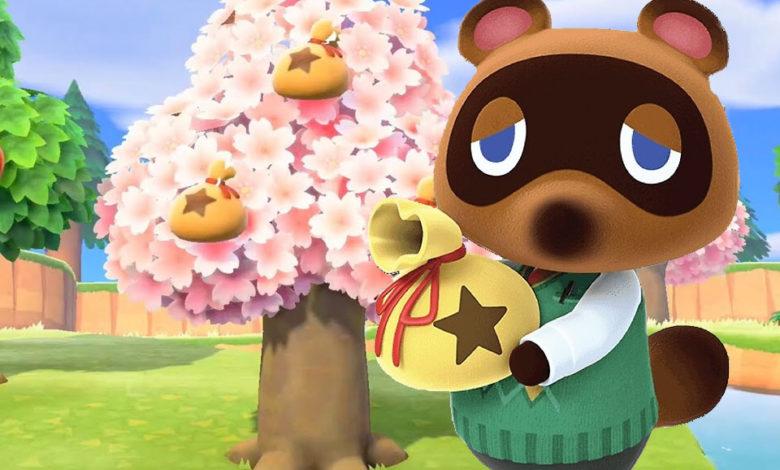
- Dig for free Bells if you see a shining patch of ground. As many as 10,000 Bells can be replanted at this point. You’ll be able to reap three times as much fruit as you buried when the tree is fully grown, but you can only do so once.
New Horizons Tips to Up Your Island Game
1. Craft Faster
An annoyance of generating your own recipes is having to wait for the animations to finish each time. When your character begins to craft, press the A button several times quickly in order to speed things up. (Repeatedly hitting B speeds up animal speech, in case you didn’t know.)
2. Optimize Your Inventory
To make extra room in your pockets, use your Nook Miles and the NookStop to unlock the maximum inventory capacity of 40 item slots. Some of my crafting supplies are always with me so that I can whip up a new bug-catching net or fishing pole on the fly. Beyond tools, I usually have iron nuggets, wood (soft or hard), stones and tree branches in my toolbox. As soon as you reach 30 pieces of anything like wood, the item will begin taking up a new inventory slot.
3. Move Carefully
When you’re moving about, hold down B to make yourself run. This deters insects and fish, but it can also destroy newly planted flowers. When you’re carrying a net and pressing A, you’ll be able to sneak up on your opponent. The net comes crashing down as soon as you let grip of A. The only way to catch tarantulas and scorpions is to sneak up on them, and this is the greatest method for doing so. Stop as soon as their legs start wobbling as you slowly approach them with your net raised. When they’ve finished, go back and do it all over again.
Are you a fan of the Animal Crossing series? In the comments box below, please share your own tips and methods. (You can sign up for an account here.)
On Mystery Island Tours, shake every tree.
Shake every tree you come across on a mysterious island. There’s usually a piece of furniture lurking somewhere in one of these rooms. At least one wasp nest is expected to fall, so you’ll want to bring your net along. Yes, you can catch those wasps before they sting you to death. Quickly tap A when they appear (facing them).
5. Wish Upon a Star
When a Meteor Shower is on its way, Isabelle will let you know in the morning announcements. There is no rhyme or reason to the timing at all. Even though I’ve spent more than 170 hours in the game, I’ve yet to experience an official Meteor Shower. Occasionally, she will provide you with an unique zodiac-themed DIY recipe from Blathers’ sister. Some gamers haven’t seen Celeste but have seen Meteor Showers, while others have seen Celeste but not a shooting star, and so forth.)
On clear, cloudless evenings, shooting stars emerge at random between the hours of 7 p.m. and 4 a.m., regardless of their appearance pattern. A shimmering bell-like sound comes from them. If you want to hear the sounds, you’ll need headphones. To make a wish, make sure your hands are free, gaze up with the right joystick, and press A when a star appears above you. After you’ve made your wish, keep an eye on the sky in case more shooting stars arrive. There will be Star Fragments on your beaches by the next day.
6. Use Fruits for Super Powers
Isn’t it time you learned that eating fruit and then striking a rock with your shovel or stone axe can actually help you move trees around the landscape? There is no longer a need to chop and replant. You can dig up a tree with your shovel, as WIRED’s Louise Matsakis pointed out in a recent article. It’ll be tucked away in your pocket and ready to go when you need it.
7. Make Your Money Trees Better
Xem thêm : Overwatch Mercy Guide Update 07/2026
There will be a shiny area on the ground with 1,000 Bells once every day. In a few days, the buried bag of Bells will grow into a cash-producing tree. Planting more Bells, on the other hand, increases your chances of producing a tree with thicker Bell sacks. I’ve been able to develop many 10,000-Bell trees thanks to this approach. Go to your pockets and click on the Bell counter in the lower left-hand corner to plant more Bells. In order to plant the Bells, select the Bury in Hole option and then select the number of Bells to separate.
8. Fish and Bugs Can Be Evasive
Occasionally, a monster will only be around for a month or two at a time. To avoid giving anything away, I’ll leave you with this: They change depending on where you live in the hemisphere. A lot of people underestimate the difficulty of finding bugs and fish. The topmost cliff river, the mouth of a river, or a pond are some of the places I’ve captured fish that only spawn for a few hours at a time. Bugs are the same. Only rotting food, trash, or locals will produce some of the most rare species. In your search, be innovative and persistent! Use fish bait if you want to spawn fish in a specific location. You may be rewarded with a few Nook Miles in compensation.
9. Maximize Your Nook Miles
Once a day, you’re most likely stopping by the NookStop in your Resident Services Center to earn bonus miles. Here’s a new one: Use the NookPhone app to redeem your Nook Miles as soon as you’ve earned them. When you redeem bonus miles, you’ll get a new task, and it may be for something you were already planning to accomplish. Taking this simple step can help you accumulate more quickly.
10. Spend Bells Liberally
It’s never too late to pay off your house. Putting your Bells toward the debt is one thing, but after you’ve completed your first or second makeover, be sure to spend them generously at other vendors around your island. For many enhancements, spending Bells is required. Take a look at what’s on offer at the general store each day (and press R to see the cabinet’s contents). You never know what you’ll find in the fitting room at a tailor’s business.
Keep your Bells in your ABD savings account instead of your wallet to help you save money. Over time, interest will be accrued (though Nintendo slashed the interest rate a bit).
11. Customize Your Clothing
While the clothing and dressing interface in New Horizons are unquestionably the greatest in the series, you can still customize your character’s appearance with a variety of different patterns. Face paint and unique patterns were utilized by WIRED’s Cecilia D’Anastasio to give her avatar the cool eyebrows and crop tops she has today. The tailor’s store has a kiosk where you can download clothing and path designs if you don’t have a lot of experience with patterns. Instagram has a slew of accounts dedicated solely to sharing adorable designs with the world. In addition to finding and creating your own designs, you may use AC Patterns.
12. Play the Stalk Market
It is Daisy Mae’s plan to come to your island on Sunday. Sow Joan’s granddaughter, she’s a sweet pig you may remember from earlier Animal Crossing games. They range in price from Daisy Mae’s turnips, which she sells. You have the option to purchase in ten-packs. Turnips can be sold later in the week for a lot of money.
Reddit is a great place to find islands with high purchase prices if you’re looking to buy low and sell high. Even if you’re willing to stand in line for a long, this is the finest way to make money online. Turnips decay after one week, so don’t mess with with the game settings or travel back in time unless you want to lose a lot of food.
13. Time-Travel Carefully
Time-hopping is controversial since it involves changing the date and time on the Nintendo Switch in order to gain an advantage over the game’s clock. While I enjoy wandering around New Horizons for hours at a time, some individuals love the game’s inherent slow pace. When you use time-hopping, you can complete improvements and bridges faster, uncover more fossils, and generally start over with your everyday activities.
However, there are dangers to time travel if done carelessly. In the absence of internet connectivity, you risk losing contact with your fellow citizens, your island may become overrun with weeds, and you may be unable to participate in game-related events.
Here’s what I do to time-hop safely:
- The minus button on your left Joy-Con can be used to save your progress in the game at any time. Press the Home button, then X to end your session with the program.
- In the system settings menu, go to System, then Date & Time, and you’re done.
- Uncheck the internet clock sync box on your Switch. Take one day off of the current date.
- Restart Animal Crossing and save your progress.
- Go back to steps 1–3 and tick the box to sync your in-game clock with the internet this time.
In the future, your game will have advanced to a point where you will not risk destroying your island. Remember that time-hopping rots turnips.
14. Improve Your Island Rating
It will take time and effort to get a five-star island rating. Isabelle in Resident Services can provide you with information about your island’s rating. Her advise is to be taken literally: Adding more fencing is a no-brainer if she believes you need it. The same principle applies to home furnishings. Does she mean that you require additional decorations or more handcrafted goods from your own creation? Observe her clues and follow her instructions to the letter.
Level Up With the Games Newsletter
You’ll need a good mix of furniture and decor pieces spread out around your island, as well as a particular number of plants, trees, and other landscaping features. Tree limbs and weeds detract from the appearance of your island and should be removed immediately.
15. How to Get Rid of a Villager
One way to persuade someone to move to your island is to keep bringing up the topic of the villager visiting your campsite over and over again. This is critical: They will evict a villager at random. If they’re seeking to swap places with a critter you don’t like, you can accept their initial offer. If they don’t pick the correct villager, you’ll have to restart the game and go through the process all over again.
Getting rid of a villager and having a visitor at the campsite is a good idea if you’re just starting out in the game. If you have to restart, you won’t have to worry about losing your work. A less time-consuming alternative is to ignore your soon-to-be evictee totally. A bubble over their head, which may signal that they are contemplating a move, is a good indicator that they might be considering talking to you (though sometimes bubbles over their head might mean they want to give you something). When that time comes, you’ll be in a position to encourage them on their journey.
You’ll need an amiibo figure or card to expel a villagers with ease. On three separate days, use the ABD Machine to bring the amiibo villager to your campground. Ask them to relocate to your island every time they visit. They’ll agree to move in after the third visit and ask who you’d want to replace them. Once you’ve selected your least favorite NPC, the quest is complete. To say goodbye to Rodney, my blue hamster archenemy, I used this strategy.
16. Visit With Visitors
A special guest could show up at any time. Wherever you find them will depend on whether they’re in your plaza, strolling around your island, or passing asleep on the beach. Engage them in conversation. Your museum might get a donation or you might acquire some decorations for your island. You might even get an opportunity to sell bugs and fish. When Flick is around, I make sure to collect every bug I see so that I can sell them for 1.5 times the regular price. Visitors can also help you arrange your daily activities.
17. Use a Real-Life App to Make Your Gameplay Better
The in-game keyboard is a pain to use when you’re attempting to communicate with your buddies. It’s possible to type whatever you want using the keyboard on your real-life phone by downloading the Nintendo Switch Online app. Your character’s head is seen with the words above it in-game. Using two devices can be a hassle, but this is the greatest way I’ve discovered to communicate with others on the Nintendo Switch without going crazy trying to type on the virtual keyboard.
Note: To attach the app to your game, you’ll need to tap the minus symbol on the game’s loading screen and select NookLink Settings from the drop-down list.
18. Change Your Rivers and Cliffs
The Island Designer software will eventually allow you to terraform your island. It allows you to draw down trails, adjust rivers, and edit cliffs in your landscape. Consider the case where you wish to build a bridge, but the river is unsuitable for the project. Open the app and utilize the permit to reshape the canal, if you have one Within the NookStop, you may access these permits and designs.
19. Make Your Town Tune Catchy
Want to make a music your town’s theme song, but aren’t sure how? This subreddit is worth a look. If you can’t find what you’re looking for, you can ask for assistance. It’s also possible to try out this website.
20. Grow Hybrid Flowers
A few varieties of flowers are available at the island’s general store. If you can’t find what you’re looking for, try another island; Leif may have some on hand. When two or more different kinds of flowers are blossoming near each other and you use a watering can to hydrate them, you can create hybrid flowers.
There are a plethora of resources available for producing specific hybrid flowers, but my recommendation is to place blooms of the same type close together, leaving space between them for additional growth. After that, make a habit of misting them each day. To increase your chances of producing unique hybrids, the more flowers you plant and the more water they receive.
21. Send Letters
Sending a letter is something you might want to do. Visit the airport’s main service desk, which has a card stand adjacent to it. Letters to present residents, your future self, or friends you’ve designated as Best Friends can be sent using the NookPhone app. Prior to mailing the letter, you can attach a gift and wrap it in wrapping paper purchased from your island’s general store, if desired. It costs 200 Bells to send a card to someone.
22. How to Use Amiibo
Your favorite villagers can be brought to your island with an Amiibo card or figurine. Finding Amiibos online has become more difficult as a result of the Covid-19 epidemic. Even if you don’t want to take a chance, eBay is your best bet if you are looking for a specific villager in the game. Cards are less expensive and more readily available than figures. Check out our eBay shopping guide before you start bidding on anything.
Invite a Camper at the NookStop and follow the on-screen instructions after you have your Amiibo card.
23. How to Acquire Coveted Items
Perhaps you’ve been unable to grow the perfect hybrid flowers for your Cute furniture set, or perhaps you’ve been unable to finish the project. Welcome to the enormous Animal Crossing: New Horizons Nookazon DIY marketplace. The site, which is mostly run through Discord, is full of people selling everything from clothing to furniture. Bells can be exchanged for the things you just can’t live without. Ensure that your trades are secure by reading the regulations before you begin. For further information, see this starting guide.
24. How to Capture Photos and Videos
NookPhone Camera is a free program that lets you snap a variety of creatively-styled screenshots using the square button on the left Joy-Con. There are several opportunities to take photos on your way to Harvey’s island from your airport. This feature is especially useful whether you’re filming an ephemeral TikTok or want to record the moment you finally catch that elusive scorpion.
Your Nintendo Albums store all of your photos and videos. Although you can’t save the images, you can use the console’s built-in social media integration to post them to Twitter and Facebook. As a result, I made changes to my Facebook privacy settings so that only I can see the Nintendo Switch Share photographs that are shared. If you select “Post Batch” in the Albums software, you can post up to four photographs at once.
25. Avoid Getting Scammed by Redd
Jolly Redd was added to ACNH after an update. When he visits, he’ll show up on his boat, which is parked on the private beach at the back of your island, with both art and furniture for sale, as well as other items. However, be aware of what you’re getting yourself into. Only one of the offered works of art can be purchased per visit, and all but one of them are fakes. Because Blathers will not accept fake artwork, you must exercise caution when making a purchase.
Be careful to notify Redd if you want a closer look at a piece of art while you’re on his boat. This will draw attention to the specific piece. For a closer look, you can use the zoom feature. A scowling Mona Lisa is an obvious fake, but other times, you’ll have to examine very hard to see any forgery details at all. In order to save both time and Bells, I follow this guide to determine whether or not a piece of art is authentic.
26. Customize Your Nintendo Switch
If you can’t get your hands on the limited-edition Nintendo Switch console for Animal Crossing: New Horizons, you’re in luck. Dbrand, a well-known manufacturer of custom skins, produces virtually identical skins for the Nintendo Switch that appear just like the genuine thing. Indeed, this is a move Jolly Redd would have been proud of.
Amazon has a variety of Animal Crossing Nintendo Switch accessories that you may purchase. These bespoke thumbgrips are a fantastic alternative to the cute outdoor pattern skin. You don’t need to buy a new console to demonstrate your passion for the island lifestyle.
27. How to Dive for Sea Creatures
You may now delve deep into the sea to find elusive scallops, which you can then exchange for mermaid-themed DIY recipes and pearls from Pascal (a necessary component of those recipes). A wet suit is a need if you want to go scuba diving. In the main store or through the Nook Shopping ABD option, you can buy one Wearing a wet suit over your clothes will not hinder your ability to utilize your tools.
Empty your hands before you dive (and your pockets, if you want to save time). To do so, head to the beach and press A. You’ll take a few steps toward the water. To swim about, keep pressing the A key. Swimmability is not contingent upon pressing the button quickly. Push the Y button to dive once you’ve found some bubbles. Underwater, you’re on the lookout for a shadow. Your character will automatically dive for the critter if he or she swims above the shadow. Attempt to get as near to the bubbles as possible before you take the plunge. You’ll find new aquatic friends to add to your Critterpedia, find new donations for Blathers, and rack up Bells. Some of the underwater companions sell for as much as 12,000 Bells each.
FAQS:
How do you make your island better in Animal Crossing?
- Put Outdoor Furniture There. Every Day, Pick Up a Piece of Furniture. …
- Renovate the Buildings. In order to improve the island’s standing, all Facilities must be constructed. …
- Bridges and Slopes should be added….
- Increase the number of villagers….
- Reforest More Land….
- The more flowers you plant, the better.
- Fencing for a certain location….
- Take Care of Weeds and Waste.
What should I prioritize in Animal Crossing?
In this walkthrough, we’ll go over some of the most critical aspects of New Horizons on Switch.
- Earn Nook Miles by stopping at the Nook Stop.
- … Find a rock full of money.
- Make a point to look around your favorite stores.
- Aim to unearth fossils.
- Look for messages written on bottles.
- Talk to people….
- Accomplish your initial set of five Nook Miles+ objectives.
Conclusion:
Make the most of Animal Crossing: New Horizons by following these pointers. It’s time to be creative with your island’s inhabitants and the controller you choose.
Nguồn: https://gemaga.com
Danh mục: Guide