Normally, Windows would be able to handle the installation of an update without any issues. However, there are occasions when Windows is unable to execute its job because of user settings or other underlying difficulties. There are several things you may do to get Windows to start downloading and installing updates again.
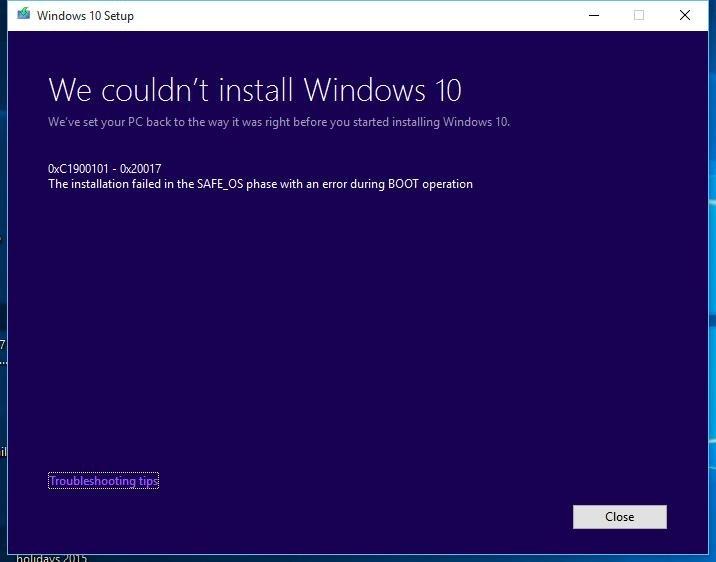
Repair Corrupt System Files
Solution 1: Run the Windows Update Troubleshooter
If a feature in Windows 10 isn’t working or acting as it should, you can use the built-in Troubleshooting tool in Windows 10, but just for the problematic feature. If Windows Update is acting weirdly, the first thing you should attempt is launching the Windows Update Troubleshooter. To accomplish this, you must:
- Go to the Windows Control Panel.
- Icons are the way to go.
- Select Troubleshooting from the drop-down menu that appears.
- In the left pane, select “View all” to see everything.
- Click on Windows Update.
- Follow the on-screen directions to the end of the troubleshooter, and then click Next to continue.
Windows Update Troubleshooter will try to identify and fix any issues it discovers. After successfully running the Troubleshooter, restart your computer and see if the issue persists by downloading and installing Windows Updates.
Solution 2: Ensure that all services related to Windows Update are running
If one or more of the services associated with Windows Update is either not enabled or is not operating on your computer, you may be experiencing this issue. If that’s the case, all Windows Update-related services should be enabled and operating to fix this problem.
- To open the Run window, press and hold the Windows Logo key while pressing R.
- Enter the command services.msc in the Run dialog box.
- Right-click on the Windows Update service and select Properties from the menu that appears.
- If the service isn’t running, change the Startup type to Automatic, then click Start, Apply, and OK to restart it.
- Look for BITS, right-click it, and then select Properties from the menu that appears.
- Repeat the previous step.
- Locate and right-click on the Cryptographic Service, then select Properties from the context menu.
- Repeat the previous step.
Restart your computer after you’ve finished using the utility, and see if the problem has been resolved.
Windows Update can be reset using a registry tweak, which is the third option.
If none of the suggestions above helped, you can try a Registry Tweak to restore Windows Update’s registry keys to their default settings, which may help fix your problem if they were corrupted or updated in some other way.
- The Registry Tweak can be downloaded here.
- Please be patient while the Registry Tweak is downloaded.
- To use the Tweak, go to the location where it was downloaded and double-click on it.
- “Are you sure you want to proceed?” will appear in a pop-up window. Press “Yes”
- Please click OK.
- Check if the problem persists after restarting your computer.
Solution 4: Fix the issue via an elevated Command Prompt
It’s possible that an elevated Command Prompt may be all that’s needed to solve this problem if none of the alternatives above have worked for you. To accomplish this, you must:
- Open the WinX Menu by right-clicking on the Start Menu button.
- To open a command prompt, select Command Prompt from the shortcut menu (Admin).
- In the elevated Command Prompt, type the following commands sequentially, pressing Enter after each one and allowing each command to complete before moving on to the next:
Solution 5: Turn OFF Metered Connection
If your internet connection is set up as a metered connection, the download restriction may be imposed on your connection as a result. As a result, we’ll disable the metered connection in this stage and then observe if the problem persists. Because of this:
- To launch the settings menu, press “Windows” + “I.”
- Select “Network and Internet” from the drop-down menu.
- Select “Wifi” from the left pane and then “Manage recognized Networks” from the next window.
- In the following box, right-click on the Wifi name and choose “Properties.”
- “Set as Metered Connection” can be turned off by clicking the “Toggle” button.
- Check to see whether the problem has resurfaced.
Remove Third-party Security Software
Firstly, a third-party protection program can safeguard your computer from virus attack or other security concerns, but it may also cause some applications to behave abnormally..
Since third-party security software can be temporarily removed, you can reactivate Windows Update. In the next section, we’ll discuss how to remove any third-party software from your computer.
Step 1: Select Control Panel from the Start menu by right-clicking it.
Once the third-party software has been selected, select it and right-click to uninstall it from the Programs & Features window. Restart your computer and see whether the Windows 10 won’t update problem has been resolved.
Check Windows Update Utility Manually
Automated download and installation of software updates is provided by Microsoft’s Windows Update service. Updates for Microsoft’s numerous antivirus programs, including Windows Defender and Microsoft Security Essentials, are delivered through the service.
To see if the Windows Update Utility is operating if Windows 10 won’t update, you can use the command line tool. In the next section, we’ll show you how to use the Windows Update utility.
Tip 1: Click Update & Security in the Settings app on the Start Menu of Windows 10 or by pressing Windows Key + I simultaneously.
Step 2: The following window will appear on your screen. You’ll be able to learn more about what’s wrong if Windows already knows. As a result, you’ll need to select Fix problems, and the Windows Update software will do the rest.
Step 3: If you’d want to learn more, click the Advanced options. It is suggested that you go with Automatic.
After you’ve completed all the procedures, restart your computer to see whether the issue with Windows not downloading updates has been resolved.
Keep All Services about Windows Update Running
It’s possible that you’ll get the Windows 10 won’t update problem if none of the necessary Windows update services are operating.
Now, we’ll walk you through the process of keeping all of the Windows update services working smoothly.
Click on Start and select Run or press Win+R to open the Run dialog box. To proceed, type services.msc into the box and then click OK.
Step 2: Right-click on Windows Update in the popup window and select Properties.
Make sure that the startup type is set to automatic when you open the popup window. To restart the service, select Start, then Apply and OK to confirm your action.
Step 4: Find and select Properties from the context menu of the Background Intelligent Transfer Service (BITS) by right-clicking on it. The Startup Type should be set to Automatic, and the Service Status should read “Running.” To proceed, click OK.
Step 5: Find and select Properties from the Cryptographic Service’s context menu by right-clicking on it. Then select “Automatic” as the Startup type. Repeat the procedure a final time to complete the configuration.
Check to see if the Windows 10 update error persists after all the procedures are completed.
Xem thêm : Overwatch Winston Guide: Helpful Tips and Strategies Update 02/2026
The next step is to run Windows Update Troubleshooter if Windows Update Utility is working properly but Windows 10 still won’t update.
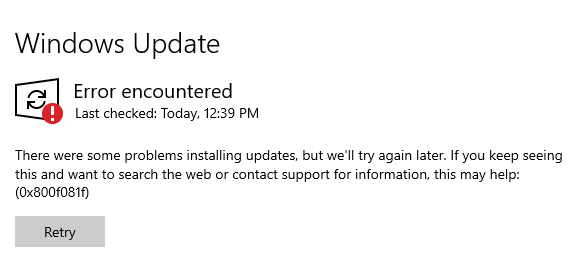
Run Windows Update Troubleshooter
Windows Update Troubleshooter, a Microsoft-provided automatic diagnostic tool, can be used to resolve difficulties with Windows 10 not downloading updates. Using Troubleshooter, we can now fix the Windows 10 update problem.
To get started, right-click the Start menu and select Control Panel.
Using the View by option in the upper right corner, select Large icons and select Troubleshooting.
In the next step, select Windows Update from the list by clicking View all. Enter the main interface by pressing the Next button after running the program.
Step 4: Press the mouse button. Keep trying as an administrator to find out what’s causing the problem.
Wait for the software to identify and correct any problems. Windows Update Troubleshooter is now closed.
Windows Update Troubleshooter can be exited and relaunched at this point.
Restart Windows Update Service by CMD
Restarting Windows Update services may help if Windows 10 is refusing to update. Below, you’ll find a list of thorough instructions.
As a first step, right-click the Start menu in Windows 10 and select Command Prompt (Admin).
Press Enter after each command to complete step two: Open a popup window and type the following command. Before moving on to the next step, wait for the previous one to complete.
wuauserv halt the net
put an end to cryptSvc
There are no more bits on the net
MsiServer can be stopped by typing “net stop msiserver”
reformatted the Windows system drive SoftwareDistribution SoftwareDistribution.old
Catroot2.old /renew C:WindowsSystem32catroot2
internet to begin serving wuauserv
CryptSvc can be started using the command-line.
Start-up bits on the Internet
It’s time to restart our computer and see if the problem with Windows 10 not downloading updates has been resolved.
Increase Free Space of System Drive
Windows 10 won’t install or download updates may be caused by a lack of storage space on the computer’s internal hard drive. As a result, upgrading to Windows 10 will require more available space on your hard drive.
In order to enhance the system drive’s capacity, there are numerous options. Disk Cleanup and Extend Partition are two methods we’ll discuss.
Disk Clean-up
If you have a lot of unneeded files on your computer’s hard drive, you can use Disk Clean-up to clear up disk space and get rid of them.
Step by step, we’ll show you how to clear up a disk.
Run diskmgmt.msc by right-clicking the Start menu in Windows 10 and selecting Run. Then press the OK button or press Enter to proceed.
Disk Management’s main interface may be found here. Once you’ve selected the system drive, you can access its properties via the context menu by selecting Properties from the context menu.
Xem thêm : Anthem: Interceptor Javelin Guide. Is interceptor a good Javelin? Update 02/2026
When the pop-up window appears, click the Disk Clean-up button to continue.
To compute the free space, Disk Clean-up will take a few minutes, but the exact time depends on the amount of data stored on the disk at hand. After that, you can select whatever files you want to get rid of. Finally, press the OK button to proceed.
Step 5: A message will appear in a pop-up window. Click Delete Files if you are sure you want to permanently delete these files. Afterwards, the Disk Clean-up can be finished.
MiniTool Partition Wizard
It is possible to enhance the storage capacity of the system drive by only a small amount when you clean up the disk. A large operating system will not be able to be installed on a system drive if the drive’s storage capacity is insufficient.
Applying best partition software might therefore be beneficial in expanding the partition. Thousands of people have chosen MiniTool Partition Wizard as their partition manager of choice. Using this high-performance program, you can guarantee that your hard drive structure is optimal.
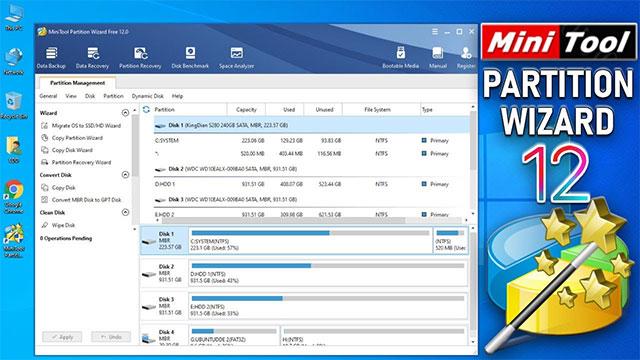
It’s best to utilize the bootable version for this purpose. You can do this by launching the MiniTool Partition Wizard and then clicking Bootable Media Builder.
Connect it to your computer and boot from it.
The system drive is the third option. then select ‘expand partition’ or ‘extend context menu’ or ‘expand left pane’
You may then select a partition or unallocated space from the drop-down menu in the Take Free Space from menu and take free space from that partition or space.
In addition, you can slide the sliding handle to determine how much open area you want to occupy. To proceed, simply click the OK button one more time.
You can now enlarge your system partition by selecting the Apply option from the menu bar.
That’s all there is to MiniTool Partition Wizard Pro’s ways for enlarging partitions. It’s possible to enlarge a partition without losing data.
The MiniTool Partition Wizard may extend a partition even if there is no neighboring unallocated space to the right of the system partition, as opposed to the Disk Management method. When it comes to expanding a partition, MiniTool Partition Wizard is more convenient.
Our PCs can now be rebooted to see if the problem with Windows 10 not updating has been resolved after we’ve expanded the storage capacity of our system drives.
My data is safe because I utilized MiniTool Partition Wizard to expand my hard disk so I could install Windows 10 on it. Non-adjacent unallocated space can be accessed by this device.” To tweet, click here.
Repair Corrupted System Files
Corrupted system files may be to blame for Windows 10’s inability to perform automatic updates. Use System File Checker to identify and restore any damaged or corrupted system files.
We’ll walk you through the process step-by-by-step now.
First, type Command Prompt in the Windows 10 search box, then select the Run as administrator option.
Step 2: Type the command sfc /scannow in the Command Prompt window and press Enter to proceed.
After that, the scanning process will begin, and please do not close the command line window until you see the message verification complete. Rebooting your computer after the procedure is complete will allow you to verify that the problem with Windows 10 not updating has been resolved.
Reinstalling Windows 10 may be necessary if the preceding options fail.
After keeping all Windows Update services functioning, I was able to resolve my Windows 10 update issues.” “Also, it’s simple to use.” To tweet, click here.
Bottom Line
After reading this page, are you still experiencing problems with the Windows 10 update? Now it’s your job to attempt each of the ways listed above one at a time. Use MiniTool Partition Wizard while expanding a partition. Remember to create a backup of all your files before attempting any approach to prevent data loss.
Send an email to [email protected] if you have any questions about MiniTool Partition Wizard. Windows 10 won’t upgrade? Post your workaround in the comments section if you have one.
FAQS:
What do I do if my Windows 10 won’t update?
- Uninstall any third-party security software.
- Manually check the Windows update utility.
- Keep Windows update services up and operating at all times.
- Run the troubleshooter for Windows updates.
- Windows’s update service can be restarted using CMD.
- Make more room on the system drive for data.
- Repair system files that have become corrupted.
How do I force Windows 10 to update?
- As an administrator, open Command Prompt and type in your command.
- Enter the command wuauclt.exe /updatenow to proceed.
- Choose Update & Security in Settings.
- Go to the Windows Update tab and select Check for updates.
What to do if my computer is stuck updating?
- Wait a few minutes or restart the computer if the issue persists.
- Boost the amount of available storage space on your computer’s hard drive.
- Allow only Microsoft programs to run.
- Temporarily disable the Firewall.
- Run the troubleshooter for Windows updates.
- Restarting the Windows update service is necessary.
- Install and run anti-virus software.
Why is Windows update taking so long?
Microsoft’s ongoing addition of larger files and features to the Windows 10 upgrade causes it to take so long to complete. Some issues will be fixed with the latest Windows update as well. Spring and fall are often the busiest times for new releases.
Conclusion:
Windows updates should be installed on a regular basis. There are, however, certain exceptions to this rule. If an update is very difficult, you may have to choose between installing Windows 10 from scratch or skipping the update altogether. There have been a number of Windows 10 upgrades that are known for being difficult to install or causing major issues for specific hardware setups.
While it’s usually a good idea to stay up with the newest Windows 10 updates, there are times when you may need to put off an update and wait for the next one to come out.
Nguồn: https://gemaga.com
Danh mục: Guide


